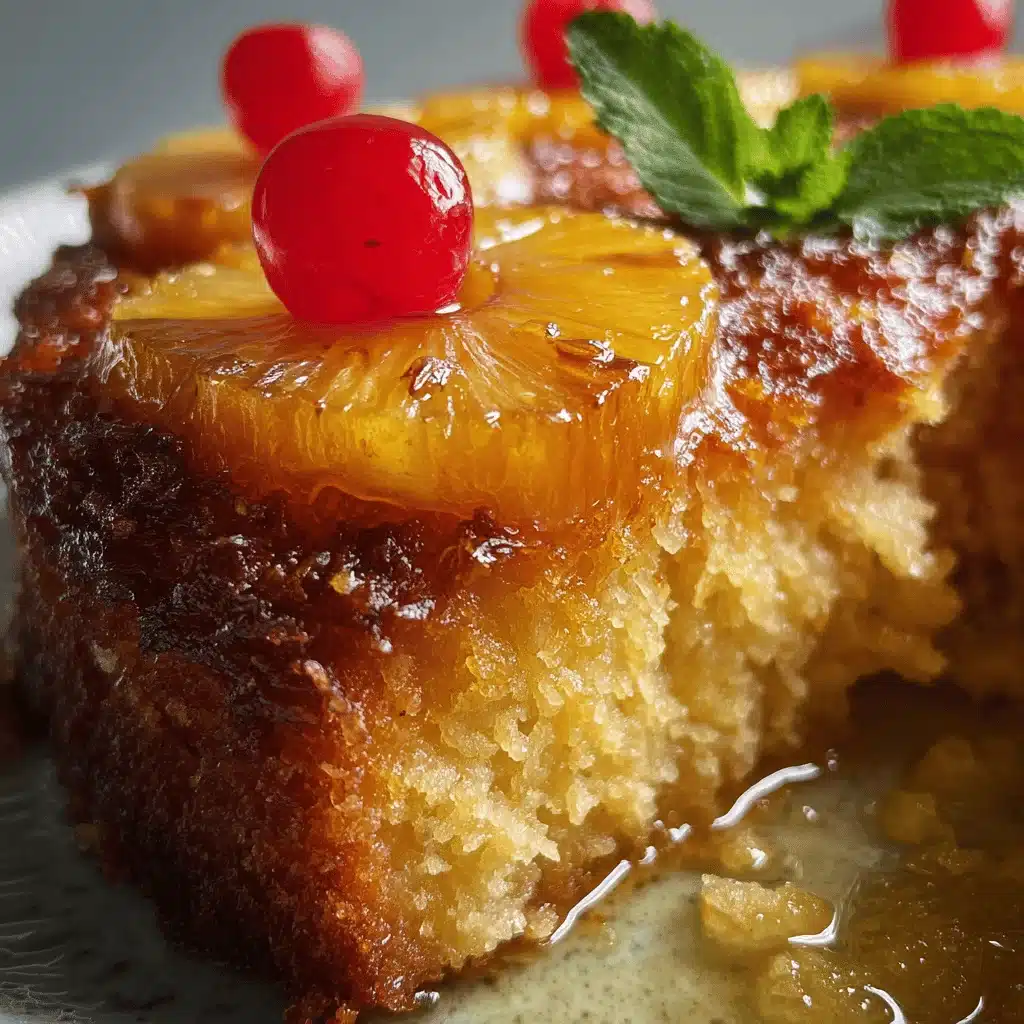
There’s something about the sweet, sunny scent of pineapple that instantly puts me in a good mood. Seriously, the first time I made Pineapple Sunshine Cake, my whole kitchen smelled like a tropical breeze—no joke! I stumbled onto this recipe years ago at a summer family reunion when my aunt brought out a golden, fluffy cake topped with clouds of whipped frosting. Everyone rushed the dessert table (including me, shamelessly), and the first bite was a revelation. Soft, moist cake bursting with pineapple flavor, finished with a creamy, tangy topping that was honestly addictive. Pineapple Sunshine Cake became my go-to whenever I needed a dessert that’s easy but guaranteed to impress.
Since then, I’ve tested this cake more times than I can count—sometimes with fresh pineapple, sometimes with canned, and even with a splash of coconut for fun. Each time, it’s a hit. Whether you’re baking for a summer party, a casual backyard barbecue, or just craving something sweet and tropical, this Pineapple Sunshine Cake recipe is the answer. It’s ridiculously simple, uses pantry staples, and you don’t need to be a pro baker to nail it. Plus, it’s the kind of dessert that makes people ask for the recipe after just one bite.
If you love desserts that are light, fruity, and make you feel like you’re on vacation, you’ll fall for this Pineapple Sunshine Cake. It’s perfect for busy families, picky eaters (my kids can never say no), and anyone who wants an easy tropical dessert without fuss. As someone who’s obsessed with reliable, crowd-pleasing treats, I promise you this recipe is worth every minute. Let’s get to baking the happiest cake around!
Why You’ll Love This Recipe
- Quick & Easy: You can whip up Pineapple Sunshine Cake in under 45 minutes (yes, including baking time!). No complicated steps, just mix, bake, and frost.
- Simple Ingredients: All you need is a box of cake mix, canned pineapple, eggs, and a few extras. No wild shopping trips—most of this stuff is probably in your pantry right now.
- Perfect for Summer Parties: This cake is basically sunshine on a plate. Ideal for potlucks, picnics, or poolside gatherings. It travels well and looks gorgeous on a dessert table.
- Crowd-Pleaser: Kids love it, grown-ups love it, and I’ve never had leftovers (which says a lot). The pineapple flavor is sweet but not overwhelming, and the topping is light as air.
- Unbelievably Delicious: The combo of moist cake and creamy pineapple whipped topping is pure comfort food, but with a tropical twist. It’s the kind of treat that makes you close your eyes and savor.
What sets this Pineapple Sunshine Cake recipe apart? For starters, I use crushed pineapple both in the batter and in the frosting—double the fruit means double the flavor (and moisture). Instead of the usual heavy buttercream, the frosting is a blend of whipped topping and pudding, which makes it lighter, fluffier, and less sugary. If you’ve ever had a dry cake, you know the disappointment. With this method, you get a cake that stays soft for days.
This recipe is more than just good—it’s the kind that turns an ordinary day into a celebration. I’ve made it for birthdays, showers, and even for a “just because” treat, and it never fails to spark joy. It’s stress-free baking at its best, with results that look and taste way fancier than the effort required. If you want a dessert that feels like a mini vacation, Pineapple Sunshine Cake is your ticket. Trust me, you’ll want seconds!
Ingredients Needed
This recipe uses simple, wholesome ingredients to deliver bold tropical flavor and a dreamy texture without any fuss. Most of what you need is probably hiding in your pantry or fridge right now!
- For the Cake:
- 1 box yellow cake mix (about 15.25 oz / 432g; I use Duncan Hines or Pillsbury for best results)
- 4 large eggs (room temperature; helps the cake rise evenly)
- 1 can crushed pineapple (20 oz / 567g, juice included—don’t drain!)
- 1/2 cup vegetable oil (120ml; keeps the cake moist without making it greasy)
- For the Frosting:
- 1 can crushed pineapple (8 oz / 227g, drained—reserve some juice for extra flavor)
- 1 package instant vanilla pudding mix (3.4 oz / 96g; not prepared, just the dry mix)
- 1 tub whipped topping (8 oz / 227g; I use Cool Whip, but store brands work too)
- Optional Toppings:
- Maraschino cherries (for a pop of color)
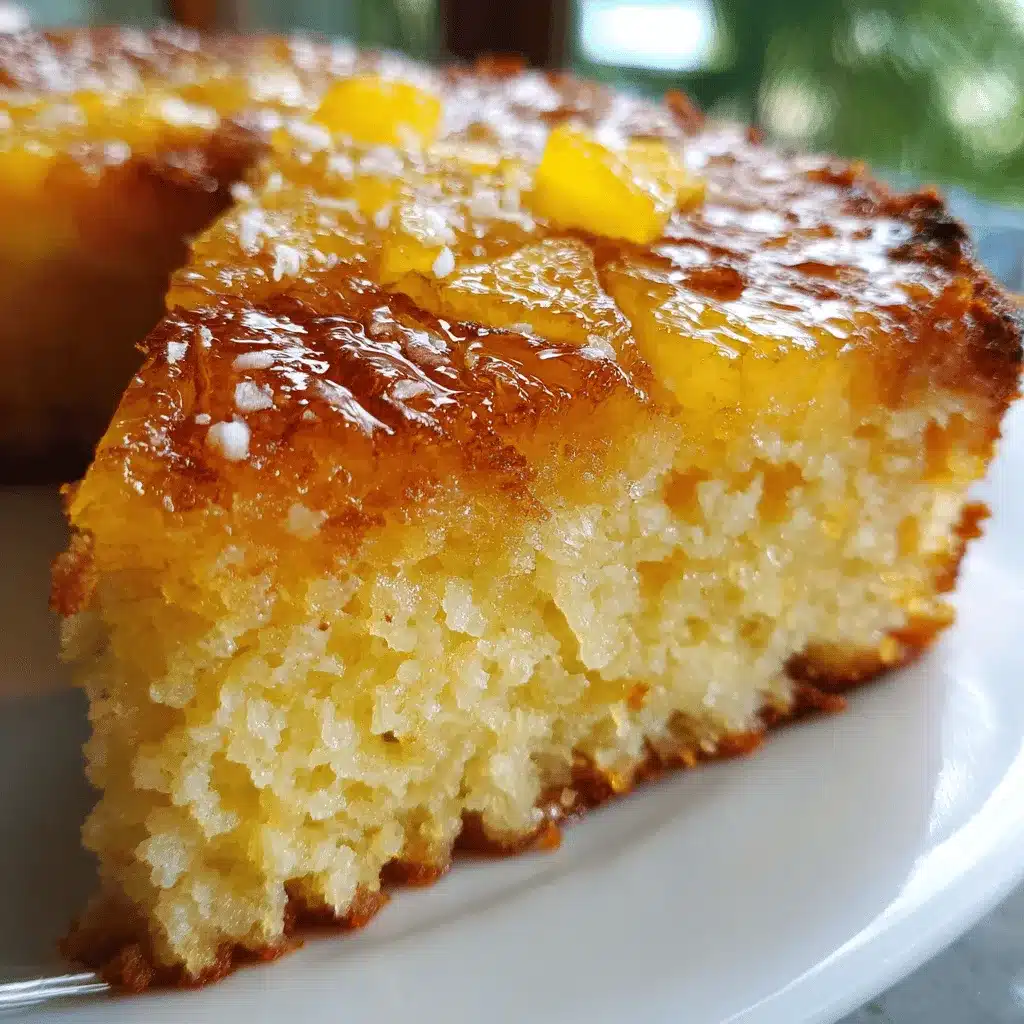
- Toasted coconut flakes (about 1/4 cup / 25g, adds texture and flavor)
- Fresh pineapple chunks or slices (for garnish)
Ingredient Tips: For the cake mix, yellow or pineapple-flavored both work well. If you want a gluten-free option, swap in your favorite gluten-free cake mix. For dairy-free needs, use coconut whipped topping and check your pudding mix ingredients. I’ve tried this with both canned and fresh pineapple; canned is easier and gives consistent results, but fresh works if you chop it very finely. If you’re feeling adventurous, add a splash of coconut extract to the batter for a “piña colada” vibe.
Don’t be afraid to tweak the oil type—melted butter or coconut oil can swap in for a richer flavor (though vegetable oil gives the lightest crumb). For the whipped topping, homemade whipped cream is delicious, but the store-bought kind holds up better if you need to make the cake ahead. And if you’re out of maraschino cherries, sliced strawberries look lovely too. The ingredient list is forgiving, so make it your own!
Equipment Needed
- 13×9 inch (33×23 cm) baking pan (glass or metal; I usually go for glass for even browning)
- Large mixing bowl (for cake batter)
- Medium mixing bowl (for frosting)
- Electric mixer or whisk (hand mixer speeds things up, but you can definitely whisk by hand if you’re feeling energetic)
- Rubber spatula (for scraping and spreading)
- Measuring cups and spoons (accuracy is key!)
- Can opener (if using canned pineapple)
- Cooling rack (helps the cake cool evenly)
If you don’t have a 13×9 pan, you can use two 8-inch (20cm) round pans and make a layered cake. I’ve even used disposable aluminum pans for easy cleanup at parties—works just fine. For mixing, I’ve tried both stand and hand mixers; honestly, hand mixer is less fuss unless you’re doubling the recipe. If you use a metal pan, check a few minutes early since cakes sometimes bake faster. Clean your rubber spatula right away after spreading the frosting, or that sweet topping gets sticky!
On a budget? Thrift stores are goldmines for pans and mixing bowls. I bought my favorite cake pan for $2, and it’s lasted years. Just avoid using plastic bowls for mixing the frosting—they don’t get as fluffy. If you’re into baking, keep a good cooling rack on hand; it really helps prevent soggy bottoms.
Preparation Method
- Prep the Oven & Pan (5 minutes):
Preheat your oven to 350°F (175°C). Lightly grease your 13×9 inch (33×23 cm) pan with nonstick spray or butter. If you like easy cleanup, line with parchment paper. (Trust me, it makes getting the cake out a breeze!) - Mix the Cake Batter (10 minutes):
In a large bowl, add the yellow cake mix, 4 eggs, 1 can crushed pineapple (juice and all), and 1/2 cup (120ml) vegetable oil. Use an electric mixer on medium speed for 2-3 minutes, until well combined and smooth. Batter will be thick and pale yellow, with little pineapple bits throughout.
Note: Don’t overmix. Stop once everything’s blended—overbeating can make the cake tough! - Bake the Cake (25-30 minutes):
Pour batter into your prepared pan and spread evenly with a spatula. Bake in the preheated oven for 25-30 minutes, or until a toothpick inserted in the center comes out clean.
Sensory Cue: The top should be golden and springy to the touch. If your kitchen smells like a pineapple paradise, you’re on the right track. - Cool Completely (30 minutes):
Place the pan on a cooling rack. Let cake cool completely before frosting—otherwise, the topping will melt and get runny. (I’ve rushed it before and regretted it!) - Prepare the Frosting (5 minutes):
In a medium bowl, combine 1 can drained crushed pineapple (8 oz / 227g), 1 package instant vanilla pudding mix (3.4 oz / 96g), and 1 tub whipped topping (8 oz / 227g). Stir gently with a spatula until smooth and fluffy. If it’s too thick, add a tablespoon of reserved pineapple juice. Mix until just combined.
Troubleshooting: If the frosting looks lumpy, keep stirring—sometimes the pudding mix takes a minute to blend in. - Frost the Cake (5 minutes):
Once cake is cool, dollop frosting evenly over the top. Use a spatula to spread into a thick, airy layer. Don’t worry about perfection—rustic swirls look inviting! - Add Toppings (2 minutes, optional):
Sprinkle toasted coconut, add maraschino cherries, or decorate with pineapple chunks. Go wild, or keep it simple. Both ways taste amazing. - Chill Before Serving (30 minutes, optional):
For best flavor and texture, refrigerate the cake for 30 minutes before slicing. The frosting sets up nicely, and the pineapple flavor deepens. (But if you’re impatient, you can dig in right away—been there!)
Efficiency Tip: Make the frosting while the cake cools, and toss your toppings together at the same time. If you’re short on time, pop the cake in the fridge to speed up cooling.
Warnings: Do not frost a warm cake! The topping will slide off and turn soupy. If your cake looks a little sunken in the middle, don’t panic—a generous layer of frosting covers all cake sins.
Cooking Tips & Techniques
Let’s face it, baking cakes can be unpredictable sometimes. Here are my best tips for Pineapple Sunshine Cake success, straight from trial and error and a few kitchen mishaps:
- Room Temperature Ingredients: Use room temp eggs for fluffier texture. Cold eggs can make the batter uneven and dense.
- Don’t Drain the Pineapple for the Cake: The juice keeps the cake extra moist. Draining it will lead to a drier crumb. I learned this the hard way!
- Bake Evenly: Rotate your pan halfway through if your oven has hot spots. One time, I forgot and ended up with a cake half golden, half pale.
- Test for Doneness: Toothpick or skewer should come out clean. If unsure, press the center lightly; it should spring back.
- Cool Completely Before Frosting: This is huge! Warm cake makes the topping melt and slide. Patience pays off here.
- Chill for Best Flavor: Refrigerate the finished cake for at least 30 minutes before serving. The flavors meld and the texture gets dreamy.
- Layering Option: For parties, try baking in two round pans and stacking with frosting in between. It’s a showstopper (just be gentle—cake is tender!).
- Multitasking: While the cake bakes, prep your toppings and clean up. The faster you finish, the sooner you eat dessert!
If you overmix the batter, your cake might turn out tough. If this happens, don’t sweat it—just add extra frosting and nobody will mind. Also, too much pineapple in the frosting can make it watery; drain well but save a bit of juice for flavor. For a sunny yellow cake, use a cake mix with no artificial coloring (some brands turn out pale).
Consistency matters, but perfection isn’t necessary. Rustic cakes always get compliments! With these tips, you’ll be serving Pineapple Sunshine Cake like a pro—even if you’re baking in flip-flops.
Variations & Adaptations
One of the best things about Pineapple Sunshine Cake is how easy it is to customize. Here are some favorite twists I’ve tried or seen:
- Gluten-Free: Substitute your favorite gluten-free yellow cake mix. The rest of the ingredients are naturally gluten-free, so it’s an easy swap.
- Dairy-Free: Use coconut whipped topping and check for dairy-free pudding mix. The flavor is fantastic—think piña colada!
- Fresh Pineapple: Swap canned pineapple for finely chopped fresh pineapple. The texture is chunkier, and the flavor is even brighter.
- Coconut Sunshine Cake: Add 1/2 cup (50g) shredded coconut to the batter and/or topping. It’s a tropical party in your mouth.
- Lemon Twist: Mix in 1 tablespoon lemon zest to the batter for a little zing. Pineapple and lemon are surprisingly good together.
If you want to bake the cake as cupcakes, just divide the batter into muffin tins and bake for 15-18 minutes. They make adorable party treats and are easy to serve. For a lighter dessert, use angel food cake mix instead of yellow—it’s fluffier and even lower in calories.
Allergen swaps are simple: egg replacer or flax eggs work for a vegan version, and you can use almond or oat-based whipped toppings for nut or soy allergies. My personal favorite adaptation? I sliced in some strawberries between the layers at my daughter’s birthday—everyone loved the burst of color and flavor!
Serving & Storage Suggestions
Pineapple Sunshine Cake shines brightest when served chilled. Slice it into squares or rectangles and use a serrated knife for clean edges. If you’re feeling fancy, top each piece with a cherry or a sprinkle of toasted coconut—looks gorgeous for Pinterest photos!
Pair this cake with iced tea, lemonade, or a fruity punch. For brunch, serve alongside fresh fruit salad or mini quiches. It’s light enough to follow a heavier meal but flavorful enough to satisfy dessert lovers.
Leftovers? Cover the cake tightly with plastic wrap or place in an airtight container. Store in the refrigerator for up to 4 days—the flavors actually deepen as it sits. For longer storage, freeze individual slices wrapped in foil and sealed in freezer bags; thaw overnight in the fridge before serving.
To reheat (if you like your cake a bit warm), microwave a slice for 10-15 seconds, but be careful—the frosting can melt fast! Honestly, this cake tastes best cold, so I rarely bother with reheating. If you make it ahead for a party, just add toppings right before serving to keep things fresh and pretty.
Nutritional Information & Benefits
Each serving of Pineapple Sunshine Cake (about 1/12th of the cake) contains approximately:
- Calories: 240
- Fat: 9g
- Carbs: 37g
- Protein: 2g
- Sugar: 26g
Pineapple is packed with vitamin C, digestive enzymes, and antioxidants. Using crushed pineapple boosts fiber and natural sweetness, so you can cut back on added sugar. If you opt for coconut whipped topping, you’ll skip dairy and add healthy fats. This cake is naturally nut-free, and can be made gluten-free or dairy-free with simple swaps.
If you’re watching calories, serve smaller slices or use angel food cake mix. As someone who tries to balance treats with nutrition, I love that this dessert feels indulgent but isn’t super heavy. Just remember: cake is for enjoying, so don’t stress the numbers too much!
Conclusion
Pineapple Sunshine Cake is the kind of dessert that turns any day into a celebration. It’s simple, sweet, and impossible not to love—whether you’re making it for a summer party or just to chase the winter blues away. I’ve made this recipe more times than I can count, and it always brings smiles (and requests for seconds!).
Don’t be afraid to tweak it to match your tastes—swap toppings, try fresh pineapple, or give it a coconut spin. That’s the beauty of baking at home! Personally, I love this cake because it’s fuss-free but feels special, and it reminds me of sunshine even on cloudy days. Give it a try and let your kitchen fill with tropical vibes.
If you bake this Pineapple Sunshine Cake, drop a comment below, share your photos, or tell me how you made it your own. I’d love to hear your favorite twists! Happy baking, and may your desserts always be as bright as your mood!
Frequently Asked Questions
Can I use fresh pineapple instead of canned?
Yes, just make sure to chop it very finely and include the juice for moisture. Canned pineapple is easier and gives more consistent results, but fresh adds extra flavor!
Can I make Pineapple Sunshine Cake ahead of time?
Definitely! Bake and frost the cake up to a day in advance. Store covered in the fridge until ready to serve. Add toppings right before serving for best presentation.
Is this recipe gluten-free?
Not as written, but you can easily substitute a gluten-free yellow cake mix. Everything else is naturally gluten-free!
Can I freeze Pineapple Sunshine Cake?
Yes, slice the cake and wrap each piece tightly in foil, then place in a freezer bag. Thaw overnight in the fridge before serving. The texture is still great after freezing.
What if I don’t have a 13×9 pan?
You can use two 8-inch round pans or make cupcakes. Just adjust the baking time—round pans may take 20-22 minutes, cupcakes 15-18 minutes.
Pin This Recipe!
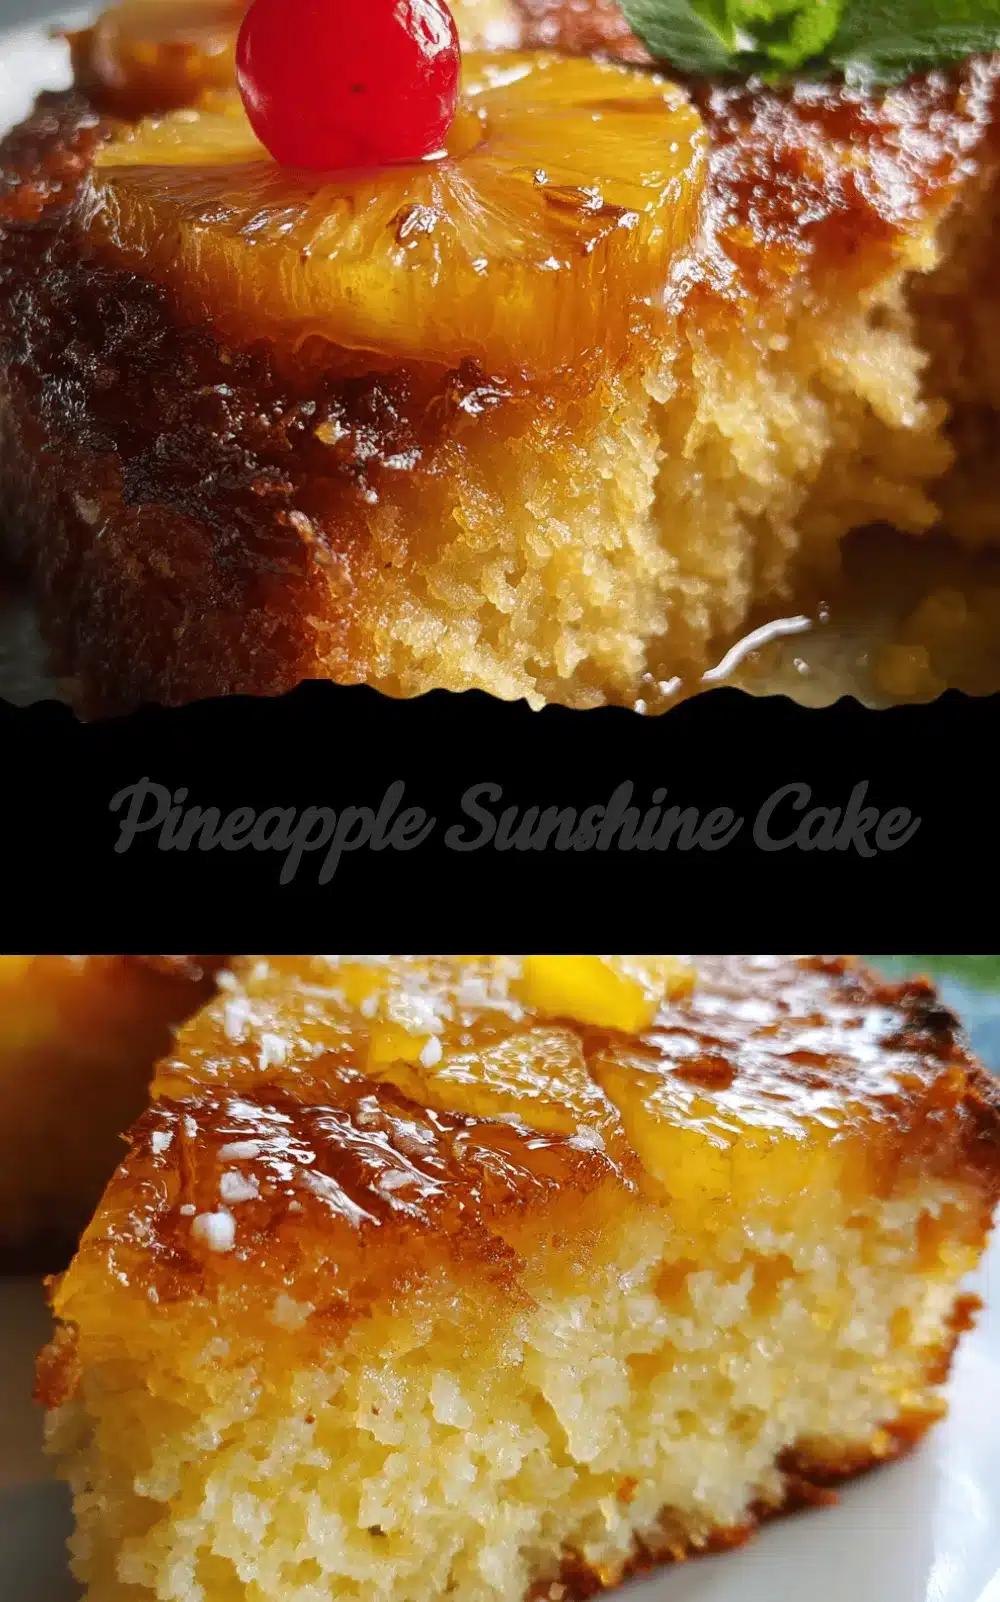

Pineapple Sunshine Cake
- Total Time: 45 minutes
- Yield: 12 servings 1x
Description
A light, moist, and tropical cake bursting with pineapple flavor and topped with a creamy whipped frosting. Perfect for summer parties, potlucks, or any occasion that calls for a sunny dessert.
Ingredients
- 1 box yellow cake mix (15.25 oz)
- 4 large eggs, room temperature
- 1 can crushed pineapple (20 oz, juice included)
- 1/2 cup vegetable oil
- 1 can crushed pineapple (8 oz, drained, reserve some juice)
- 1 package instant vanilla pudding mix (3.4 oz, dry mix)
- 1 tub whipped topping (8 oz, e.g., Cool Whip)
- Maraschino cherries (optional, for topping)
- Toasted coconut flakes (1/4 cup, optional)
- Fresh pineapple chunks or slices (optional, for garnish)
Instructions
- Preheat oven to 350°F (175°C). Lightly grease a 13×9 inch baking pan with nonstick spray or butter. Optionally, line with parchment paper.
- In a large bowl, combine yellow cake mix, eggs, 20 oz can crushed pineapple (with juice), and vegetable oil. Mix with an electric mixer on medium speed for 2-3 minutes until smooth. Do not overmix.
- Pour batter into prepared pan and spread evenly. Bake for 25-30 minutes, or until a toothpick inserted in the center comes out clean and the top is golden and springy.
- Place pan on a cooling rack and let cake cool completely before frosting (about 30 minutes).
- In a medium bowl, combine 8 oz drained crushed pineapple, instant vanilla pudding mix, and whipped topping. Stir gently until smooth and fluffy. If too thick, add a tablespoon of reserved pineapple juice.
- Once cake is cool, spread frosting evenly over the top with a spatula.
- Add optional toppings: sprinkle toasted coconut, place maraschino cherries, or decorate with pineapple chunks.
- Refrigerate cake for 30 minutes before slicing for best flavor and texture. Serve chilled.
Notes
For gluten-free or dairy-free adaptations, substitute with gluten-free cake mix and coconut whipped topping. Do not frost a warm cake, as the topping will melt. Cake can be made ahead and stored in the fridge for up to 4 days. For a layered cake, use two 8-inch round pans. Cupcake variation: bake in muffin tins for 15-18 minutes.
- Prep Time: 15 minutes
- Cook Time: 30 minutes
- Category: Dessert
- Cuisine: American
Nutrition
- Serving Size: 1/12th of cake
- Calories: 240
- Sugar: 26
- Sodium: 320
- Fat: 9
- Saturated Fat: 3
- Carbohydrates: 37
- Fiber: 1
- Protein: 2
Keywords: pineapple cake, summer dessert, tropical cake, easy cake recipe, potluck dessert, pineapple sunshine cake, whipped topping cake, party dessert