Introduction
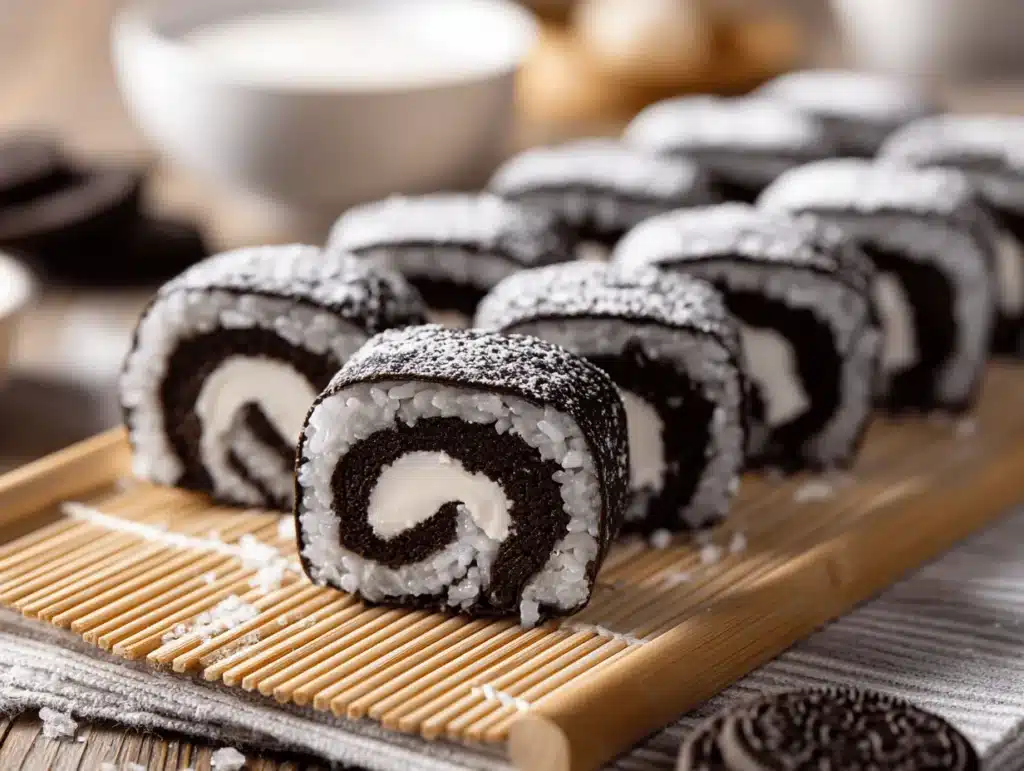
Crunch. Cream. A sweet surprise in every bite—that’s exactly what you get with these Easy Oreo Sushi Rolls. I still remember the first time I whipped up a batch for my niece’s birthday party. She’s obsessed with sushi (well, the look of it, not the fish!), and let’s face it, Oreos are practically their own food group in our family. So, I figured: Why not turn everyone’s favorite cookie into a playful, eye-catching treat?
Honestly, making candy sushi with Oreo cookies is a total game-changer. It’s the kind of hands-on recipe kids (and adults who are kids at heart) can make together—no fancy baking skills, no oven, and no stress. You mash, you roll, you slice, and suddenly, you’ve got a platter of edible sushi that looks almost too cute to eat. The best part? These Oreo sushi rolls are ready in less than 30 minutes, and cleanup is a breeze.
As someone who’s tested party snacks for years, I can tell you: This recipe is always a hit. Whether you’re hosting a playdate, a themed birthday, or just want a memorable after-school snack, these Oreo sushi rolls deliver maximum fun with minimum effort. Plus, with simple ingredients and endless ways to decorate, you’ll never get bored of making them. If you’re searching for a creative way to bring a little “wow” to your dessert table, this Easy Oreo Sushi Rolls recipe is the answer. Trust me, after a few batches, you’ll be hooked!
Why You’ll Love This Recipe
- Quick & Easy: Whip up Oreo sushi rolls in under 30 minutes—no oven, no complicated steps.
- Simple Ingredients: All you need are Oreos, cream cheese, and a handful of candy—stuff you probably already have.
- Perfect for Parties: These candy sushi rolls turn any kids’ gathering into a celebration. Sushi night never looked so sweet!
- Crowd-Pleaser: Every time I bring these to a party, kids and adults swarm the plate. They’re just that fun.
- Unbelievably Delicious: The combination of crunchy cookie, creamy filling, and chewy candy is pure happiness. It’s like dessert and playtime rolled into one.
Honestly, what makes this Easy Oreo Sushi Rolls recipe stand out isn’t just the look—it’s the way the flavors and textures work together. Blending Oreos with cream cheese creates a soft, rich “rice” that holds its shape but melts in your mouth. Rolling it up with chewy gummy candies (think: fruit strips or licorice) gives that authentic sushi vibe. And when you slice it, it’s almost magical watching each piece reveal its swirly, candy-filled center.
This isn’t your average party snack. It’s the kind of recipe you make once and keep coming back to—because it’s so easy, customizable, and just plain fun. I’ve tested dozens of candy sushi recipes, and this one always wins for flavor, texture, and Pinterest-worthy presentation. If you’re looking for a treat that doubles as a craft project, you’ve found your new go-to. Just be warned: Once you start, you might not stop at just one roll!
Ingredients Needed
This recipe relies on simple, kid-friendly ingredients to create bold flavor and playful texture. Most of these are pantry staples—no need for a special grocery run.
- Oreos (24 cookies): Classic chocolate sandwich cookies. I like using regular—not Double Stuf—for the best texture.
- Cream Cheese (4 oz / 115 g): Softened to room temperature. This helps bind the Oreo crumbs and gives a “sticky rice” feel.
- Candy Strips or Fruit Leather (3-4 strips): For the “sushi filling.” Fruit roll-ups or any chewy, flexible candy works. Rainbow colors are fun for kids!
- Gummy Worms or Licorice (6-8 pieces): Cut into strips; these add flavor and a sushi-inspired look.
- Mini Marshmallows (optional, ½ cup / 30 g): For extra creaminess and texture. I toss a few in when I want a softer roll.
- Sprinkles or Edible Glitter (optional): For decorating the finished rolls. Adds sparkle and color.
- Powdered Sugar (1 tbsp / 8 g): For dusting your work surface and preventing sticking.
- Plastic Wrap: For rolling and shaping your sushi logs.
Feel free to mix and match candies based on what you have. I’ve used everything from sour straws to jelly beans in the center—kids love experimenting with different combos. If you’re dairy-free, swap the cream cheese for vegan cream cheese or even nut butter (although texture will be a bit different). Gluten-free Oreos also work if you need to avoid wheat—just keep an eye out for any added allergens in your candy choices.
For best results, pick firm fruit leather or candy strips that won’t get mushy as you roll. I’ve found that softer candies can make rolling tricky, but they do taste amazing. Want a richer flavor? Try adding a dash of vanilla or a spoonful of peanut butter to the Oreo mixture—it’s a small detail that makes a big difference.
I usually stick with classic Oreo cookies, but feel free to try golden Oreos for a unique twist. Just remember: The “rice” comes from finely crushed Oreos, so the more uniform your crumbs, the better the rolls will hold together. If you don’t have a food processor, a sturdy zip bag and rolling pin work just fine—kids love helping with this part!
Equipment Needed
- Food Processor or Blender: For crushing Oreos into fine crumbs. No food processor? Use a zip-top bag and rolling pin—it just takes a little extra muscle.
- Mixing Bowl: For combining Oreo crumbs and cream cheese.
- Plastic Wrap or Parchment Paper: Essential for rolling and shaping the sushi logs.
- Sharp Knife: For slicing the sushi rolls into neat pieces. A serrated knife works best to avoid squishing.
- Cutting Board: For assembling and slicing your rolls.
- Spatula or Spoon: For mixing and spreading the Oreo mixture.
If you’re making these with kids, opt for butter knives or plastic knives for safety—they work surprisingly well on the soft rolls. I’ve tried using sushi mats for shaping, but honestly, plastic wrap is easier and less cleanup. After making dozens of batches, I recommend cleaning your knife between slices to keep each piece looking sharp (literally and visually!).
On a budget? Skip the fancy gear—all you need is a bowl, some plastic wrap, and a little patience. Just make sure whatever knife you use is clean and slightly damp to prevent sticking. Pro tip: If your rolls are extra sticky, chill them for 10 minutes before slicing—they’ll hold their shape better.
Preparation Method
-
Crush the Oreos: Place 24 Oreo cookies in a food processor or blender. Pulse until they become fine crumbs (about 30 seconds). If you don’t have a processor, put the cookies in a zip-top bag and crush with a rolling pin until no big chunks remain.
Tip: Uniform crumbs help the rolls stick together. Don’t leave any big pieces! -
Mix with Cream Cheese: Transfer Oreo crumbs to a mixing bowl. Add 4 oz (115 g) softened cream cheese. Mix well with a spatula or clean hands until it forms a thick, sticky dough.
Sensory cue: It should feel like playdough—firm but pliable. -
Prep Your Work Surface: Sprinkle powdered sugar (about 1 tbsp / 8 g) on a cutting board to prevent sticking. Lay a sheet of plastic wrap on top.
Warning: Don’t skip the sugar, or your dough will cling to everything! -
Shape the Dough: Place half the Oreo mixture on the plastic wrap. Pat and press into a rectangle, about 6 x 8 inches (15 x 20 cm) and ¼ inch (0.5 cm) thick. Use a rolling pin or your hands.
Tip: If dough cracks, press gently to patch—imperfections give it character. -
Add the Candy Filling: Lay candy strips, fruit leather, and gummy worms across the width of the rectangle, about 1 inch (2.5 cm) from the edge. Arrange however you like—kids love rainbow stripes!
Sensory cue: The colors should pop against the dark Oreo “rice.” -
Roll It Up: Using the plastic wrap, gently lift the edge and roll the dough over the candy filling, pressing as you go to shape a tight log. Roll completely, tucking in the ends. If it cracks, patch with extra dough.
Tip: Chill the log for 10-15 minutes if it’s too soft to slice. -
Slice the Sushi: Remove the roll from the plastic wrap. Use a sharp (or serrated) knife to slice into 1-inch (2.5 cm) pieces. Wipe the knife between cuts for clean slices.
Warning: If pieces squish, chill longer or slice gently using a sawing motion. - Decorate: Top each sushi roll with sprinkles, edible glitter, or mini marshmallows for a festive look.
- Repeat: Shape and roll the remaining Oreo dough with your candy fillings, following the same steps.
- Serve: Arrange Oreo sushi rolls on a platter or sushi tray. Serve immediately or cover and chill until ready to enjoy.
Personal tip: If you want extra neat rolls, wrap them tightly in plastic and chill for 30 minutes before slicing. Clean, sharp edges every time!
Cooking Tips & Techniques
Making Easy Oreo Sushi Rolls is mostly about having fun, but a few pro tricks can help you nail the look and texture.
- Chill for Clean Slices: If your dough feels sticky or soft, don’t force it—chill the rolls in the fridge for 10-15 minutes. They slice up way neater, and you’ll get those classic sushi “coins.”
- Uniform Crumbs: The finer the Oreo crumbs, the smoother your “rice.” I’ve learned the hard way—big chunks make the rolls fall apart. If you’re crushing by hand, take your time!
- Don’t Overwork the Dough: Mixing too much makes it gummy. As soon as the cream cheese is blended in, stop—trust me, less is more.
- Slicing Technique: Use a gentle, sawing motion with your knife. Pushing down hard squishes the rolls and makes the filling ooze out.
- Keep Hands Clean: Wash and dry your hands before shaping. Oreo dough is sticky—sticky hands = sticky mess!
- Decorating: Let kids go wild with toppings! Sprinkles, mini candies, even little drops of colored frosting. There’s no wrong way.
I’ve had batches fall apart because I rushed the rolling. If the dough cracks, just pinch it back together—these sushi rolls are supposed to be fun, not perfect. Once, I tried using extra cream cheese for a creamier texture, but it got too soft to roll properly. Lesson learned: Stick to the ratios! Multitasking is easy with this recipe—set up a “rolling station” so everyone gets a turn. If you want consistent results, measure your rectangles and fillings, but honestly, freeform shapes taste just as good.
Variations & Adaptations
One of the coolest things about Easy Oreo Sushi Rolls is how customizable they are. Here are some tasty twists:
- Gluten-Free Version: Use gluten-free chocolate sandwich cookies. The texture is nearly identical, and no one will notice the swap.
- Dairy-Free Adaptation: Substitute vegan cream cheese or almond butter for the filling. The rolls will be slightly softer, but still delicious.
- Seasonal Fun: Use red and green candies for Christmas, pastel colors for Easter, or orange gummies for Halloween sushi rolls.
- Flavor Twists: Try Golden Oreos or mint-flavored Oreos for a unique taste. Add a splash of vanilla or orange zest to the dough for extra zing.
- Nut-Free: Stick with classic cream cheese and avoid nut-based fillings to keep things allergy-friendly. Always check candy labels for hidden nuts, especially if serving a crowd.
- Baking-Free “Rice”: For a lighter version, mix crushed rice cereal with marshmallow fluff as your sushi base. It’s a completely different texture, but still lots of fun!
My personal favorite? Using strawberry fruit leather and rainbow gummy worms for birthday parties. The colors are so vibrant, and kids go nuts for the candy surprise inside. If you want to get fancy, wrap the rolls in thin strips of fruit leather for a “seaweed” look. There are tons of ways to make this recipe your own—let your imagination (and taste buds) lead the way!
Serving & Storage Suggestions
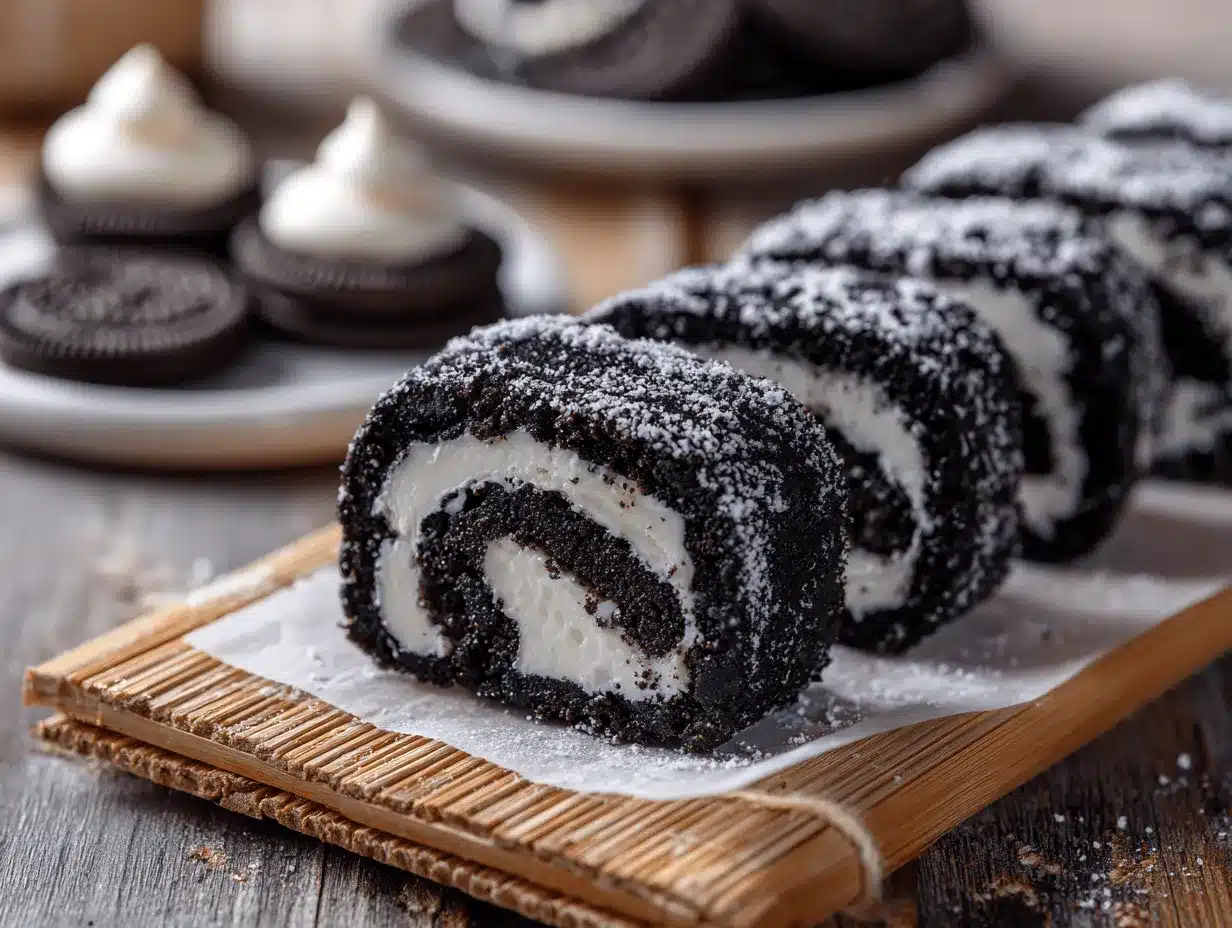
Oreo sushi rolls are best served chilled or at room temperature. I love arranging them on a sushi tray with little bowls of extra sprinkles or whipped cream “soy sauce” for dipping—kids get a kick out of the playful setup.
- Serving Ideas: Serve as a fun dessert for kids’ parties, after-school snacks, or even at sleepovers. They pair perfectly with milk, lemonade, or fruity punch.
- Storage: Store leftover rolls in an airtight container in the refrigerator for up to 3 days. Lay parchment paper between layers to prevent sticking.
- Freezer Option: Freeze rolls (un-sliced) for up to 1 month. Thaw in the fridge, then slice and decorate before serving.
- Reheating: These are best enjoyed cold—no reheating needed. If they get too firm in the fridge, let them sit out for 5 minutes before serving.
One thing I’ve noticed—flavors meld and get even richer after a day in the fridge. Just don’t wait too long, as candy fillings can lose their texture over time. For parties, prep the rolls ahead and slice right before guests arrive. They hold up beautifully and always get plenty of “oohs” and “aahs!”
Nutritional Information & Benefits
Each Oreo sushi roll contains an estimated 80-100 calories, depending on the fillings and toppings. Here’s a rough breakdown per piece (assuming 18 pieces per batch):
- Calories: 90
- Fat: 5g
- Carbohydrates: 12g
- Sugar: 8g
- Protein: 1g
The cream cheese adds a bit of calcium and protein, while Oreos provide quick carbs for energy. Most candies are pure sugar, so enjoy in moderation. For gluten-free or dairy-free adaptations, double-check candy ingredients for hidden allergens. If you’re watching sugar, swap in lower-sugar candies or mini marshmallows.
From my own perspective, I see these as a special treat, not an everyday snack. They’re perfect for parties, not for lunchboxes. If you’re looking for a fun way to get kids involved in the kitchen (and sneak in a little learning about food assembly!), this recipe fits the bill.
Conclusion
If you love playful recipes that double as edible crafts, Easy Oreo Sushi Rolls are a must-try. They’re quick, kid-friendly, and almost guaranteed to make your dessert table the talk of the neighborhood. Whether you’re making them for a party or just because, you’ll appreciate how simple and satisfying they are.
Don’t be afraid to experiment with fillings, colors, and shapes. Each batch is a new adventure, and there’s really no wrong way to make them. I love this recipe for how it brings people together—rolling, laughing, and sneaking bites before the platter hits the table.
Ready to make your own candy sushi? Give this recipe a go, share your creations in the comments, and let me know which combos are your favorites. Tag me on social for a chance to be featured! Honestly, I can’t wait to see what you come up with. Happy rolling!
FAQs
How do I crush Oreos without a food processor?
Just put the cookies in a zip-top bag and smash with a rolling pin or heavy spoon. Make sure there are no big chunks left before mixing.
Can I use other sandwich cookies instead of Oreos?
Absolutely! Golden Oreos, chocolate chip cookies, or gluten-free sandwich cookies all work. Just make sure they’re crunchy enough to crush into fine crumbs.
Are these Oreo sushi rolls safe for nut allergies?
Yes, as long as you use nut-free cream cheese and candy. Always check candy labels, since some brands process with nuts.
How far in advance can I make Oreo sushi rolls?
You can make them up to 2 days ahead. Store in the fridge in an airtight container, and slice right before serving for best presentation.
Can I freeze Oreo sushi rolls?
Yes. Freeze the un-sliced rolls, wrapped tightly in plastic. Thaw in the fridge, then slice and decorate before serving. They taste just as good!
Pin This Recipe!
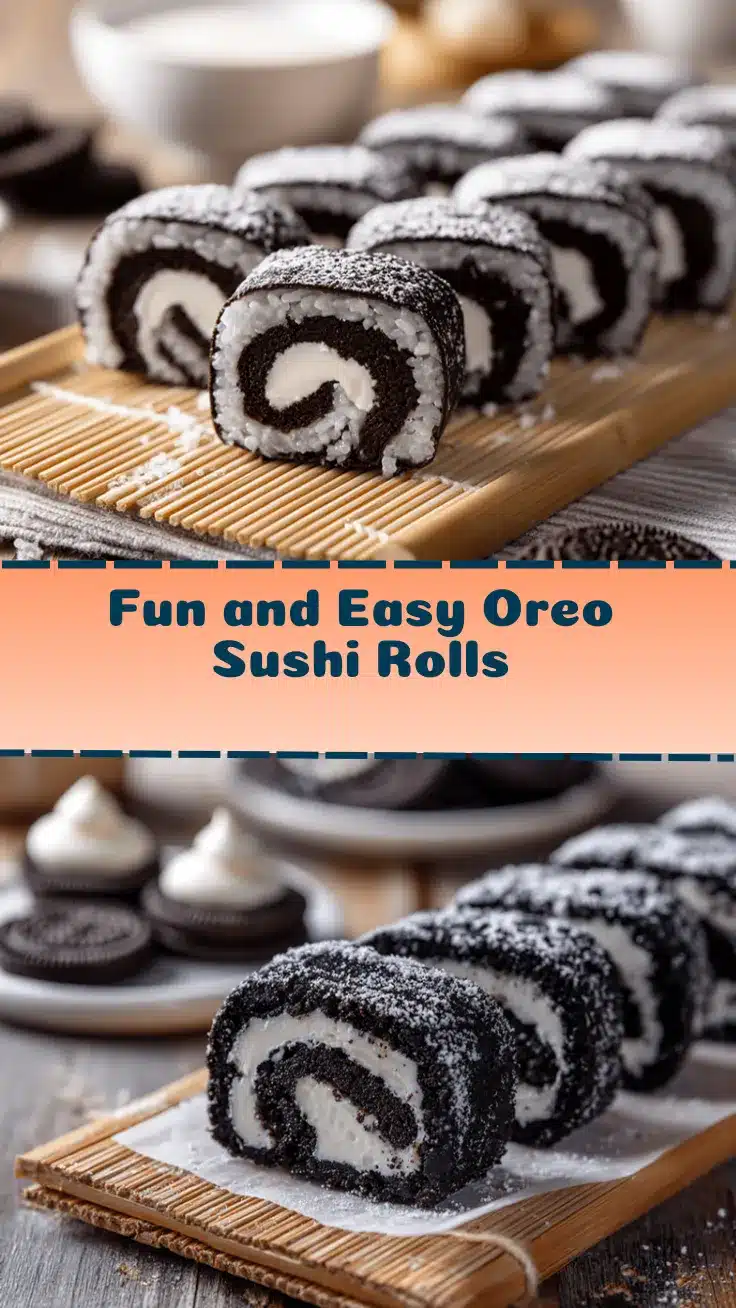
Easy Oreo Sushi Rolls
- Total Time: 25 minutes
- Yield: 18 pieces 1x
Description
These playful Oreo Sushi Rolls are a quick, no-bake candy treat that looks like sushi but tastes like dessert. Perfect for kids’ parties, after-school snacks, or any time you want a fun, hands-on recipe everyone can help make.
Ingredients
- 24 Oreo cookies
- 4 oz cream cheese, softened
- 3–4 candy strips or fruit leather (such as fruit roll-ups)
- 6–8 gummy worms or licorice, cut into strips
- 1/2 cup mini marshmallows (optional)
- Sprinkles or edible glitter (optional, for decorating)
- 1 tbsp powdered sugar (for dusting work surface)
Instructions
- Place Oreo cookies in a food processor or blender and pulse until fine crumbs form. Alternatively, crush cookies in a zip-top bag with a rolling pin.
- Transfer Oreo crumbs to a mixing bowl. Add softened cream cheese and mix until a thick, sticky dough forms.
- Sprinkle powdered sugar on a cutting board and lay a sheet of plastic wrap on top.
- Divide Oreo mixture in half. Pat and press each half into a rectangle about 6 x 8 inches and 1/4 inch thick.
- Lay candy strips, fruit leather, and gummy worms across the width of the rectangle, about 1 inch from the edge.
- Using the plastic wrap, gently roll the dough over the candy filling to form a tight log. Tuck in the ends and patch any cracks.
- Chill the log for 10-15 minutes if too soft to slice.
- Remove from plastic wrap and slice into 1-inch pieces with a sharp or serrated knife, wiping knife between cuts.
- Decorate each sushi roll with sprinkles, edible glitter, or mini marshmallows as desired.
- Repeat with remaining Oreo dough and candy fillings.
- Arrange sushi rolls on a platter and serve immediately or chill until ready to enjoy.
Notes
For best results, chill the rolls before slicing for clean edges. Use gluten-free Oreos and vegan cream cheese for allergy-friendly versions. Let kids help with rolling and decorating for a fun activity. Store leftovers in an airtight container in the fridge for up to 3 days, or freeze un-sliced rolls for up to 1 month.
- Prep Time: 15 minutes
- Cook Time: 0 minutes
- Category: Dessert
- Cuisine: American
Nutrition
- Serving Size: 1 sushi roll
- Calories: 90
- Sugar: 8
- Sodium: 60
- Fat: 5
- Saturated Fat: 2
- Carbohydrates: 12
- Fiber: 0.5
- Protein: 1
Keywords: Oreo sushi, candy sushi, kids dessert, no bake, party treat, easy dessert, Oreo recipe, birthday snack, edible craft, fun food