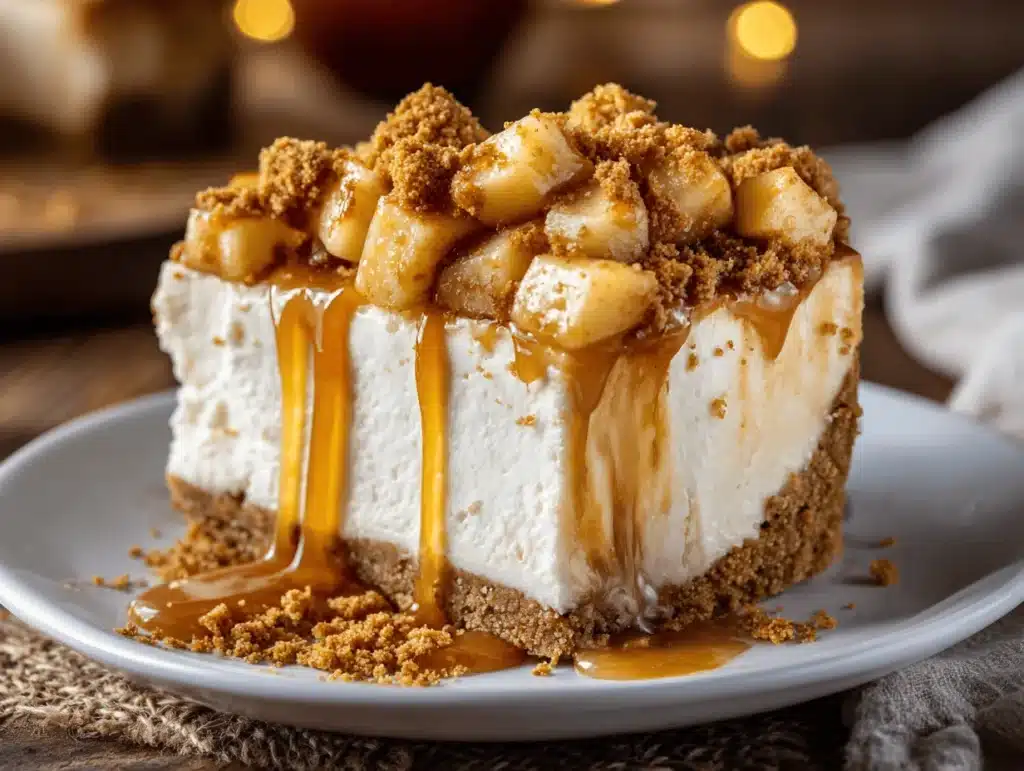
Sticky caramel apples, creamy cheesecake filling, and a buttery biscuit base—just saying it makes my mouth water. You know, the smell of cinnamon and apples floating through the kitchen is one of those things that instantly feels like home. I first stumbled across an idea for a no bake apple pie cheesecake slice one chilly fall afternoon, when my oven decided to take a day off (classic timing, right?). Instead of panicking, I grabbed a few pantry staples and got creative with what I had. The result? This dreamy, easy no bake apple pie cheesecake slice that’s become my go-to comfort dessert, especially when baking isn’t on the cards.
What I love most is that you don’t need fancy equipment or exotic ingredients—just a sense of adventure and an appetite. As someone who’s tested this recipe more times than I can count (sometimes just as a midnight snack, don’t judge!), I can honestly say it’s reliable. The flavors are classic, but the format is fresh: think of it as apple pie meets creamy cheesecake, all in a fuss-free slice. It’s perfect for busy families, potluck parties, or anyone who wants dessert without turning on the oven. If you’re into make ahead treats, this one will totally win you over.
So, whether you’re craving autumn vibes or just a bit of cozy sweetness, this easy no bake apple pie cheesecake slice is here to deliver. Trust me, you’ll want to save this recipe for those days when you need a dessert hug—no baking required!
Why You’ll Love This Recipe
Honestly, there’s a lot to adore about this easy no bake apple pie cheesecake slice. After making it for neighborhood get-togethers, birthday brunches, and even my picky cousins, I’ve picked up some real-life tips that make it extra special. Here’s why I keep coming back to it:
- Quick & Easy: Comes together in under 30 minutes (plus chilling), so you can whip it up even when you’re short on time.
- No Oven Needed: Perfect for hot days, small kitchens, or those times when the oven is already busy with dinner.
- Simple Ingredients: Most of these are pantry staples—think cream cheese, apples, biscuits, and a few basics you probably already have.
- Perfect for Any Occasion: Great for potlucks, holiday gatherings, family dinners, or even a late-night treat.
- Crowd-Pleaser: Kids love the apple pie flavor, adults rave about the creamy layer, and everyone asks for seconds!
- Unbelievably Delicious: The combination of buttery base, spiced apples, and tangy cheesecake filling hits all the right notes (it’s honestly comfort food at its finest).
What sets my version apart is the method: I blend the apples with a touch of lemon and cinnamon before layering, which gives the filling a really fresh zing. Plus, the no bake cheesecake layer is super smooth thanks to a trick I learned from a pastry chef friend—whipping the cream cheese with a splash of sour cream for extra creaminess. It’s simple, but these little details matter.
This easy no bake apple pie cheesecake slice isn’t just about flavor—it’s about creating that moment where you close your eyes, take a bite, and let the world slow down for a second. It’s comforting yet celebratory, fuss-free but impressive. If you want a dessert that’s memorable and stress-free, this one totally hits the mark.
Ingredients Needed
This recipe uses simple, wholesome ingredients to deliver bold flavor and satisfying texture without the fuss. Most of what you’ll need is probably already hanging out in your pantry or fridge, and there’s plenty of room to swap or add based on what’s in season or your dietary needs. Here’s the breakdown:
- For the biscuit base:
- 200g (about 7 oz) digestive biscuits or graham crackers (crushed)
- 75g (about 1/3 cup) unsalted butter, melted (adds richness and helps bind the crust)
- 1 tablespoon brown sugar (for a caramel-y undertone, optional)
- For the apple pie layer:
- 2 medium apples (about 250g/9 oz), peeled, cored, and diced (Granny Smith for tartness, or Gala for sweetness)
- 2 tablespoons lemon juice (keeps apples bright, adds freshness)
- 1/4 cup (50g) brown sugar
- 1 teaspoon ground cinnamon (classic apple pie flavor)
- 1/4 teaspoon ground nutmeg (optional, for warmth)
- 1 tablespoon cornstarch (helps thicken the apple layer)
- 1/4 cup (60ml) water
- For the cheesecake layer:
- 250g (about 8 oz) cream cheese, softened (full fat for best texture)
- 150ml (about 2/3 cup) heavy cream, cold
- 1/3 cup (80g) sour cream (adds tang and smoothness)
- 1/2 cup (60g) powdered sugar (or to taste)
- 1 teaspoon vanilla extract
- Pinch of salt
- Optional toppings:
- Extra apple slices, thinly sliced
- Caramel sauce drizzle
- Chopped toasted walnuts or pecans (for crunch)
- Whipped cream
Ingredient Tips: I recommend Philadelphia cream cheese for ultra-smooth texture. For biscuits, you can swap in gluten-free options if needed. Apples can be swapped for pears in fall, or use canned apples if you’re in a pinch (just skip the cooking step). No sour cream? Greek yogurt works great, too.
This recipe is super forgiving, so don’t stress if you need to make a swap. The key is using fresh, crisp apples and a good-quality cream cheese for that dreamy, creamy result.
Equipment Needed
- 8-inch (20cm) square baking pan – lined with parchment for easy lifting
- Mixing bowls – at least two: one for the base, one for the filling
- Hand mixer or stand mixer – makes the cheesecake layer extra smooth, but a strong whisk works in a pinch
- Small saucepan – for cooking the apple pie filling
- Rubber spatula – for scraping and spreading
- Measuring cups and spoons – always helps with accuracy
- Food processor or zip-top bag and rolling pin – for crushing biscuits (the bag method is my personal favorite for less cleanup!)
Don’t have a square pan? Use a round cake tin or even a loaf pan—just keep an eye on slice thickness. I’ve used a glass Pyrex dish before and it works perfectly. If you’re working with older pans, line with parchment to avoid sticking (trust me, learned this the hard way!). For budget-friendly options, most discount stores carry basic nonstick pans and mixing bowls that do the job beautifully.
Preparation Method
-
Prepare the biscuit base:
- Crush 200g (7 oz) digestive biscuits or graham crackers into fine crumbs. You can use a food processor or pop them in a zip-top bag and bash with a rolling pin (feels oddly satisfying!).
- Mix crumbs with 75g (1/3 cup) melted unsalted butter and 1 tablespoon brown sugar. Stir until the mixture looks like damp sand.
- Press firmly into a lined 8-inch (20cm) square pan, making an even layer. Use the back of a spoon or a flat-bottomed glass for a smooth finish.
- Chill in the fridge while you make the filling (about 10 minutes).
-
Cook the apple pie layer:
- In a small saucepan, combine 2 diced apples, 2 tablespoons lemon juice, 1/4 cup (50g) brown sugar, 1 teaspoon cinnamon, and 1/4 teaspoon nutmeg (if using).
- Add 1 tablespoon cornstarch and 1/4 cup (60ml) water. Stir well.
- Cook over medium heat, stirring often, for about 5-7 minutes. Apples should soften and the sauce will thicken (it smells incredible at this stage!).
- If the mixture looks too runny, let it simmer for another minute. If it’s too thick, add a splash of water.
- Let cool to room temperature. (Tip: Spread the apples out on a plate to cool faster.)
-
Make the cheesecake filling:
- In a mixing bowl, beat 250g (8 oz) softened cream cheese with 1/3 cup (80g) sour cream and a pinch of salt until smooth.
- Add 1/2 cup (60g) powdered sugar and 1 teaspoon vanilla extract. Beat until creamy.
- In a separate bowl, whip 150ml (2/3 cup) heavy cream to soft peaks. (Don’t over-whip—stop as soon as it holds a gentle shape.)
- Fold whipped cream into the cream cheese mixture gently, using a spatula. The filling should be light and fluffy.
-
Assemble the slice:
- Spread half of the cooled apple mixture over the chilled biscuit base.
- Spoon the cheesecake filling evenly on top. Use a spatula to smooth the surface.
- Dollop the remaining apple mixture over the cheesecake layer, then swirl gently with a knife for a marbled look (optional, but fun!).
- Cover and chill in the fridge for at least 4 hours, or overnight. (Longer chilling = firmer slices.)
-
Serve:
- Lift the slice out using parchment edges. Cut into squares with a sharp knife, wiping the blade between cuts for clean edges.
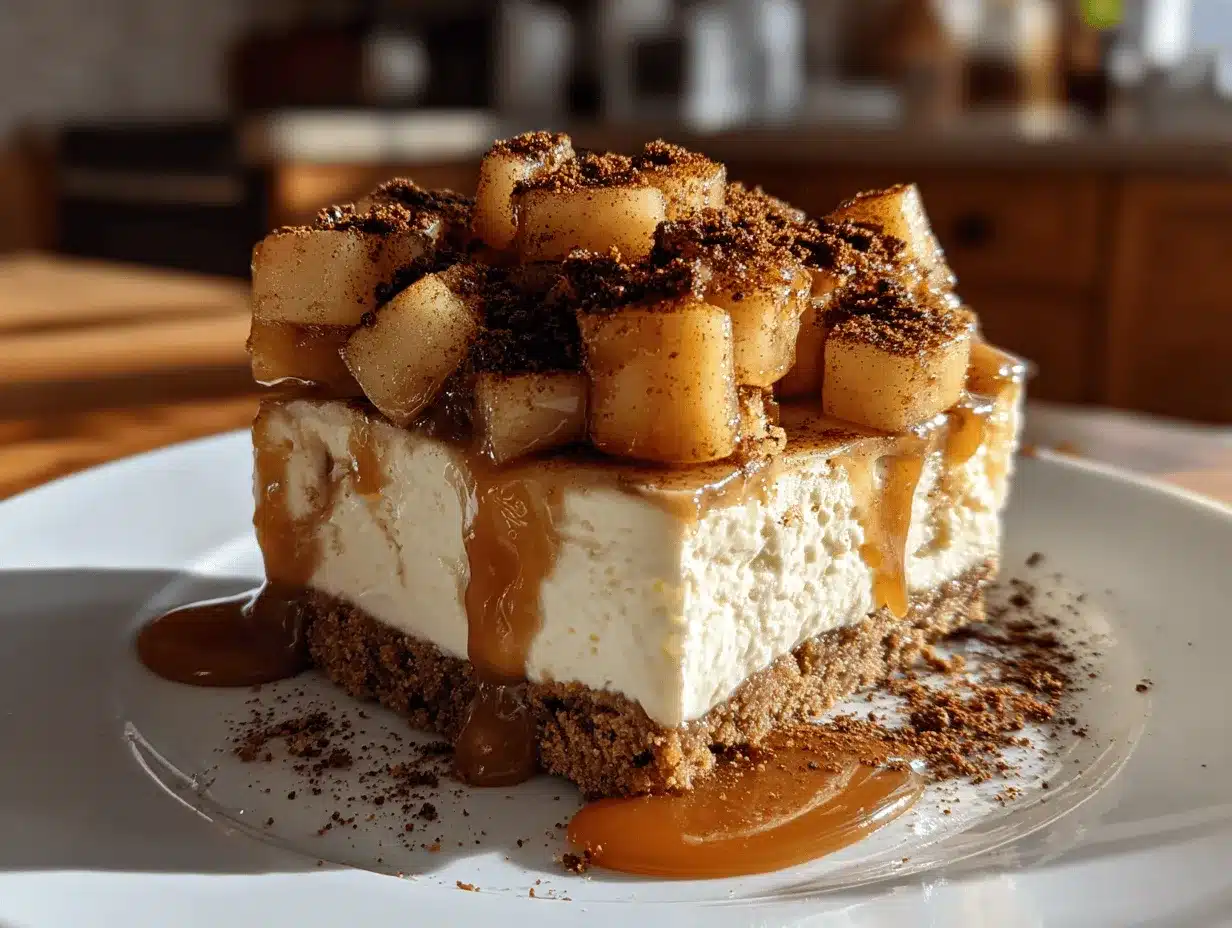
- Top with caramel sauce, extra apple slices, or chopped nuts if desired.
Troubleshooting: If the slice feels soft, pop it in the freezer for 20 minutes before cutting. If the filling seems grainy, make sure your cream cheese is fully softened. For a firmer base, press down extra hard and chill longer. Sometimes, a bit of patience is all you need!
Cooking Tips & Techniques
After making this easy no bake apple pie cheesecake slice in more kitchens than I can count, I’ve picked up some helpful tricks (and had a few hilarious mishaps, like forgetting the butter in the base—don’t recommend!). Here’s what I’ve learned along the way:
- Chill, Chill, Chill: Patience pays off—give your slice at least 4 hours in the fridge, or overnight for the best texture.
- Softened Cream Cheese Is Key: Cold cream cheese won’t blend smoothly; let it sit out for 30 minutes, or zap in short bursts in the microwave.
- Layer Evenly: Don’t rush the layering steps. Use a spatula for even spreading, and gently swirl the apples for that gorgeous marbled effect.
- Don’t Over-Whip: When beating the heavy cream, stop as soon as you get soft peaks. Over-mixing makes the filling dense and less dreamy.
- Base Compression: Press the biscuit base down firmly. If you don’t, it can crumble when you slice (been there, cleaned up that mess).
- Apple Texture: If you want chunkier apples, cut them larger and reduce cooking time slightly. For smoother filling, dice small and cook a bit longer.
Timing matters: I usually make the base and apple layer in the morning, then finish the cheesecake layer after lunch so it’s ready for dessert. Multitasking tip—clean up as you go, especially the sticky apple pan! For consistent results, weigh your ingredients (I know, more dishes, but it’s worth it for perfect texture).
Most common mistake? Rushing the chill time or skipping parchment paper. Trust me, it’s not worth the shortcut—wait it out for the best, sliceable dessert!
Variations & Adaptations
The beauty of this easy no bake apple pie cheesecake slice is how customizable it is. I’ve played around with different flavors and dietary swaps, and each time I discover something new:
- Gluten-Free Option: Use gluten-free biscuits for the base—simple swap, same great crunch.
- Vegan Version: Replace cream cheese and heavy cream with plant-based alternatives (I like Violife cream cheese and coconut cream). Use vegan butter and skip the sour cream or swap with coconut yogurt.
- Seasonal Twist: In summer, swap apples for fresh peaches or berries—just adjust cooking time as needed. Pears are also lovely in fall.
- Nutty Crunch: Stir chopped pecans or walnuts into the apple layer or sprinkle on top for extra texture.
- Spice It Up: Add a dash of cardamom or ginger to the apple filling for a cozy twist.
- Caramel Lovers: Drizzle caramel sauce between layers or over the top for richer flavor.
For allergies, use dairy-free cream cheese and coconut cream if you’re avoiding lactose. I once tried swapping the biscuit base for crushed oats and honey—surprisingly tasty, though a little softer. Don’t be afraid to play around with what you have; this recipe is forgiving and fun to experiment with.
Serving & Storage Suggestions
Serve these slices chilled, straight from the fridge, for the best texture and flavor. I like to cut them into generous squares and pile them up on a rustic wooden board—great for sharing at parties or casual gatherings.
For presentation, add a swirl of caramel sauce, a sprinkle of chopped nuts, and a dollop of whipped cream. Pair with hot coffee, spiced chai, or even cold apple cider. They’re perfect as a brunch treat, dessert after dinner, or even a decadent snack with friends.
Storage is easy: cover tightly and keep in the fridge for up to 4 days. If you want to freeze, wrap individual slices in parchment and store in an airtight container for up to a month. Thaw overnight in the fridge before serving. Reheat isn’t needed, but if you prefer a softer texture, let slices sit at room temp for 10 minutes before eating.
Honestly, the flavors deepen after a day in the fridge—so don’t worry about making these ahead. They only get better!
Nutritional Information & Benefits
Each slice of easy no bake apple pie cheesecake (based on 12 servings) has around 250-300 calories, 18g fat, 26g carbs, and 4g protein—pretty balanced for a dessert. The apples bring in fiber and vitamin C, while cream cheese adds a nice dose of calcium and protein.
For gluten-free and low-carb diets, swap the biscuits for almond flour crust. If you’re watching sugar, use a sugar substitute like monk fruit or stevia. Allergens to look out for: dairy and gluten (unless you use the swaps above).
Personally, I love that this dessert is both indulgent and wholesome. You’re getting comfort food vibes with simple, natural ingredients—no weird additives or preservatives. It’s the kind of treat I feel good about sharing with family and friends.
Conclusion
There’s something magical about a dessert that’s both easy and unforgettable. This easy no bake apple pie cheesecake slice is comfort food in every sense—creamy, spiced, and just sweet enough to make you smile. It’s perfect for busy days, special occasions, or when you just want something homemade without the baking drama.
Don’t be afraid to customize it: mix up the fruits, play with the spices, or try a new topping. Every time I make this slice, it feels a little different, and that’s part of the fun. I genuinely hope you love it as much as I do—because let’s face it, dessert should be delicious and doable.
If you try this recipe, let me know how it goes! Drop a comment, share your own twist, or tag me with your slice pics. Here’s to cozy, creamy, no bake treats—happy snacking!
FAQs
Can I make this easy no bake apple pie cheesecake slice ahead of time?
Absolutely! In fact, making it a day ahead gives the flavors time to mingle and the texture to firm up. Just keep it covered in the fridge until you’re ready to slice and serve.
What type of apples work best?
I like Granny Smith for tartness, but Gala or Honeycrisp add extra sweetness. Honestly, any crisp apple will do—use what you have!
Can I freeze the cheesecake slice?
Yes, wrap individual slices in parchment paper and store in an airtight container. Freeze for up to a month, then thaw overnight in the fridge before eating.
How do I make this gluten-free?
Just swap the digestive biscuits or graham crackers for your favorite gluten-free cookies. The rest of the recipe is naturally gluten-free!
What if my cheesecake layer doesn’t set?
It usually means it needs more chilling time. If you’re short on time, pop the pan in the freezer for 20 minutes before slicing. Make sure your cream cheese and heavy cream were whipped properly for best results.
Pin This Recipe!
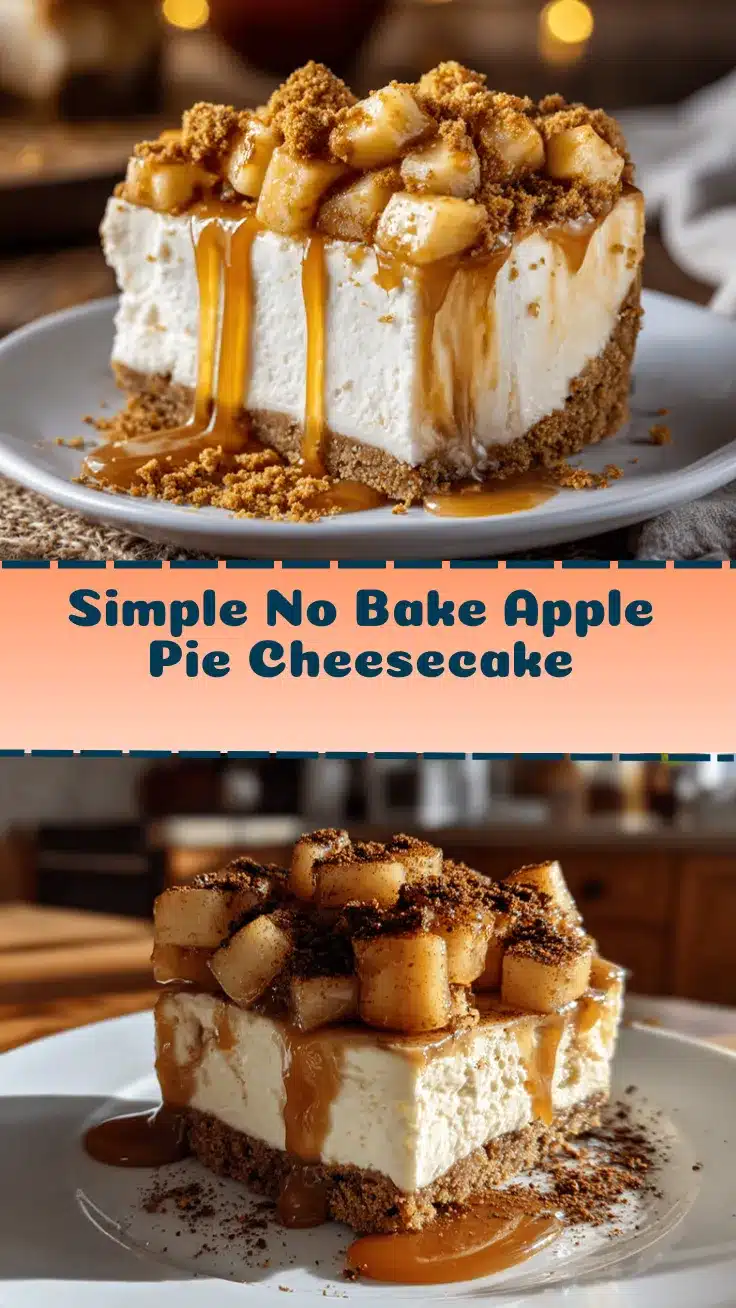

Easy No Bake Apple Pie Cheesecake Slice
- Total Time: 4 hours 30 minutes
- Yield: 12 servings 1x
Description
This comforting no bake dessert combines a buttery biscuit base, creamy cheesecake filling, and spiced caramel apple topping. It’s fuss-free, make-ahead, and perfect for cozy gatherings or busy days when you want homemade sweetness without turning on the oven.
Ingredients
- 7 oz digestive biscuits or graham crackers, crushed (about 200g)
- 1/3 cup unsalted butter, melted (about 75g)
- 1 tablespoon brown sugar (optional)
- 2 medium apples (about 9 oz), peeled, cored, and diced
- 2 tablespoons lemon juice
- 1/4 cup brown sugar (about 50g)
- 1 teaspoon ground cinnamon
- 1/4 teaspoon ground nutmeg (optional)
- 1 tablespoon cornstarch
- 1/4 cup water (about 60ml)
- 8 oz cream cheese, softened (about 250g)
- 2/3 cup heavy cream, cold (about 150ml)
- 1/3 cup sour cream (about 80g)
- 1/2 cup powdered sugar (about 60g, or to taste)
- 1 teaspoon vanilla extract
- Pinch of salt
- Optional toppings: extra apple slices, caramel sauce, chopped toasted walnuts or pecans, whipped cream
Instructions
- Crush digestive biscuits or graham crackers into fine crumbs using a food processor or zip-top bag and rolling pin.
- Mix crumbs with melted butter and brown sugar until the mixture resembles damp sand.
- Press firmly into a lined 8-inch square pan to form an even layer. Chill in the fridge for about 10 minutes.
- In a small saucepan, combine diced apples, lemon juice, brown sugar, cinnamon, and nutmeg. Add cornstarch and water, stir well.
- Cook over medium heat, stirring often, for 5-7 minutes until apples soften and sauce thickens. Let cool to room temperature.
- In a mixing bowl, beat softened cream cheese with sour cream and a pinch of salt until smooth.
- Add powdered sugar and vanilla extract, beat until creamy.
- In a separate bowl, whip heavy cream to soft peaks. Gently fold whipped cream into the cream cheese mixture.
- Spread half of the cooled apple mixture over the chilled biscuit base.
- Spoon cheesecake filling evenly on top and smooth the surface.
- Dollop remaining apple mixture over the cheesecake layer and swirl gently with a knife for a marbled look (optional).
- Cover and chill in the fridge for at least 4 hours, or overnight.
- Lift the slice out using parchment edges. Cut into squares with a sharp knife.
- Top with caramel sauce, extra apple slices, or chopped nuts if desired.
Notes
For best results, chill the slice overnight for a firmer texture. Use softened cream cheese for a smooth filling. Gluten-free biscuits can be substituted for a gluten-free version. Apples can be swapped for pears or berries. If the slice is too soft, freeze for 20 minutes before cutting. The dessert keeps well in the fridge for up to 4 days or can be frozen for up to a month.
- Prep Time: 20 minutes
- Cook Time: 7 minutes
- Category: Dessert
- Cuisine: American
Nutrition
- Serving Size: 1 slice (1/12 of recipe)
- Calories: 275
- Sugar: 18
- Sodium: 160
- Fat: 18
- Saturated Fat: 11
- Carbohydrates: 26
- Fiber: 2
- Protein: 4
Keywords: no bake, apple pie, cheesecake, dessert, easy, make ahead, comfort food, fall, autumn, potluck, creamy, caramel, biscuit base