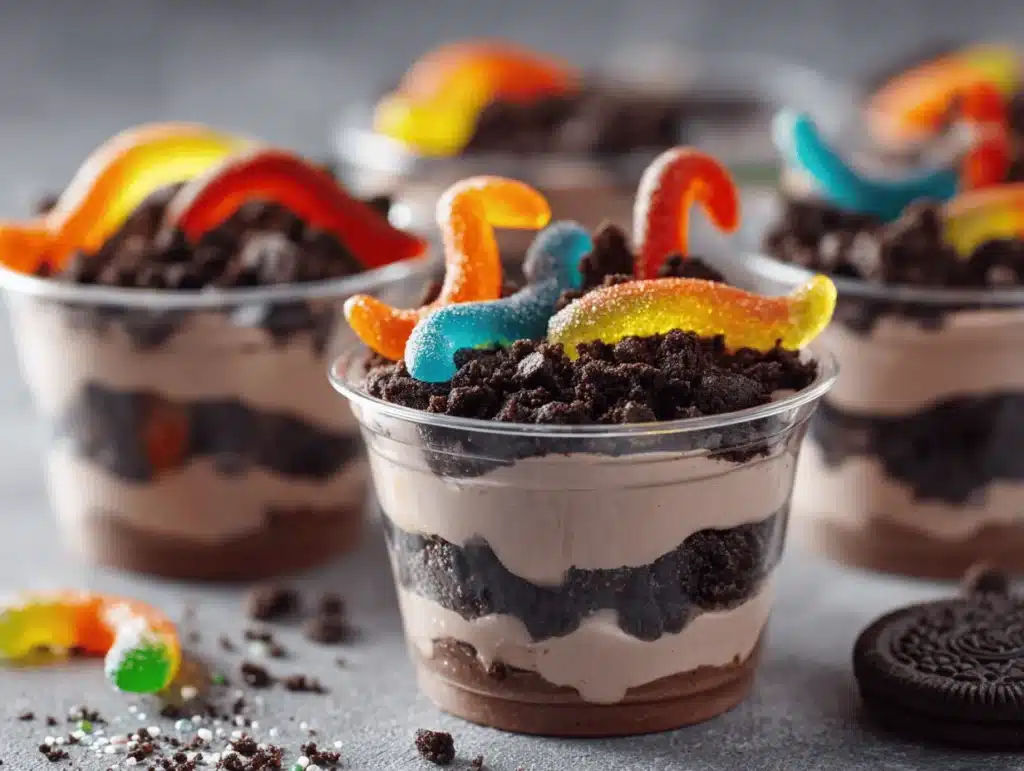
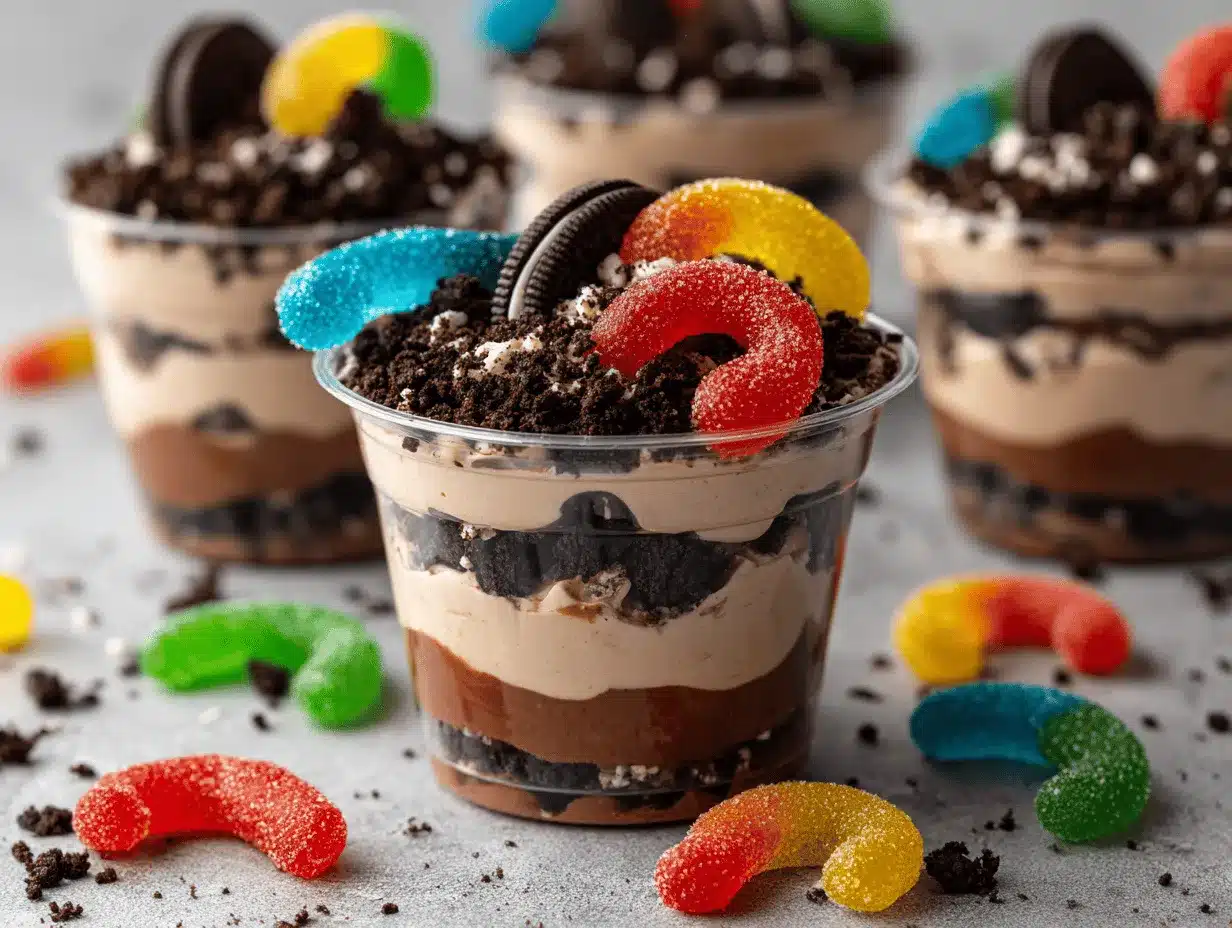
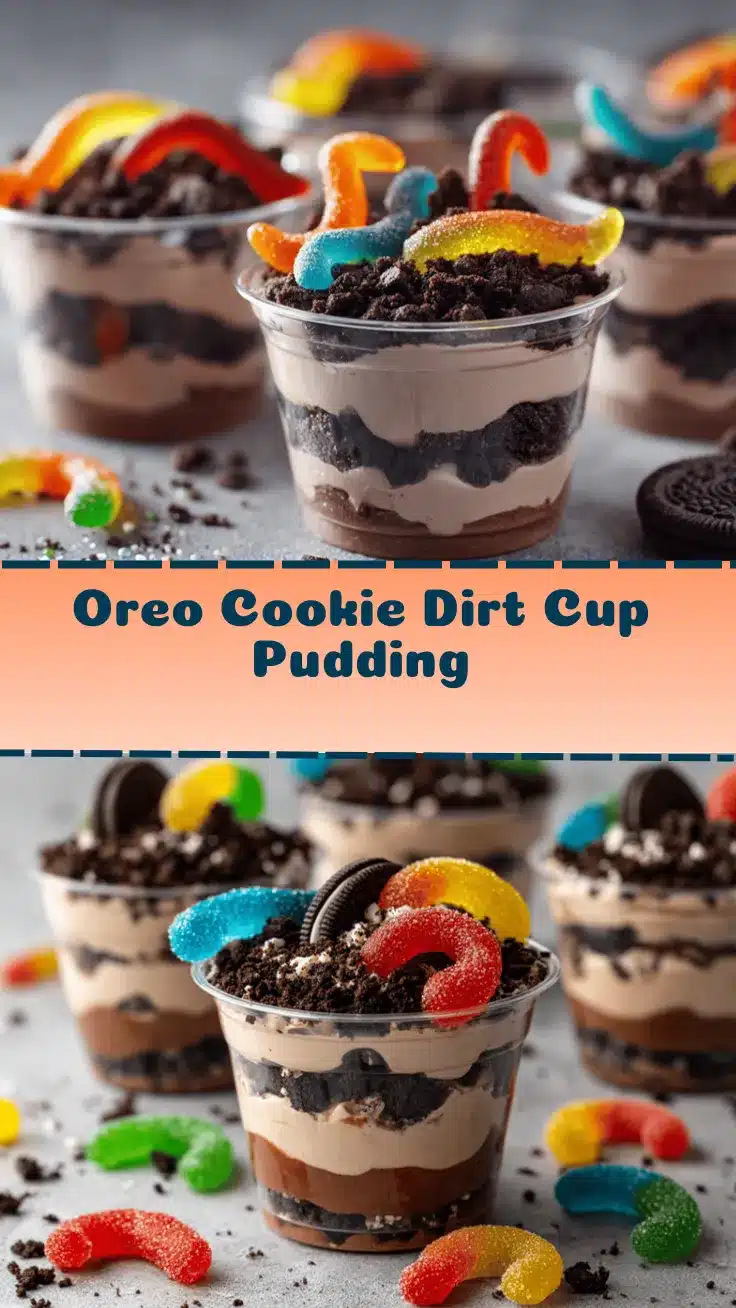
Crunch, chocolate, and creamy pudding—there’s just something magical about an Oreo Cookie Dirt Cup Pudding, especially when it’s piled high with cookie “dirt” and topped with a wriggly gummy worm. The first time I made these was for my nephew’s backyard birthday bash. Let me tell you, those dirt cups disappeared faster than the balloons! You know, there’s this burst of nostalgia whenever I crush Oreos for these treats. It takes me back to grade school parties, sticky fingers, and giggles as we tried to guess how many worms were hidden in each cup.
Honestly, Oreo Cookie Dirt Cup Pudding is more than just a fun dessert—it’s a sweet memory-maker. I’ve tested this recipe with my own crew, tweaked it for different occasions, and even made a batch with extra pudding for those with a bigger sweet tooth. Why do I keep coming back to this one? It’s simple: kids (and adults!) love the playful look, the classic flavor combo, and the hands-on assembly. Plus, it’s nearly impossible to mess up, which is saying something when you’ve got a dozen little helpers crowding the kitchen counter.
This recipe is perfect for kids’ parties, classroom celebrations, or any day you want to make dessert feel like an adventure. If you’re looking for something that’s easy, crowd-pleasing, and lets you get creative with toppings—Oreo Cookie Dirt Cup Pudding is the answer. Trust me, I’ve made it for birthday blowouts, Halloween shindigs, and even as a Friday night treat. If you’ve never tried making pudding cups with crushed Oreos, you’re about to bring some serious joy to your next party.
Why You’ll Love This Recipe
- Quick to Assemble: You can whip up a batch of Oreo Cookie Dirt Cup Pudding in under 20 minutes (plus chilling time if you want it extra cold). No oven, no fuss!
- Simple Ingredients: You probably already have most of what you need—instant pudding, milk, Oreos, whipped topping, and gummy worms. No fancy stuff, just pantry basics.
- Perfect for Parties: These dirt cups are a hit at birthdays, school events, potlucks, and even Halloween gatherings. The little cups make serving a breeze—no plates required.
- Crowd-Pleaser: Both kids and adults go wild for the playful presentation and classic chocolatey flavor. I’ve watched grown-ups sneak extra cups when the kids weren’t looking (true story!).
- Unbelievably Fun: The look of crushed Oreos as “dirt” is always a conversation starter. Add some gummy worms and you’ve got instant smiles!
This isn’t just any pudding cup—Oreo Cookie Dirt Cup Pudding stands out because you get creamy, chocolatey layers with a crunchy cookie topping. I like to blend the pudding until super smooth, so it feels extra rich (and never grainy). Using clear cups shows off the layers, which looks amazing on a party table. If you want to go all out, you can add extra toppings—like sprinkles or candy rocks—but honestly, the classic combo is always a winner.
Let’s face it, these dirt cups aren’t just for kids. There’s something about the whimsical look and taste that brings everyone together. It’s a comfort food treat dressed up for a party, and it never fails to impress. If you want to create a dessert that sparks joy and laughter, Oreo Cookie Dirt Cup Pudding is your ticket.
Ingredients Needed
This recipe is all about keeping things simple and delicious. The ingredients are easy to find, and you can always swap things out if needed. Here’s what you’ll need for the ultimate Oreo Cookie Dirt Cup Pudding:
- For the Pudding Layer:
- 2 boxes (3.9 oz / 110g each) instant chocolate pudding mix (any favorite brand works—Jell-O is my go-to)
- 4 cups (950ml) cold milk (whole milk gives the creamiest texture, but 2% works too)
- 1 tub (8 oz / 225g) whipped topping (like Cool Whip, thawed)
- For the Oreo Dirt:
- 20 Oreo cookies (regular, not Double Stuf; crush by hand or in a food processor)
- For Topping & Decoration:
- Gummy worms (about 1-2 per cup, depending on size)
- Optional: mini chocolate chips, sprinkles, candy rocks (for extra fun)
Ingredient Notes:
- Milk: If you want a dairy-free version, use oat or almond milk. Just check your pudding mix—some brands require dairy to set properly.
- Whipped Topping: There are several dairy-free or vegan whipped toppings available. I’ve tried coconut-based ones and they taste great!
- Oreos: Surprisingly, regular Oreos are vegan (at least in the US). For gluten-free, use gluten-free chocolate sandwich cookies.
- Gummy Worms: Standard gummies contain gelatin, but vegan options are available at most health food stores.
When it comes to brands, I usually stick with Jell-O for pudding and Nabisco for Oreos—they give the best texture in my opinion. For whipped topping, Cool Whip always works, but I’ve had good luck with store brands too. If you’re prepping for a big party, you can grab larger tubs and value packs. If you want to make it extra special, add a layer of vanilla pudding or swap in peanut butter Oreos for a twist—my niece swears by it!
Equipment Needed
- Mixing Bowls: One large bowl for the pudding, and a smaller one for crushing Oreos. You don’t need anything fancy.
- Whisk or Electric Mixer: A hand whisk works, but a mixer gets pudding ultra-smooth. I use a basic hand mixer for speed.
- Measuring Cups: For milk and pudding mix. If you’re making a big batch, double-check your measurements!
- Food Processor or Zip-Top Bag: Crushing Oreos is easiest in a processor, but you can use a bag and rolling pin (kids love this part).
- Clear Plastic Cups: 8–10 cups (8 oz / 240ml each) work best for showing off those layers. You can use glass ramekins for a fancier look.
- Spoons: For layering and serving. I like to use small spoons so kids get every last bite.
If you don’t have a food processor, no worries. The zip-top bag and rolling pin method is classic—and makes cleanup easy. I’ve also used sturdy plastic cups from the dollar store for huge parties. If you’re going green, reusable cups work great. Just make sure everything is clean and dry before assembling (moisture makes Oreos soggy too soon).
Maintenance tip: Rinse your mixer beaters right after use so pudding doesn’t harden (learned that the hard way). For food processors, a quick wipe with a damp cloth keeps crumbs out of the crevices.
Preparation Method
- Make the Chocolate Pudding: In a large mixing bowl, combine 2 boxes (3.9 oz / 110g each) of instant chocolate pudding mix with 4 cups (950ml) cold milk. Whisk for about 2 minutes until thickened. (If using a hand mixer, beat on medium speed for 1 minute.) The pudding should look glossy and smooth—if it’s still runny, let it sit for 5 minutes to firm up.
- Fold in Whipped Topping: Add 8 oz (225g) thawed whipped topping to the pudding. Gently fold until fully blended and fluffy. Don’t overmix, or pudding will lose its airy texture. (If you see streaks, that’s ok—just keep folding gently.)
- Crush the Oreos: Place 20 Oreo cookies in a food processor and pulse until you get fine crumbs. If you’re using a zip-top bag, seal the bag and crush Oreos with a rolling pin. You want some chunkier bits for texture. (Kids love smashing them by hand!)
- Layer the Cups: Spoon about 1/3 cup (80ml) pudding mixture into each clear cup. Tap gently to level. Sprinkle with a generous layer of Oreo “dirt” (about 2 tablespoons per cup). Add another layer of pudding, then top with more Oreo crumbs. You should see distinct layers—don’t worry if they mix a little, it adds to the “dirt” effect.
- Add Toppings: Push 1–2 gummy worms into the top layer of Oreo crumbs. If you like, add extra decorations: mini chocolate chips, candy rocks, or sprinkles for a garden vibe.
- Chill the Cups: Place assembled dirt cups in the fridge for at least 30 minutes to set. (They’re fine at room temp for a party, but chilling makes the pudding firmer and easier to eat.)
- Serving: Right before serving, check that the pudding is set and cups look neat. If some layers have shifted, just add a bit more Oreo “dirt” on top.
Troubleshooting Tips:
- If pudding is runny, refrigerate longer or add a bit more instant pudding mix.
- If Oreos get soggy, assemble just before serving or add extra crumbs right before you set them out.
- For messy little hands, prep the pudding and Oreos in advance, then let kids decorate their own cups.
Personal Tip: I line up the cups and do all the pudding first, then the Oreos, then toppings—it’s way faster than making each cup one by one. And don’t be afraid to let the layers get a little messy. That’s half the fun!
Cooking Tips & Techniques
Over the years, I’ve picked up a few tricks for making Oreo Cookie Dirt Cup Pudding turn out just right. Here’s what I’ve learned (sometimes the hard way!):
- Use Very Cold Milk: The colder, the better for instant pudding. If your milk isn’t cold, the pudding won’t set as quickly and might be runny.
- Don’t Overmix Whipped Topping: Fold gently so you keep that fluffy texture. If you stir too much, it gets dense and loses the lightness.
- Crush Oreos Right Before Assembling: The fresher the crumbs, the crunchier the “dirt.” If you crush them too far in advance, they’ll absorb moisture and get soft.
- Clear Cups Are Key: Seeing the layers is part of the fun. If you’re making for adults, glass ramekins look elegant, but for kids’ parties, plastic cups are safer.
- Layering Method: Use a small spoon or piping bag to get clean layers. If you’re in a rush, spoon it in quickly and embrace the “wild” look!
- Timing Strategy: Make the pudding up to a day ahead, but wait to crush and layer Oreos until just before serving. This keeps the texture perfect.
I’ve had my share of mistakes—once, I let the pudding sit too long and it got clumpy (not pretty). If that happens, give it a good whisk before layering. Another time, I used warm milk (oops!) and the pudding never set. Always double-check your instructions, especially if you’re multitasking with party prep.
For big parties, set up a “DIY dirt cup” station. Kids love making their own creations, and it keeps them busy while you mingle. Just be ready for a little mess—nothing a wet wipe can’t handle!
Variations & Adaptations
Oreo Cookie Dirt Cup Pudding is endlessly customizable. Here are some of my favorite twists:
- Gluten-Free Dirt Cups: Swap regular Oreos for gluten-free chocolate sandwich cookies. Most stores carry these now, and the flavor is spot-on.
- Vegan Version: Use plant-based pudding mix, non-dairy milk, vegan whipped topping, and vegan gummy worms. I’ve made this for friends with allergies, and it’s just as tasty!
- Seasonal Flavors: Try using vanilla or butterscotch pudding instead of chocolate. For Halloween, add candy pumpkins or orange sprinkles. For spring, top with edible flowers or pastel candies.
- Peanut Butter Lovers: Add a layer of peanut butter pudding or swirl peanut butter into the chocolate layer. Peanut butter Oreos are awesome for this!
- Extra Crunch: Mix in mini chocolate chips or chopped nuts with the Oreo “dirt.”
Cooking method doesn’t change much, but you can assemble in mason jars for a picnic, or make giant party bowls for a crowd. For my niece’s birthday, we did a “garden theme” and topped each cup with two gummy worms and a candy flower—huge hit!
Allergen swaps are simple, just check labels. And for picky eaters, let them choose their own toppings. Personalize each cup and you’ll have happy guests!
Serving & Storage Suggestions
Oreo Cookie Dirt Cup Pudding is best served chilled, straight from the fridge. The layers stay neat, and the pudding is refreshingly cool. If you’re prepping for a party, arrange the cups on a big tray with extra gummy worms and mini spoons.
- Serving Temperature: Serve cold for best taste and texture. If you’re outdoors, keep dirt cups in a cooler until party time.
- Presentation: Use clear cups to show off the layers. Add extra Oreo crumbs and a worm on top for a “wow” effect. For themed parties, decorate with candy rocks or edible flowers.
- Pairing Suggestions: Serve with fruit punch, lemonade, or chocolate milk. For adults, a cup of coffee pairs surprisingly well!
- Storage: Store assembled cups in the fridge, covered with plastic wrap, for up to 2 days. For best results, add Oreo “dirt” and toppings just before serving to keep things crunchy.
- Freezer: You can freeze the pudding mixture (without Oreos) for up to 1 month. Thaw in the fridge, then assemble fresh.
- Reheating: No reheating needed—just serve cold! If you accidentally freeze a whole assembled cup, let it thaw and add fresh topping.
- Flavor Development: The chocolate and Oreo flavors deepen overnight, so this is a great make-ahead dessert.
Personally, I love making these cups a day ahead and adding the finishing touches right before the guests arrive. It saves time and looks impressive!
Nutritional Information & Benefits
Here’s the scoop on what you’re eating:
- Estimated Per Serving (1 cup):
- Calories: 250–300
- Fat: 10–13g
- Sugar: 25–30g
- Protein: 3–4g
- Key Ingredients: Milk adds calcium and protein, while Oreos and pudding provide carbs for quick energy.
- Dietary Considerations: Can be made gluten-free, dairy-free, and nut-free with simple swaps. Vegan versions are delicious, too!
- Potential Allergens: Contains milk, wheat, and soy (check Oreo and pudding labels for specifics).
This dessert is meant for fun and celebration—so enjoy in moderation. I like serving smaller cups for kids so everyone gets a treat without going overboard. For families watching sugar or gluten, the substitutions make it easy to include everyone.
Conclusion
If you want an easy, crowd-pleasing party treat, Oreo Cookie Dirt Cup Pudding is the way to go. It’s playful, nostalgic, and endlessly customizable. Whether you’re hosting a birthday bash, a classroom celebration, or just want to make dessert a little more fun, these dirt cups deliver every time.
Don’t be afraid to make the recipe your own—switch up flavors, toppings, or even the cup size. I keep coming back to this one because it’s simple, festive, and always brings out smiles (and sometimes a little friendly competition over who gets the most worms!).
Give it a try, share your favorite variations, and let me know how it goes in the comments! I’d love to hear what creative toppings your crew comes up with. Happy party planning—and happy snacking!
FAQs
Can I make Oreo Cookie Dirt Cup Pudding the night before?
Yes, you can! Just prepare the pudding and layer it in the cups, then add crushed Oreos and gummy worms right before serving for maximum crunch.
How do I crush Oreos without a food processor?
Place Oreos in a zip-top bag and smash them with a rolling pin or the bottom of a mug. Kids love helping with this step!
Can I use homemade pudding instead of instant?
Absolutely. Just make sure it’s cooled and set before assembling your dirt cups. The texture will be a bit thicker and richer.
Are there nut-free and allergy-friendly options?
Yes! Use nut-free pudding and check labels on Oreos and gummy worms. Gluten-free and vegan options are available for most ingredients.
What’s the best way to serve these at a big party?
Arrange the cups on a large tray or in a muffin tin for easy transport. If you want, set up a “decorate your own” station so kids can add their favorite toppings.
Pin This Recipe!

Oreo Cookie Dirt Cup Pudding
- Total Time: 40 minutes
- Yield: 8-10 servings 1x
Description
Oreo Cookie Dirt Cup Pudding is a playful, nostalgic dessert featuring creamy chocolate pudding, crunchy Oreo ‘dirt,’ and wriggly gummy worms. It’s quick to assemble, kid-friendly, and perfect for parties or classroom celebrations.
Ingredients
- 2 boxes (3.9 oz each) instant chocolate pudding mix
- 4 cups cold milk (whole or 2%)
- 1 tub (8 oz) whipped topping (e.g., Cool Whip, thawed)
- 20 Oreo cookies (crushed)
- Gummy worms (1-2 per cup)
- Optional: mini chocolate chips, sprinkles, candy rocks
Instructions
- In a large mixing bowl, combine instant chocolate pudding mix and cold milk. Whisk for about 2 minutes until thickened, or beat with a hand mixer on medium speed for 1 minute. Let sit for 5 minutes if needed to firm up.
- Fold in thawed whipped topping gently until fully blended and fluffy. Do not overmix.
- Crush Oreo cookies into fine crumbs using a food processor or by placing them in a zip-top bag and smashing with a rolling pin.
- Spoon about 1/3 cup pudding mixture into each clear cup. Tap gently to level.
- Sprinkle with a generous layer of Oreo crumbs (about 2 tablespoons per cup). Add another layer of pudding, then top with more Oreo crumbs.
- Push 1–2 gummy worms into the top layer of Oreo crumbs. Add optional decorations if desired.
- Chill assembled dirt cups in the fridge for at least 30 minutes to set.
- Before serving, check that pudding is set and add extra Oreo crumbs if needed.
Notes
For best texture, crush Oreos just before assembling. Use very cold milk for pudding. Make ahead up to a day, but add Oreo crumbs and toppings right before serving for crunch. Gluten-free, dairy-free, and vegan adaptations are easy with ingredient swaps. Let kids decorate their own cups for a fun activity.
- Prep Time: 10 minutes
- Cook Time: 0 minutes
- Category: Dessert
- Cuisine: American
Nutrition
- Serving Size: 1 cup (8 oz)
- Calories: 250300
- Sugar: 2530
- Sodium: 350
- Fat: 1013
- Saturated Fat: 6
- Carbohydrates: 38
- Fiber: 1
- Protein: 34
Keywords: Oreo dirt cup, pudding cups, kids party dessert, easy pudding recipe, no bake dessert, chocolate pudding, gummy worms, party treat, classroom snack, birthday dessert