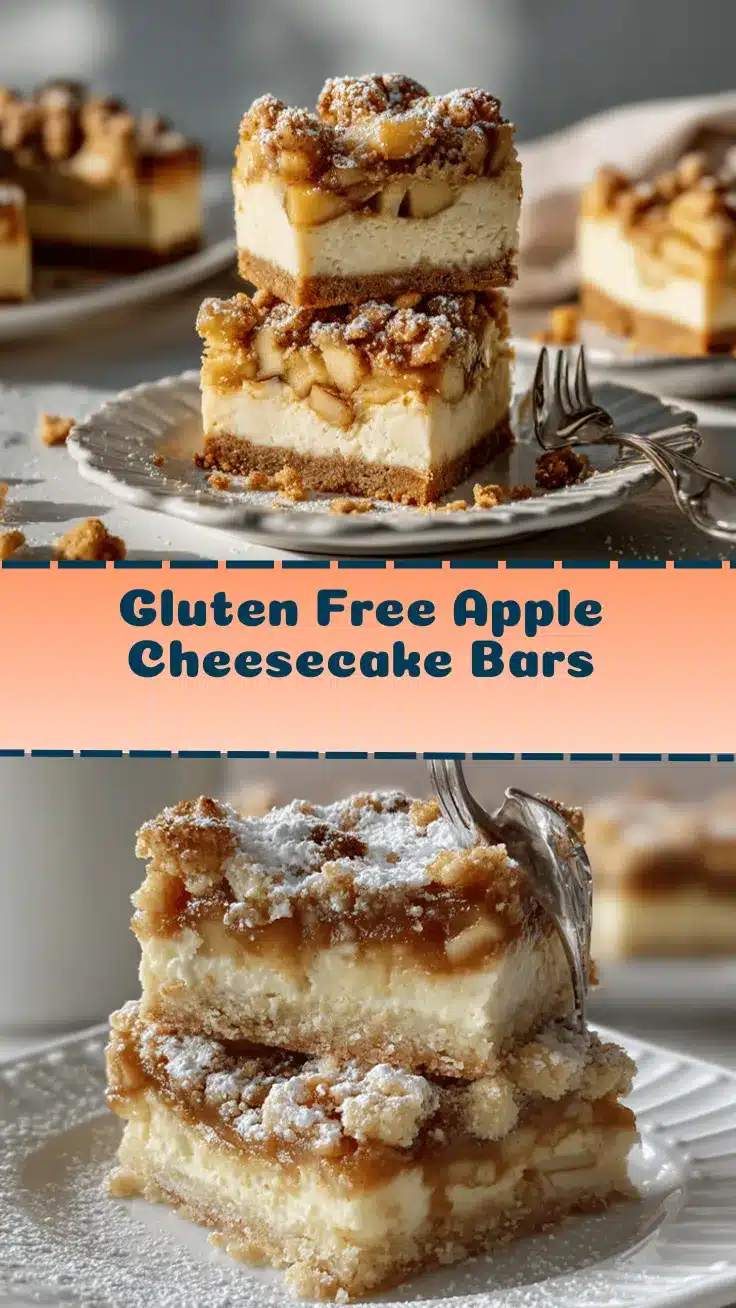
The moment you catch the aroma of apples, cinnamon, and creamy cheesecake mingling together, you know fall is in the air. I swear, the first time I whipped up these gluten free apple cheesecake bars, my kitchen smelled like an autumn festival—warm, spicy, and just a little bit magical. Honestly, it all started out as an experiment (I was determined to make a dessert my wheat-intolerant best friend would love during our annual apple-picking weekend). The result? These bars disappeared in less than an hour—no joke.
What I love most about this recipe is how it turns simple ingredients into something extraordinary. Each bite is a blend of velvety cheesecake, tender apples, and a soft, crumbly crust that’s totally gluten free. If you’ve ever struggled to find a fall dessert that’s safe for sensitive eaters but still feels indulgent, you’re in the right place. These gluten free apple cheesecake bars are perfect for busy families, cozy get-togethers, and anyone who craves that classic apple-cinnamon combo.
As someone who’s tested this recipe dozens of times (and tweaked every detail for the best flavor and texture), I can promise you’ll end up with a dessert that’s as comforting as it is impressive. Whether you’re a cheesecake fanatic or just looking for a crowd-pleasing treat, these bars check every box. Let’s face it—fall baking should be fun, flavorful, and never stressful. So grab your apples, pull out your favorite baking pan, and let’s get started!
Why You’ll Love This Recipe
Trust me, these gluten free apple cheesecake bars are not your average autumn dessert. After countless rounds of baking and taste-testing (let’s just say my family didn’t mind being guinea pigs), I’ve landed on a recipe that’s equal parts easy and irresistible. Here’s why you’ll want to make these bars again and again:
- Quick & Easy: You can have these bars ready for the oven in under 30 minutes—perfect for last-minute cravings or surprise guests.
- Simple Ingredients: No need for specialty stores or obscure flours. Everything is easy to find (and you probably have most of it already).
- Perfect for Fall Gatherings: These bars shine at potlucks, holiday brunches, or cozy nights in. The apple and cinnamon combo just screams autumn comfort.
- Crowd-Pleaser: I’ve served these to adults, kids, and gluten free skeptics—they always get rave reviews. Even picky eaters go back for seconds.
- Unbelievably Delicious: The creamy cheesecake layer pairs perfectly with spiced apples, all sitting on a buttery, gluten free crust. It’s the kind of dessert that makes you close your eyes and savor every bite.
What sets this recipe apart is the method—blending the cheesecake layer until it’s ultra-smooth, and using a tried-and-true gluten free flour blend for that melt-in-your-mouth crust. I’ve also balanced the sweetness so the apples shine without overpowering the creamy layer (it’s honestly addictive). If you’ve ever hesitated to bake gluten free, don’t worry. This recipe is foolproof, forgiving, and absolutely delicious.
But it’s more than just taste. These bars are comfort food at its best—warming, nostalgic, and perfect for making memories. Whether you’re impressing guests or just treating yourself, you’ll feel proud every time you serve them. That’s what makes these gluten free apple cheesecake bars a staple in my fall baking lineup!
Ingredients Needed
You don’t need a mile-long shopping list to make gluten free apple cheesecake bars. This recipe uses simple, wholesome ingredients that come together for bold flavor and a dreamy texture. I’ve grouped them by layer, so it’s easy to see what you’ll need:
- For the Gluten Free Crust:
- 1 cup (120g) gluten free all-purpose flour blend (I like King Arthur or Bob’s Red Mill for best texture)
- 1/4 cup (55g) light brown sugar
- 1/4 tsp ground cinnamon
- 1/4 tsp salt
- 1/2 cup (115g) unsalted butter, melted (adds richness and helps the crust hold together)
- For the Cheesecake Layer:
- 8 oz (225g) cream cheese, softened (full-fat for best taste)
- 1/3 cup (65g) granulated sugar
- 1 large egg, room temperature
- 1/2 tsp pure vanilla extract
- 2 tbsp (30ml) sour cream or plain Greek yogurt (for extra creaminess; use dairy-free if needed)
- For the Apple Layer:
- 2 medium apples (about 1 1/2 cups/180g), peeled, cored, and diced (Honeycrisp or Granny Smith work great)
- 2 tbsp (25g) granulated sugar
- 1 tsp ground cinnamon
- 1/8 tsp ground nutmeg (optional, but adds a lovely warmth)
- 1 tsp lemon juice (keeps apples bright and balances sweetness)
- For the Streusel Topping:
- 1/3 cup (40g) gluten free flour blend
- 1/4 cup (20g) certified gluten free rolled oats
- 1/4 cup (55g) light brown sugar
- 1/4 tsp cinnamon
- 3 tbsp (40g) cold unsalted butter, diced (for crunchy topping)
- Pinch salt
If you’re missing an ingredient, don’t panic. Swap almond flour for the crust if you want a nutty flavor, or use dairy-free cream cheese and yogurt for a lactose-free version. For apples, any firm, tart variety is great (Granny Smith is my go-to, but Fuji or Braeburn work if you prefer sweeter bars). In summer, you can switch apples for fresh berries—just reduce the sugar a bit. And for oats, leave them out if you’re sensitive; the topping is still delicious. Bottom line: these bars are forgiving and customizable!
Equipment Needed
You won’t need any fancy gadgets to make gluten free apple cheesecake bars—just a few kitchen staples:
- 8×8-inch (20x20cm) baking pan: Nonstick or lined with parchment paper for easy removal.
- Mixing bowls: At least two—one for the crust/topping, one for the cheesecake layer.
- Electric mixer or whisk: A handheld mixer makes the cheesecake layer extra smooth, but a sturdy whisk works if you put in some elbow grease.
- Spatula: For scraping every bit of batter and spreading layers evenly.
- Measuring cups and spoons: Precision matters for baking, especially gluten free.
- Small saucepan: Optional, if you want to pre-soften apples for extra tenderness.
- Knife and cutting board: For dicing apples (watch your fingers—I’ve had my share of kitchen mishaps here!).
If you’re on a budget, don’t worry—no need for a stand mixer or food processor. I’ve made these bars with dollar-store spatulas and thrifted pans. Just make sure the pan doesn’t warp in the heat (trust me, I learned the hard way!). For cleanup, parchment paper is your best friend.
Preparation Method
Here’s the step-by-step guide for the perfect gluten free apple cheesecake bars. I’ve included precise measurements and tips for every stage, so you can bake with confidence. Let’s do this!
-
Prep the baking pan:
Line an 8×8-inch (20x20cm) pan with parchment paper, leaving some overhang for easy lifting. Preheat your oven to 350°F (175°C).
Tip: Greasing the pan plus using parchment = foolproof removal. -
Make the crust:
In a bowl, combine 1 cup (120g) gluten free flour, 1/4 cup (55g) brown sugar, 1/4 tsp cinnamon, and 1/4 tsp salt. Stir in 1/2 cup (115g) melted butter until mixture looks like damp sand.
Press firmly into the bottom of the pan. Bake for 10-12 minutes, or until lightly golden. Cool slightly.
Note: Pressing down firmly helps prevent a crumbly base. -
Prepare the apple layer:
Toss diced apples (about 1 1/2 cups/180g) with 2 tbsp sugar, 1 tsp cinnamon, 1/8 tsp nutmeg (if using), and 1 tsp lemon juice. If you want extra tender apples, sauté lightly in a pan for 2-3 minutes, then cool.
Warning: Overcooking apples can make them mushy. They should still hold shape! -
Blend the cheesecake layer:
Using a mixer or whisk, beat 8 oz (225g) cream cheese until smooth. Add 1/3 cup (65g) sugar, 1 large egg, 1/2 tsp vanilla, and 2 tbsp (30ml) sour cream or yogurt. Beat until creamy and lump-free.
Look for a silky texture—no lumps! If you see streaks, keep mixing. -
Layer and assemble:
Pour cheesecake mixture over the cooled crust. Gently spread diced apples on top, pressing lightly so they sink in a bit.
Tip: Don’t press too hard—just enough for even coverage. -
Make streusel topping:
Combine 1/3 cup (40g) gluten free flour, 1/4 cup (20g) oats, 1/4 cup (55g) brown sugar, 1/4 tsp cinnamon, pinch of salt, and 3 tbsp (40g) cold butter. Use fingers to pinch together until crumbly.
Sprinkle evenly over apples.
Streusel should clump slightly—not sandy or greasy. -
Bake:
Bake at 350°F (175°C) for 32-38 minutes. The cheesecake layer should be set but still a little jiggly in the center.
Sensory cue: Edges will be golden and apples lightly caramelized. -
Cool and chill:
Let bars cool completely in the pan (about 1 hour). Transfer to the fridge for 2+ hours to set. Don’t rush this—chilling is key for clean slices!
If you slice too soon, the cheesecake will be messy. Patience pays off here. -
Slice and serve:
Lift bars out using parchment overhang. Cut into 16 squares (or larger if you’re feeling generous).
Tip: Wipe your knife between cuts for neat edges.
If you run into a soggy crust, check oven temperature—sometimes gluten free flours need an extra minute. For lumpy cheesecake, make sure cream cheese is really soft before mixing. And if your apples seem dry, add a splash more lemon juice before baking.
Cooking Tips & Techniques
Baking gluten free apple cheesecake bars doesn’t have to be tricky, but there are a few pro tips I’ve learned over the years (and through a couple baking fails, honestly).
- Don’t Overmix the Cheesecake Layer: Overmixing adds too much air, which can cause cracks. Mix just until smooth.
- Chill Before Slicing: I know it’s tempting, but slicing too soon makes a gooey mess. Chilling for at least 2 hours helps bars hold their shape.
- Use Room Temperature Ingredients: Cream cheese and eggs blend better when not cold. This trick prevents lumps and makes the cheesecake layer velvety.
- Watch the Apples: Dice apples small and evenly so they cook through. Big chunks can stay firm or make layers uneven.
- Keep an Eye on Baking Time: Ovens vary! If bars look set with just a tiny jiggle in the center, they’re ready. Overbaking can dry out the cheesecake.
- Multitasking: Prep apples while the crust bakes—saves time and keeps things moving smoothly.
- Common Mistakes: Skipping parchment paper means stuck bars (I learned this the hard way). Also, using cold cream cheese makes for a lumpy batter.
- Personal Lesson: Once, I forgot to chill the bars and ended up with cheesecake soup! Now I always plan ahead and make these the night before a big event.
Sticking to these tips means you’ll get consistent, delicious results every time. And if something goes wrong, don’t stress—gluten free baking is forgiving, and these bars taste great even if they’re a little rustic.
Variations & Adaptations
One of my favorite things about gluten free apple cheesecake bars is how easy they are to customize! Here are a few fun ways to switch things up:
- Dairy-Free: Use plant-based cream cheese and yogurt for the cheesecake layer, and swap butter for coconut oil or vegan margarine. The bars stay creamy and rich!
- Nutty Crust: Replace half the flour in the crust with almond flour or finely ground pecans for a deeper flavor.
- Berry Swirl: Sub apples for blueberries, raspberries, or even diced pears—just reduce the sugar in the fruit layer if using sweet berries.
- Low Sugar: Cut sugar in half throughout the recipe and use a sugar alternative like coconut sugar or monk fruit.
- Oat-Free: Skip the oats in the topping and use extra gluten free flour for those sensitive to oats.
- Spiced Up: Add a pinch of cardamom or ginger to the apple layer for a unique twist.
Personally, my go-to adaptation is adding a handful of chopped walnuts to the streusel topping—adds crunch and a nutty flavor that’s hard to beat. For spring, I swap apples for fresh rhubarb or strawberries. However you adapt, these bars are forgiving (I’ve made every variation under the sun, and they’re always a hit!).
Serving & Storage Suggestions
These gluten free apple cheesecake bars taste best when served chilled or at room temperature. I love to present them on a rustic wooden board, sprinkled with extra cinnamon and a few apple slices on the side. If you’re serving at a party, add a dollop of whipped cream or vanilla ice cream for extra decadence.
For beverages, pair with spiced chai, hot apple cider, or a mug of strong coffee—seriously, the flavors play so well together. At brunch, serve alongside scrambled eggs and crisp bacon for a sweet-savory combo.
To store, keep bars in an airtight container in the refrigerator for up to 5 days. If you want to freeze them, wrap tightly in plastic and then foil—good for up to 2 months. To reheat, let thaw in the fridge overnight, then enjoy cold or bring to room temperature. The flavors actually deepen and mellow after a day or two, making leftovers even better.
If you notice any condensation, just blot gently with a paper towel before serving (learned that after a humid summer potluck). These bars travel well, so they’re perfect for making ahead and sharing.
Nutritional Information & Benefits
Each gluten free apple cheesecake bar packs about 180 calories, 9g fat, 22g carbs, and 3g protein (based on 16 servings). The apples provide fiber, vitamin C, and antioxidants, while the cream cheese adds a little protein and calcium.
This recipe is suitable for gluten free diets, and with a couple tweaks (dairy-free swaps, oat-free topping), can fit most allergy needs. Watch out for dairy and eggs—these are the main allergens. For a lower carb option, use almond flour and a sugar substitute.
From a wellness angle, I love that these bars satisfy a sweet tooth without relying on heavy, processed ingredients. Fresh apples and cinnamon have natural anti-inflammatory properties, and the gluten free base means more people can enjoy them. They’re a fun way to treat yourself and still feel good about what you’re eating.
Conclusion
If you’re searching for the ultimate fall dessert, these gluten free apple cheesecake bars deliver every time. They’re easy to make, bursting with cozy flavor, and friendly to most dietary needs. Whether you stick to the classic recipe or riff with your own twists, you’ll end up with a treat that’s as delicious as it is comforting.
I keep coming back to these bars because they remind me of chilly afternoons, laughter around the table, and the simple joy of homemade dessert. Give them a try, make them your own, and don’t forget to share your results!
Drop a comment below with your favorite variation, or tell me how you served them! Pin this recipe for later, share with friends, and keep baking with heart. Happy fall, folks—may your kitchen always smell like cinnamon and apples.
Frequently Asked Questions
Can I make these gluten free apple cheesecake bars ahead of time?
Absolutely! These bars actually taste better after chilling overnight. Just keep them in the fridge until you’re ready to slice and serve.
What’s the best apple variety for this recipe?
I love using Honeycrisp or Granny Smith because they hold their shape and add a nice balance of sweet and tart. Any firm apple works, though!
Can I freeze the bars for later?
Yes, you can freeze them for up to 2 months. Wrap tightly in plastic and foil, then thaw overnight in the fridge before serving.
How do I make these bars dairy-free?
Swap regular cream cheese and sour cream for plant-based versions, and replace butter with coconut oil or vegan margarine. The bars stay creamy and delicious.
Why is my cheesecake layer lumpy?
Usually, the cream cheese was too cold. Make sure all ingredients are at room temperature and beat until smooth for the silkiest texture.
Pin This Recipe!
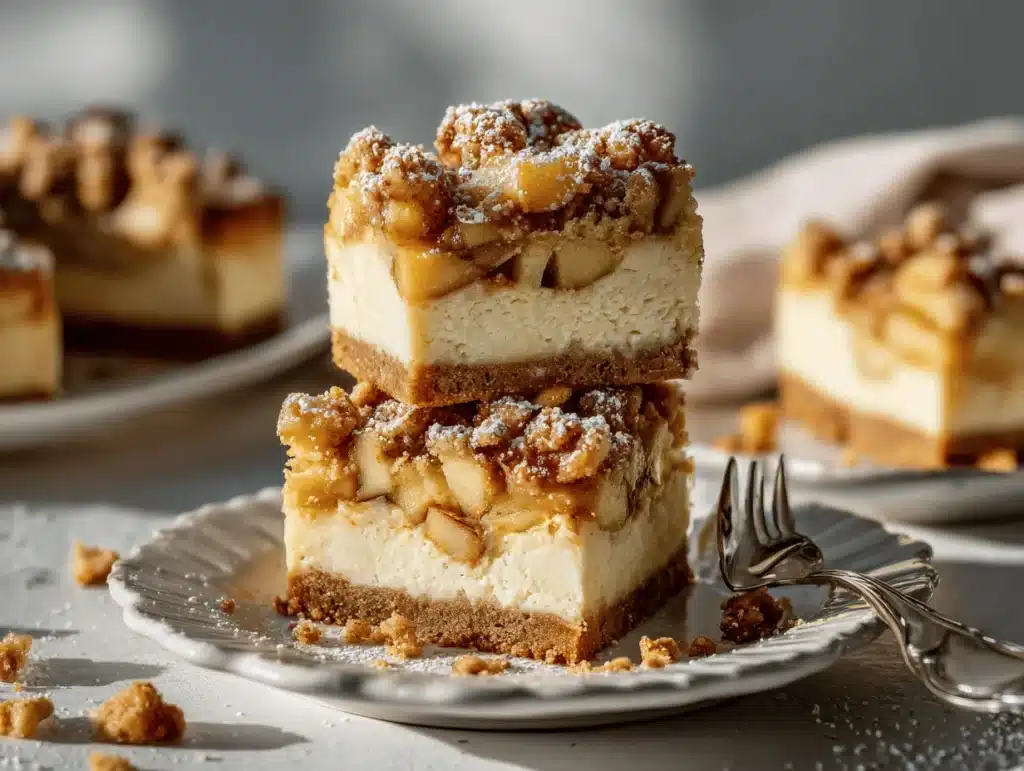
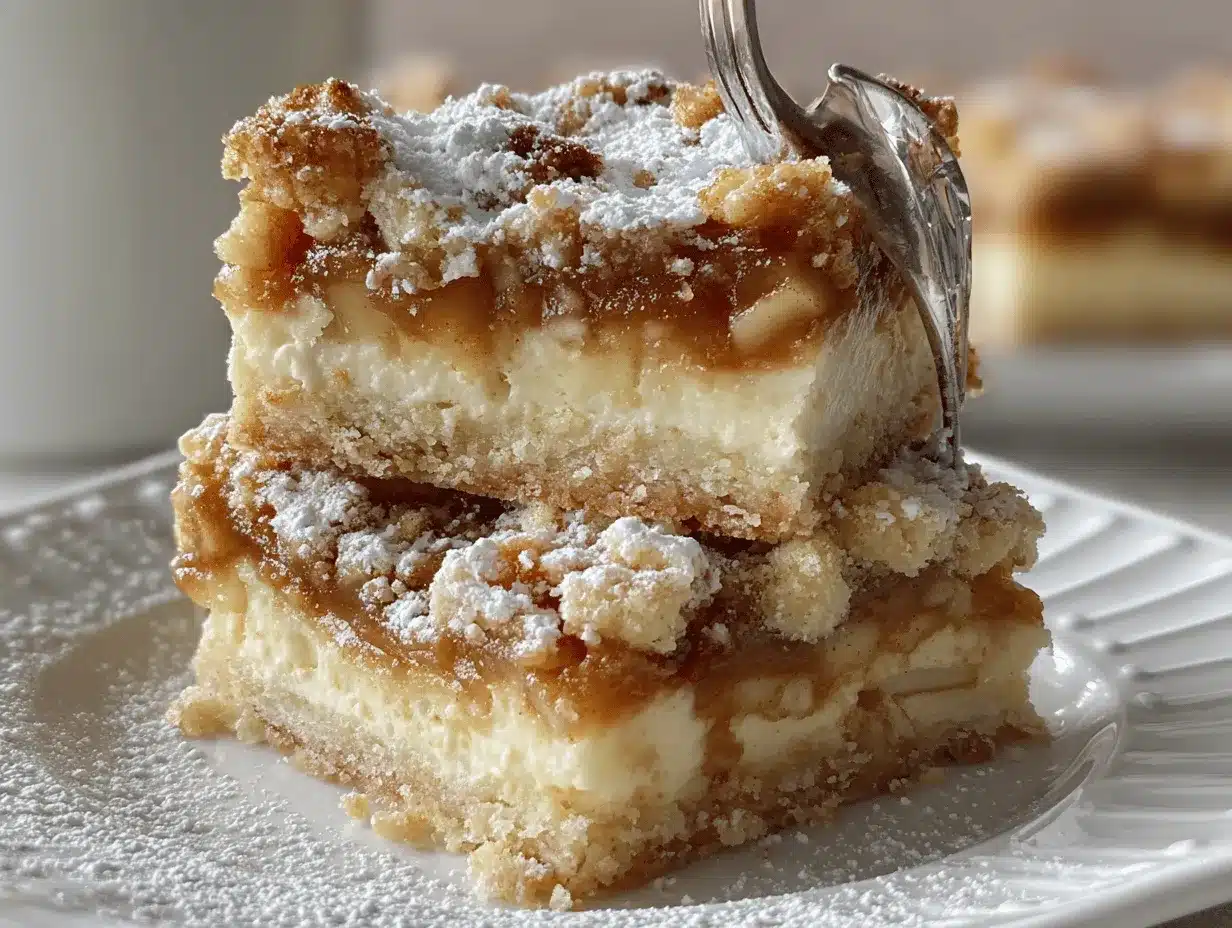
Gluten Free Apple Cheesecake Bars
- Total Time: 3 hours 15 minutes
- Yield: 16 bars 1x
Description
These easy gluten free apple cheesecake bars combine a buttery crust, creamy cheesecake, and spiced apples for the ultimate fall dessert. Perfect for gatherings or cozy nights in, they’re indulgent, comforting, and allergy-friendly.
Ingredients
- 1 cup gluten free all-purpose flour blend
- 1/4 cup light brown sugar
- 1/4 tsp ground cinnamon
- 1/4 tsp salt
- 1/2 cup unsalted butter, melted
- 8 oz cream cheese, softened
- 1/3 cup granulated sugar
- 1 large egg, room temperature
- 1/2 tsp pure vanilla extract
- 2 tbsp sour cream or plain Greek yogurt
- 2 medium apples (about 1 1/2 cups), peeled, cored, and diced
- 2 tbsp granulated sugar
- 1 tsp ground cinnamon
- 1/8 tsp ground nutmeg (optional)
- 1 tsp lemon juice
- 1/3 cup gluten free flour blend
- 1/4 cup certified gluten free rolled oats
- 1/4 cup light brown sugar
- 1/4 tsp cinnamon
- 3 tbsp cold unsalted butter, diced
- Pinch salt
Instructions
- Line an 8×8-inch baking pan with parchment paper, leaving overhang for easy lifting. Preheat oven to 350°F (175°C).
- In a bowl, combine 1 cup gluten free flour, 1/4 cup brown sugar, 1/4 tsp cinnamon, and 1/4 tsp salt. Stir in 1/2 cup melted butter until mixture resembles damp sand.
- Press crust mixture firmly into the bottom of the pan. Bake for 10-12 minutes, or until lightly golden. Cool slightly.
- Toss diced apples with 2 tbsp sugar, 1 tsp cinnamon, 1/8 tsp nutmeg (if using), and 1 tsp lemon juice. Optionally, sauté apples in a pan for 2-3 minutes for extra tenderness, then cool.
- Using a mixer or whisk, beat 8 oz cream cheese until smooth. Add 1/3 cup sugar, 1 large egg, 1/2 tsp vanilla, and 2 tbsp sour cream or yogurt. Beat until creamy and lump-free.
- Pour cheesecake mixture over cooled crust. Gently spread diced apples on top, pressing lightly.
- Combine 1/3 cup gluten free flour, 1/4 cup oats, 1/4 cup brown sugar, 1/4 tsp cinnamon, pinch of salt, and 3 tbsp cold butter. Pinch together until crumbly. Sprinkle evenly over apples.
- Bake at 350°F (175°C) for 32-38 minutes, until cheesecake layer is set but slightly jiggly in the center.
- Cool bars completely in the pan (about 1 hour). Transfer to fridge for at least 2 hours to set.
- Lift bars out using parchment overhang. Cut into 16 squares. Wipe knife between cuts for neat edges.
Notes
Use room temperature cream cheese and egg for a smooth cheesecake layer. Chill bars thoroughly before slicing for clean edges. Swap apples for berries or use dairy-free alternatives for dietary needs. Bars can be made ahead and taste even better after chilling overnight. Store in the fridge up to 5 days or freeze up to 2 months.
- Prep Time: 25 minutes
- Cook Time: 38 minutes
- Category: Dessert
- Cuisine: American
Nutrition
- Serving Size: 1 bar
- Calories: 180
- Sugar: 13
- Sodium: 90
- Fat: 9
- Saturated Fat: 5
- Carbohydrates: 22
- Fiber: 2
- Protein: 3
Keywords: gluten free, apple cheesecake bars, fall dessert, easy bars, autumn baking, apple cinnamon, allergy friendly, cheesecake bars