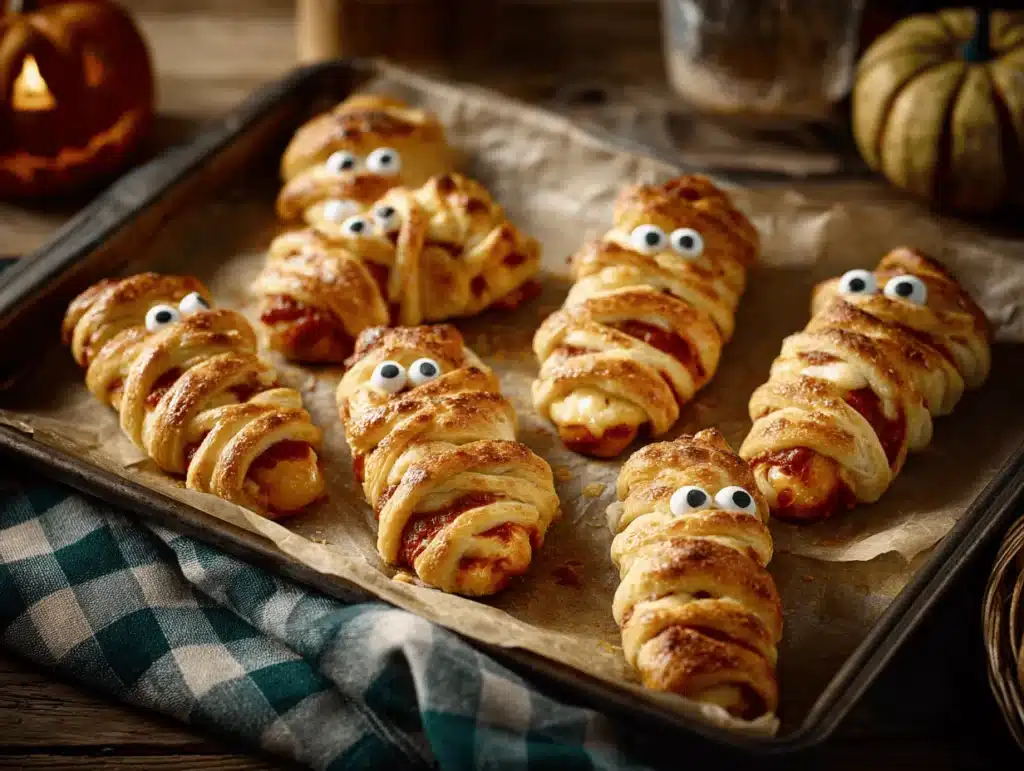
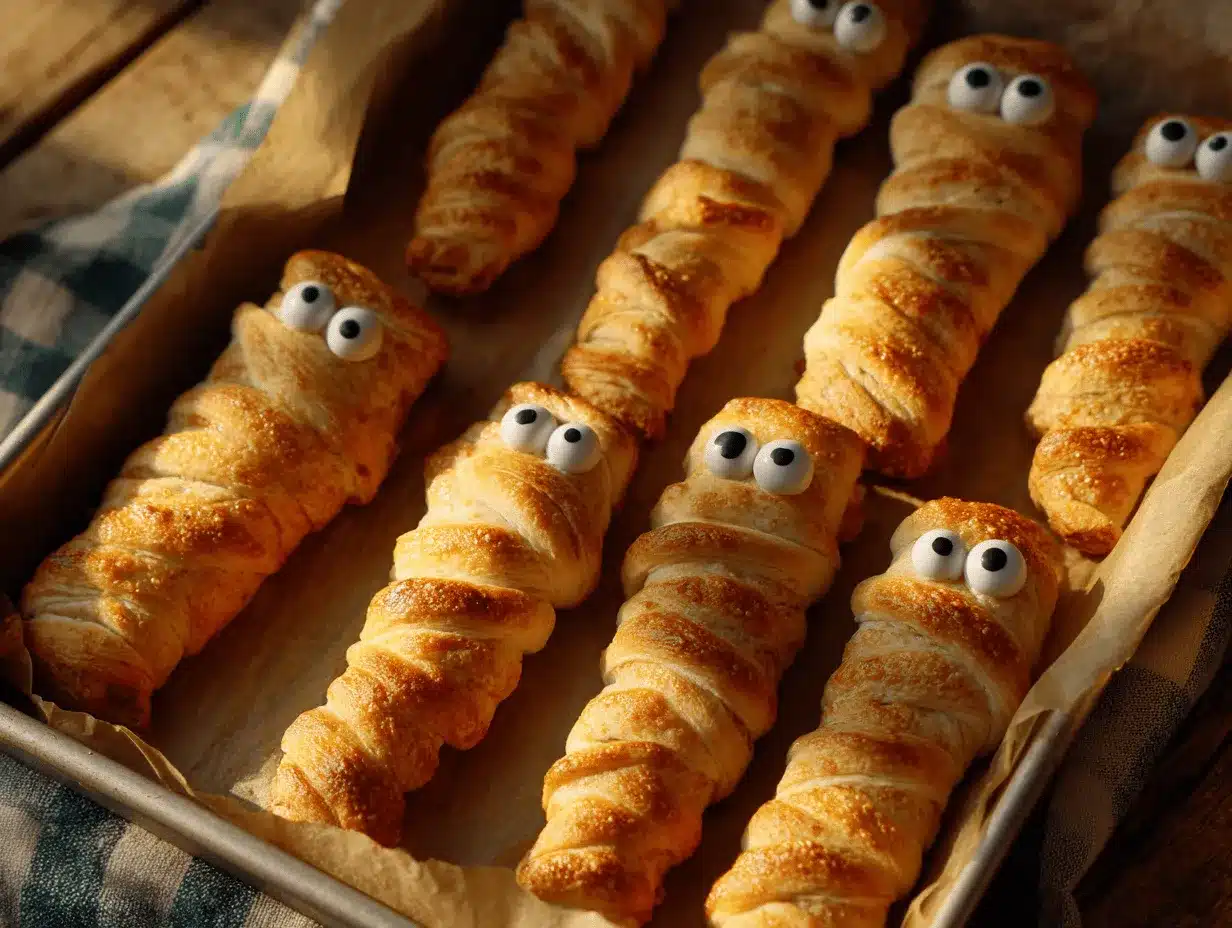
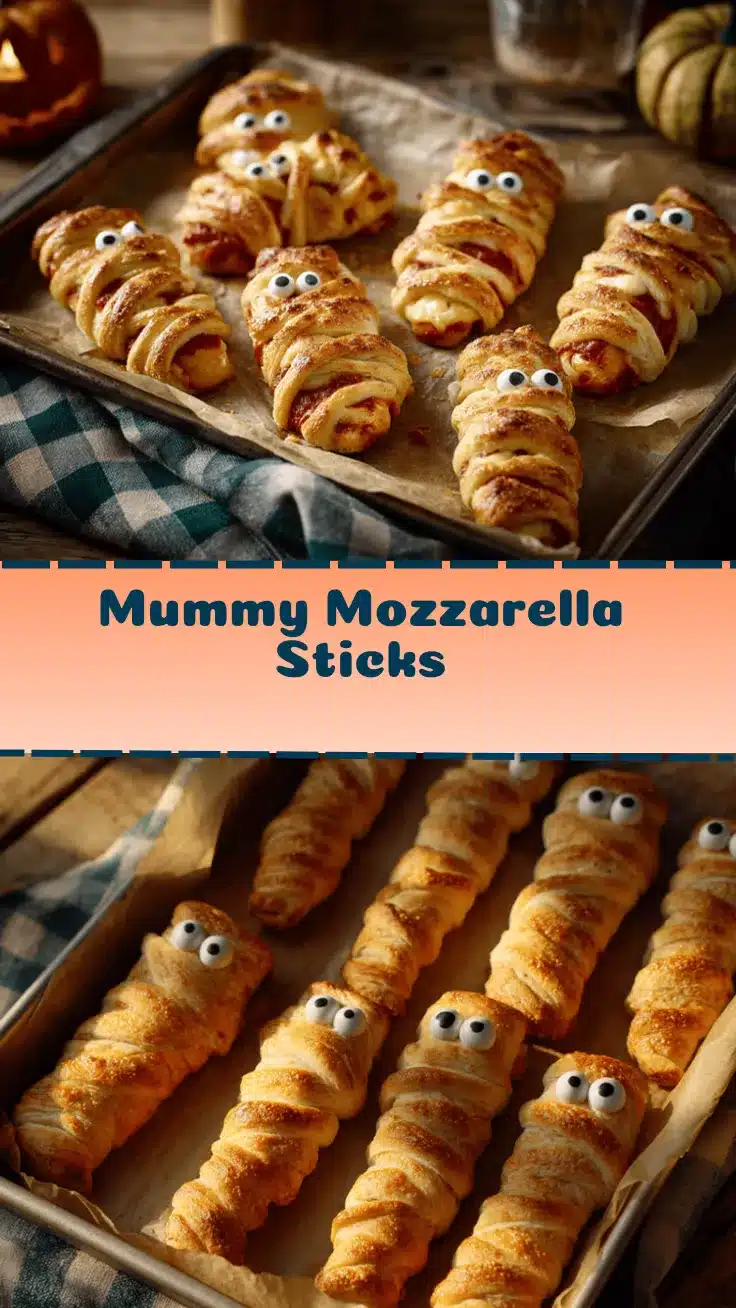
Golden, gooey cheese wrapped in flaky pastry with playful “mummy” stripes—if that doesn’t scream Halloween fun, I don’t know what does! The first time I made mummy mozzarella sticks, my kitchen looked like a haunted laboratory (string cheese everywhere, pastry scraps flying, kids giggling in the background). It was a spontaneous idea sparked by leftover crescent dough and a craving for something festive but easy. Honestly, these cheesy mummies became the highlight of our party table, outshining even my classic pumpkin cupcakes. You know how Halloween snacks can sometimes look cute but taste bland? Not these. Mummy mozzarella sticks deliver both the spook factor and the crave-worthy, melty goodness everyone wants in a party snack.
There’s a little nostalgia here too—mozzarella sticks were a staple at my family’s Friday movie nights, but Halloween always called for something extra. Wrapping them up in “bandages” turned a basic snack into a centerpiece that makes kids squeal and adults sneak seconds. Plus, with just a handful of ingredients and almost no prep, you can whip these up last minute before trick-or-treaters arrive. If you’re looking for a recipe that’s seriously simple, totally kid-approved, and guaranteed to disappear before the candy bowl, mummy mozzarella sticks are your answer.
So whether you’re hosting a full-blown Halloween bash, need a creative snack for school parties, or just want a fun way to jazz up dinner, this mummy mozzarella sticks recipe is pure gold. Trust me, after testing it so many times (and eating way too many in the process), I can promise they’re as fun to make as they are to eat!
Why You’ll Love This Recipe
- Quick & Easy: Ready in under 30 minutes—because, let’s face it, who has time for complicated snacks on party day?
- Simple Ingredients: All you need is string cheese, refrigerated dough, and a few pantry basics. No fancy shopping trips required.
- Perfect for Parties: Great for Halloween gatherings, school events, or movie nights. They travel well and stay delicious even at room temp.
- Crowd-Pleaser: Kids adore the fun look, adults love the cheesy flavor. Every batch vanishes faster than you’d expect!
- Unbelievably Delicious: Crispy on the outside, gooey in the middle—comfort food with a playful twist.
After years of making Halloween treats, I can say mummy mozzarella sticks are a game-changer. The secret? Wrapping thin strips of crescent dough around the cheese for those iconic mummy bandages. I’ve tested everything from homemade pastry to store-bought pizza dough, but classic crescent roll dough wins for both flavor and ease. The result is a snack that’s flaky, cheesy, and totally irresistible—no soggy bottoms or bland breading.
What really sets this recipe apart is the combination of nostalgia and creativity. You get that classic mozzarella stick flavor, but with a festive twist that makes everyone smile. Plus, you can prep them ahead, bake them right before serving, and still get that fresh-out-of-the-oven crunch. They’re perfect for busy parents, rushed hosts, or anyone looking for a low-stress, high-impact appetizer. If you want a Halloween snack that brings joy (and maybe a little cheese-induced happiness), look no further. I promise, your party will be remembered for these mummies!
Ingredients Needed
This mummy mozzarella sticks recipe keeps things simple, but every ingredient pulls its weight to create crave-worthy flavor and texture. Here’s what you’ll need:
- String Cheese Sticks (12 sticks, or about 340g) — Regular mozzarella string cheese works best. I like Frigo or Sargento for reliable meltiness. You can use part-skim or whole milk, depending on preference.
- Refrigerated Crescent Roll Dough (1 tube, 8oz/226g) — Pillsbury classic crescent rolls are my go-to. You can swap for pizza dough or puff pastry, but crescent dough is easiest to handle and gives a nice flaky finish.
- Large Egg (1, beaten) — For brushing over the pastry to achieve a golden brown mummy wrap. If you’re egg-free, use milk or cream instead.
- Black Olive Slices (about 24 slices) — For the eyes! You can substitute with tiny pieces of black bean, edible marker, or even dots of ketchup if olives aren’t popular at your house.
- Optional Seasoning:
- Garlic Powder (½ tsp) — Adds depth to the pastry bandages.
- Italian Seasoning (½ tsp) — Sprinkle lightly for a herby kick.
- Cooking Spray or Oil — For greasing your baking sheet so nothing sticks.
- Marinara Sauce (for dipping) — Store-bought or homemade, totally up to you. I often use Rao’s for a robust, tomatoey flavor.
Ingredient tips: If you’re making these gluten-free, look for gluten-free crescent dough (brands like Schär offer solid alternatives). Dairy-free mozzarella sticks are available at most supermarkets—Daiya works in a pinch. For a spicy twist, add a pinch of red pepper flakes to the dough before wrapping. During summer, I swap marinara for fresh salsa—trust me, it’s awesome.
I’ve found that the smaller, firmer string cheese sticks hold up best during baking, and the crescent dough is easiest to cut into strips when it’s cold. If you’re prepping for a crowd, double the batch—these go fast!
Equipment Needed
- Baking Sheet — Any rimmed sheet works. I use a standard half-sheet pan for even browning.
- Parchment Paper — Optional, but makes cleanup easier and prevents sticking.
- Sharp Knife or Pizza Cutter — For slicing crescent dough into thin “bandages.” Pizza cutters make quick work of long strips.
- Small Bowl — For beating the egg wash.
- Pastry Brush — Spreads egg wash evenly. If you don’t have one, use the back of a spoon.
- Measuring Spoons — For seasonings, if using.
If you’re out of parchment, just grease the baking sheet with a little oil—works fine. Crescent dough can be sticky, so cold tools help. I’ve even used a butter knife when my pizza cutter went missing (not ideal, but it got the job done). For budget-friendly options, dollar store pans hold up for this recipe, especially when lined with foil. Just avoid using dark pans—they can over-brown the bottoms.
After dozens of batches, I can say: keep your tools cold and your workspace tidy. Dough strips behave much better that way!
Preparation Method
- Prep your workspace: Preheat your oven to 375°F (190°C). Line your baking sheet with parchment paper or lightly grease with oil. (A clean surface makes everything less stressful!)
- Slice the dough: Open the crescent roll tube and unroll the dough on a cutting board. Using a pizza cutter or sharp knife, slice the dough into long, thin strips—about ¼ inch (0.6cm) wide. You’ll need 2-3 strips per cheese stick.
- Wrap the cheese: Take one string cheese stick and begin wrapping a dough strip around it, crisscrossing to mimic mummy bandages. Leave a small gap near one end for the “face.” Repeat with all cheese sticks. If dough splits, just press the ends together—imperfection adds personality!
- Arrange on baking sheet: Place wrapped sticks spaced about 1 inch (2.5cm) apart. Cheese may ooze a bit when baking, so give them room.
- Brush and season: Beat your egg in a small bowl and brush lightly over each mummy stick. Sprinkle with garlic powder and Italian seasoning if desired.
- Bake: Slide the baking sheet into the oven. Bake for 12-15 minutes, until pastry is golden brown and cheese just begins to melt. (Keep a close eye—overbaking leads to cheese puddles!)
- Add eyes: Let sticks cool for 2-3 minutes, then press two black olive slices into the exposed gap for “eyes.” If using other eye options, wait until sticks are just warm.
- Serve: Transfer to a platter and serve warm with marinara sauce for dipping.
Troubleshooting: If cheese leaks out, try baking at a slightly lower temp (350°F/175°C) next time. Dough too sticky? Chill in the fridge for 10 minutes. For crispier bandages, bake on the top oven rack. Sensory cues: The mummies are ready when the dough smells buttery, looks puffed and golden, and the cheese is just starting to peek from the ends.
Pro tip: Kids love helping with the wrapping—just expect some “creative” mummies. I always make an extra batch because honestly, half disappear before they hit the plate!
Cooking Tips & Techniques
I’ve made mummy mozzarella sticks enough times to learn a few tricks (and, let’s be real, have a few baking disasters along the way). Here’s what works best:
- Chill the Dough: Cold dough is easier to slice and wrap. If it gets sticky, pop it in the fridge for 10 minutes.
- Don’t Overload the Cheese: Too much dough makes the sticks bready instead of cheesy. Thin strips are key—aim for 2-3 per stick.
- Seal the Ends: Pinch the dough lightly at each end to keep the cheese inside. Not perfect? That’s okay—oozy cheese is part of the charm.
- Watch the Oven: Bake just until golden. Overbaking causes cheese explosions (has happened to me more than once!).
- Egg Wash for Shine: Don’t skip the egg wash—it gives that irresistible, bakery-style finish.
- Experiment with Seasonings: Garlic powder and Italian herbs add a savory punch, but you can try onion powder, paprika, or even ranch seasoning for a twist.
- Batch Baking: For parties, bake in batches and keep warm in a low oven (170°F/75°C). Don’t stack—they’ll get soggy.
One of my biggest flops was wrapping the cheese too tightly—dough split, cheese escaped, and my “mummies” looked more like abstract art. Lesson learned: gentle wrapping works best. I also found that prepping ahead (wrapping and chilling in the fridge) makes party day a breeze. If you’re multitasking, set a timer and check halfway to rotate the pan for even browning. Consistency tip: Use the same brand of string cheese each time—different brands melt at different speeds. After a few rounds, you’ll have the timing down to a science!
Variations & Adaptations
No two Halloween parties are the same, so why should your mummy mozzarella sticks be identical? Here are some fun ways to switch it up:
- Gluten-Free: Use gluten-free crescent dough or pizza dough. Schär makes a good option, and it bakes up nicely for mummies.
- Dairy-Free: Swap regular string cheese for vegan mozzarella sticks (Daiya or Follow Your Heart). They melt a little differently, so bake at 350°F (175°C) for 15 minutes.
- Spicy Mummies: Sprinkle dough strips with chili powder or add a sliver of pickled jalapeño inside for a mild kick. Great for grown-up parties!
- Sweet & Savory: Want a dessert twist? Use cream cheese sticks and sprinkle cinnamon-sugar on the dough before baking.
- Pizza Style: Brush dough strips with pizza sauce before wrapping, and add mini pepperoni for “buttons” along the bandages.
For different cooking methods, you can air-fry the sticks at 350°F (175°C) for 8-10 minutes for extra crispiness. If you’re making these for picky eaters, swap olive eyes for dots of mustard or ketchup. I tried a version with puff pastry once—super flaky, but a little messier to wrap. My personal favorite adaptation was adding a sprinkle of smoked paprika and serving with sriracha ranch—spooky and bold!
Serving & Storage Suggestions
For the full Halloween effect, serve mummy mozzarella sticks on a dark platter with a bowl of blood-red marinara for dipping. They’re tastiest warm, fresh from the oven, with cheese just beginning to stretch. If you’re prepping for a party, you can bake them up to 2 hours ahead; keep in a warm oven (170°F/75°C) uncovered to avoid sogginess.
Pair with other spooky snacks—think carrot “witch fingers,” deviled “eyeball” eggs, or apple monster mouths. For drinks, a fizzy orange soda or a simple punch completes the theme. If you have leftovers (rare!), store in an airtight container in the fridge for up to 2 days. Reheat in a toaster oven at 350°F (175°C) for 5 minutes—microwave reheating works, but you lose the crunch. Over time, the flavors meld even more, but the pastry softens, so don’t wait too long to enjoy them.
Tip: If you want to freeze, wrap unbaked mummies tightly and freeze for up to 1 month. Bake straight from frozen, adding 2-3 minutes to the baking time. Perfect for planning ahead for big parties!
Nutritional Information & Benefits
Each mummy mozzarella stick packs about 90-110 calories, depending on dough and cheese brand. You’ll get roughly 6g protein per stick (thanks, mozzarella!). Crescent dough adds some carbs, but you can cut back by using low-carb or gluten-free dough. These sticks are nut-free and can be made egg-free (swap for milk wash).
Mozzarella is a good source of calcium and protein, making this snack more filling than your average Halloween treat. Watch for allergens: dairy, gluten, and egg are present unless swapped for alternatives. Personally, I love that these mummies offer a little more nutrition and substance at parties—kids get some real food before diving into candy!
Conclusion
If you want a Halloween recipe that’s fast, festive, and totally irresistible, mummy mozzarella sticks are the way to go. They combine playful presentation with classic cheesy comfort—honestly, everyone loves them. Whether you’re customizing for dietary needs or just want a fun way to get the kids involved, this recipe adapts to any crowd.
Every batch brings back memories of laughter, sticky fingers, and happy faces. I can’t imagine a Halloween party without these mummies. Why not try them yourself? Leave a comment if you make them, share your creative twists, or tag me on social with your spooky snack table. Happy Halloween and happy munching—don’t be surprised when your mummies vanish in minutes!
FAQs
How do I keep the cheese from leaking out during baking?
Make sure the dough is wrapped securely and pinch the ends closed. Don’t overbake—once the dough is golden, they’re ready.
Can I make mummy mozzarella sticks ahead of time?
Yes! Wrap and refrigerate up to 24 hours ahead. Bake just before serving for best texture.
What’s the best dipping sauce for mummy mozzarella sticks?
Classic marinara is always a hit, but ranch, sriracha mayo, or garlic butter are great too.
Are mummy mozzarella sticks gluten-free?
They can be! Just use gluten-free crescent or pizza dough and check your cheese label.
Can I air fry mummy mozzarella sticks?
Absolutely—air fry at 350°F (175°C) for 8-10 minutes. They come out even crispier!
Pin This Recipe!

Mummy Mozzarella Sticks
- Total Time: 25 minutes
- Yield: 12 mummy mozzarella sticks 1x
Description
Golden, gooey mozzarella cheese wrapped in flaky crescent dough and decorated with playful ‘mummy’ stripes, these easy Halloween party snacks are kid-approved and disappear fast! Perfect for festive gatherings, school parties, or movie nights.
Ingredients
- 12 mozzarella string cheese sticks (about 12 oz)
- 1 tube refrigerated crescent roll dough (8 oz)
- 1 large egg, beaten (or milk/cream for egg-free)
- 24 black olive slices (for eyes)
- Cooking spray or oil (for greasing baking sheet)
- Marinara sauce, for dipping
- 1/2 teaspoon garlic powder (optional)
- 1/2 teaspoon Italian seasoning (optional)
Instructions
- Preheat oven to 375°F (190°C). Line a baking sheet with parchment paper or lightly grease with oil.
- Unroll crescent dough on a cutting board. Slice into long, thin strips about 1/4 inch wide using a pizza cutter or sharp knife.
- Wrap each mozzarella stick with 2-3 dough strips, crisscrossing to mimic mummy bandages. Leave a small gap near one end for the ‘face.’
- Place wrapped sticks about 1 inch apart on the prepared baking sheet.
- Brush each mummy stick lightly with beaten egg (or milk/cream). Sprinkle with garlic powder and Italian seasoning if desired.
- Bake for 12-15 minutes, until pastry is golden brown and cheese just begins to melt.
- Let sticks cool for 2-3 minutes, then press two black olive slices into the exposed gap for ‘eyes.’
- Serve warm with marinara sauce for dipping.
Notes
For gluten-free or dairy-free adaptations, use alternative dough and cheese brands. Chill dough before slicing for easier handling. Don’t overbake to avoid cheese leakage. Kids love helping with the wrapping—expect creative results! Can be made ahead and baked just before serving. Air fryer option: bake at 350°F for 8-10 minutes.
- Prep Time: 10 minutes
- Cook Time: 15 minutes
- Category: Appetizer
- Cuisine: American
Nutrition
- Serving Size: 1 mummy mozzarella stick
- Calories: 100
- Sugar: 1
- Sodium: 250
- Fat: 6
- Saturated Fat: 3
- Carbohydrates: 8
- Protein: 6
Keywords: Halloween, mozzarella sticks, party snack, kid-friendly, crescent dough, cheese, easy appetizer, spooky, mummy recipe