Introduction
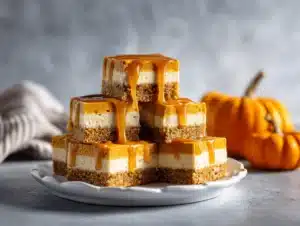
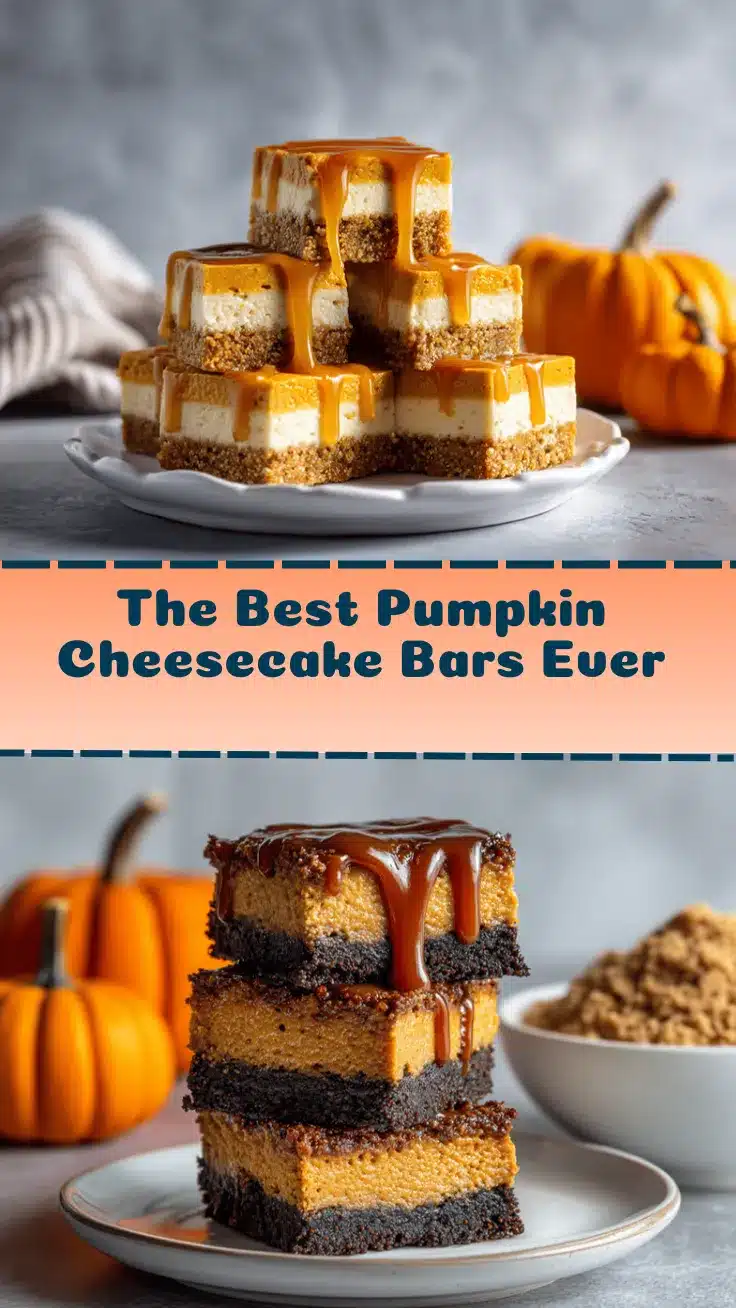
The aroma of warm pumpkin spice swirling through the kitchen—honestly, that’s my favorite autumn scent. That first bite of a creamy, velvety pumpkin cheesecake bar, with just the right amount of tang and a buttery graham cracker crust, always brings back memories of bustling Thanksgiving mornings in my house. Truthfully, I stumbled upon pumpkin cheesecake bars years ago when I wanted something easier (and less intimidating) than a classic pumpkin pie—no fussing over cracks or water baths, just pure dessert joy.
I remember making these pumpkin cheesecake bars for the first time after someone in my family declared, “Pie is overrated!” Well, I couldn’t let Thanksgiving dessert be anything short of magical. So, I grabbed my favorite canned pumpkin and whipped up a batch, blending the rich flavors of cheesecake with the cozy notes of pumpkin and cinnamon. The result? Instantly devoured. These bars have become a staple at my holiday table ever since. They’re perfectly portable, easy to cut, and (let’s face it) way less stressful than a full-size cheesecake.
If you’re on the hunt for a Thanksgiving dessert that’s a crowd-pleaser but won’t keep you chained to the oven all day, these ultimate pumpkin cheesecake bars are it. They’re ideal for busy hosts, picky eaters, and anyone who craves something sweet but not too heavy. As someone who’s made this recipe at least a dozen times (and tested every possible tweak), I can say with confidence—these bars always deliver. Whether you’re a baking newbie or cheesecake connoisseur, you’ll love how simple and satisfying this pumpkin cheesecake bars recipe is. So, let’s get baking!
Why You’ll Love This Recipe
- Quick & Easy: You can whip up these pumpkin cheesecake bars in about 15 minutes of hands-on work—no water bath, no fancy tricks.
- Simple Ingredients: No need to hunt down specialty items. Everything you need is probably in your pantry or fridge already.
- Perfect for Thanksgiving: These bars slice up beautifully for sharing—ideal for potlucks, Friendsgiving, or a cozy family dinner.
- Crowd-Pleaser: Kids love the creamy texture, adults rave about the spiced pumpkin flavor, and they always disappear fast!
- Unbelievably Delicious: The combination of tangy cream cheese, smooth pumpkin, and a buttery graham cracker crust is just dreamy.
Now, what sets this pumpkin cheesecake bars recipe apart? I always blend the cream cheese and pumpkin until totally smooth (no lumps allowed), then swirl in cinnamon and nutmeg for a little extra kick. I swear by using full-fat cream cheese for maximum richness—trust me, the difference is worth it. And, if you’re worried about soggy crust, I’ll show you how to get it perfectly crisp every time (learned the hard way after my first batch was a little too moist—oops!).
This recipe isn’t just good—it’s the kind of dessert that makes you sigh with happiness after every bite. It’s a lighter, more approachable twist on classic cheesecake, but with all the soul-soothing comfort of pumpkin pie. Whether you’re impressing guests or just treating yourself, these pumpkin cheesecake bars are the way to go. I’ve served them at everything from holiday brunches to midnight snacks, and they never fail to bring people together around the table.
Ingredients Needed
This pumpkin cheesecake bars recipe relies on wholesome, easy-to-find ingredients to create layers of flavor and texture that are just irresistible. Here’s what you’ll need:
- For the Crust:
- 1 1/2 cups (150g) graham cracker crumbs (about 12 full sheets)
- 1/4 cup (50g) granulated sugar
- 1/2 cup (115g) unsalted butter, melted (adds richness and helps the crust set)
- 1/2 tsp ground cinnamon (optional, but gives the crust a warm, autumn vibe)
- For the Pumpkin Cheesecake Filling:
- 2 packages (16 oz / 450g) cream cheese, softened (full-fat for best texture)
- 1 cup (225g) canned pumpkin puree (not pumpkin pie filling—just pure pumpkin)
- 3/4 cup (150g) granulated sugar
- 1/4 cup (60ml) sour cream (adds a slight tang; Greek yogurt works too)
- 2 large eggs, room temperature
- 2 tsp vanilla extract
- 1 1/2 tsp ground cinnamon
- 1/2 tsp ground nutmeg
- 1/4 tsp ground ginger (optional, for extra warmth)
- Pinch of salt
- For the Topping (Optional):
- Whipped cream, for serving
- Toasted pecans or walnuts, chopped
- Extra sprinkle of cinnamon or pumpkin spice
Ingredient Notes & Substitutions:
- Cream cheese: I always use Philadelphia for the smoothest result, but store brands work fine too. If you’re dairy-free, substitute with plant-based cream cheese (texture will be slightly different).
- Graham crackers: For gluten-free, swap in GF graham crackers or use almond flour for a nutty crust.
- Pumpkin: Fresh homemade puree works, but make sure it’s thick—not watery.
- Sour cream: Greek yogurt makes a great substitute. I’ve tried both—works like a charm.
- Spices: Feel free to adjust cinnamon, nutmeg, and ginger to your liking. Pumpkin pie spice can be used for an all-in-one boost.
Pro tip: If you want a little crunch, toss some chopped pecans into the crust before baking. It’s a simple way to add more texture and flavor—plus, it looks gorgeous for serving!
Equipment Needed
- 9×13-inch (23x33cm) baking pan (glass or metal; I’ve used both, but glass makes it easier to see doneness)
- Parchment paper (for easy removal and less mess—trust me, you don’t want stuck bars)
- Mixing bowls (at least two: one for crust, one for filling)
- Hand mixer or stand mixer (a whisk can work in a pinch, but electric is faster and smoother—learned that the hard way after sore arms!)
- Rubber spatula (great for scraping down the sides and folding ingredients together)
- Measuring cups and spoons (accuracy matters for cheesecake texture)
- Knife or offset spatula (to spread filling and slice bars)
If you don’t own a hand mixer, a sturdy whisk will do, but expect a little more elbow grease. For budget-friendly baking, dollar-store spatulas and bowls work fine—I’ve used them plenty of times and they hold up. Always line your pan with parchment for easy lifting (that’s one thing I never skip, even when I’m in a rush). If you use metal pans, reduce the bake time by a couple minutes—they conduct heat faster and can brown the crust more quickly.
Preparation Method
- Prep the Pan: Line a 9×13-inch (23x33cm) pan with parchment paper, leaving an overhang for easy removal. Preheat your oven to 325°F (163°C).
- Make the Crust: In a medium bowl, combine 1 1/2 cups (150g) graham cracker crumbs, 1/4 cup (50g) sugar, 1/2 cup (115g) melted butter, and 1/2 tsp cinnamon. Stir until the mixture resembles wet sand and holds together when pressed. Pour into your prepared pan and press down firmly with the back of a measuring cup. Aim for an even, compact layer—don’t rush this step (a loose crust falls apart!). Bake for 8 minutes, then set aside to cool slightly.
- Create the Filling: In a large bowl, beat 16 oz (450g) cream cheese until smooth—about 2 minutes on medium speed. Add 3/4 cup (150g) sugar and mix until combined. Scrape down sides as needed. Blend in 1 cup (225g) pumpkin puree, 1/4 cup (60ml) sour cream, and 2 tsp vanilla extract. Mix until silky and lump-free.
- Add Eggs & Spices: Add 2 eggs, one at a time, beating on low after each addition. Sprinkle in 1 1/2 tsp cinnamon, 1/2 tsp nutmeg, 1/4 tsp ginger, and a pinch of salt. Mix just until combined—don’t overbeat (learned that from a few cracked cheesecakes!).
- Pour & Smooth: Pour the pumpkin cheesecake filling over the cooled crust. Smooth out the top gently with a spatula. Give the pan a light tap on the counter to release air bubbles.
- Bake: Bake in the preheated oven for 35-40 minutes, or until the edges are set and the center jiggles slightly (not liquidy, just a gentle wobble). If you see browning, tent with foil for the last 10 minutes.
- Cool & Chill: Remove from oven and let cool to room temperature (about 1 hour). Then refrigerate for at least 3 hours—overnight is best for clean slices.
- Slice & Serve: Use the parchment overhang to lift bars from the pan. Cut into squares (I usually get 20-24 pieces). Wipe your knife between cuts for perfect edges.
- Top It Off: Add whipped cream, toasted pecans, and a sprinkle of cinnamon if you like. Serve chilled and enjoy every bite!
Troubleshooting Tips: If the filling seems runny, it may need extra baking time (ovens vary!). Bars crack? No problem—cover with whipped cream or call it “rustic.” If the crust seems soggy, try baking it a few minutes longer before adding filling. Texture too dense? Make sure ingredients are at room temperature and don’t overmix.
Sensory Cues: The bars should smell like sweet autumn spices with a hint of cream cheese tang. The filling will be golden-orange and set around the edges, slightly jiggly in the center. The crust should be firm and not greasy to the touch.
Efficiency Tip: Prep the crust while the oven preheats, and make the filling as the crust cools. I usually clean up as I go—the less mess, the better when it’s time to eat!
Cooking Tips & Techniques
Having baked my fair share of pumpkin cheesecake bars, I’ve picked up a few tricks along the way. Here’s what really works (and what to avoid):
- Room Temperature Ingredients: Always bring cream cheese and eggs to room temp. Cold cream cheese leads to lumps, and cold eggs can mess with texture. I once tried to rush it—never again!
- Don’t Overmix: Once you add the eggs, mix just until combined. Overmixing adds air, which can cause cracks or a spongy texture. If in doubt, stop early.
- Even Crust: Press the crust firmly and evenly, especially in the corners. Use a flat-bottomed glass for extra pressure. A patchy crust means bars won’t hold together.
- Bake Time: Every oven is different. Bars are done when the edges are set and the center is just a bit jiggly. If you’re unsure, a thermometer should read about 150°F (65°C) in the center.
- Cooling: Let bars cool in the pan, then chill before slicing. Cutting too soon leads to messy edges and soft bars. Patience pays off!
- Multitasking: Prep toppings while bars bake. I toast pecans and whip cream so everything’s ready to go.
- Consistent Slices: Wipe your knife between cuts. Use a long, sharp blade—not a serrated one. I learned this after a batch of crumbly, uneven squares.
- Lesson Learned: Never skip the parchment paper! It makes lifting and slicing so much easier (I tried without once—total disaster).
Little things make a big difference. Follow these tips, and your pumpkin cheesecake bars will look and taste bakery-quality—every single time.
Variations & Adaptations
If you want to switch things up, this pumpkin cheesecake bars recipe is super flexible. Here are a few of my favorite tweaks:
- Gluten-Free: Use gluten-free graham crackers or swap the crust for almond flour and a touch of coconut oil. I’ve made it both ways for gluten-sensitive friends—delicious!
- Dairy-Free: Substitute dairy-free cream cheese and coconut yogurt for a plant-based version. The bars will be slightly softer, but still tasty.
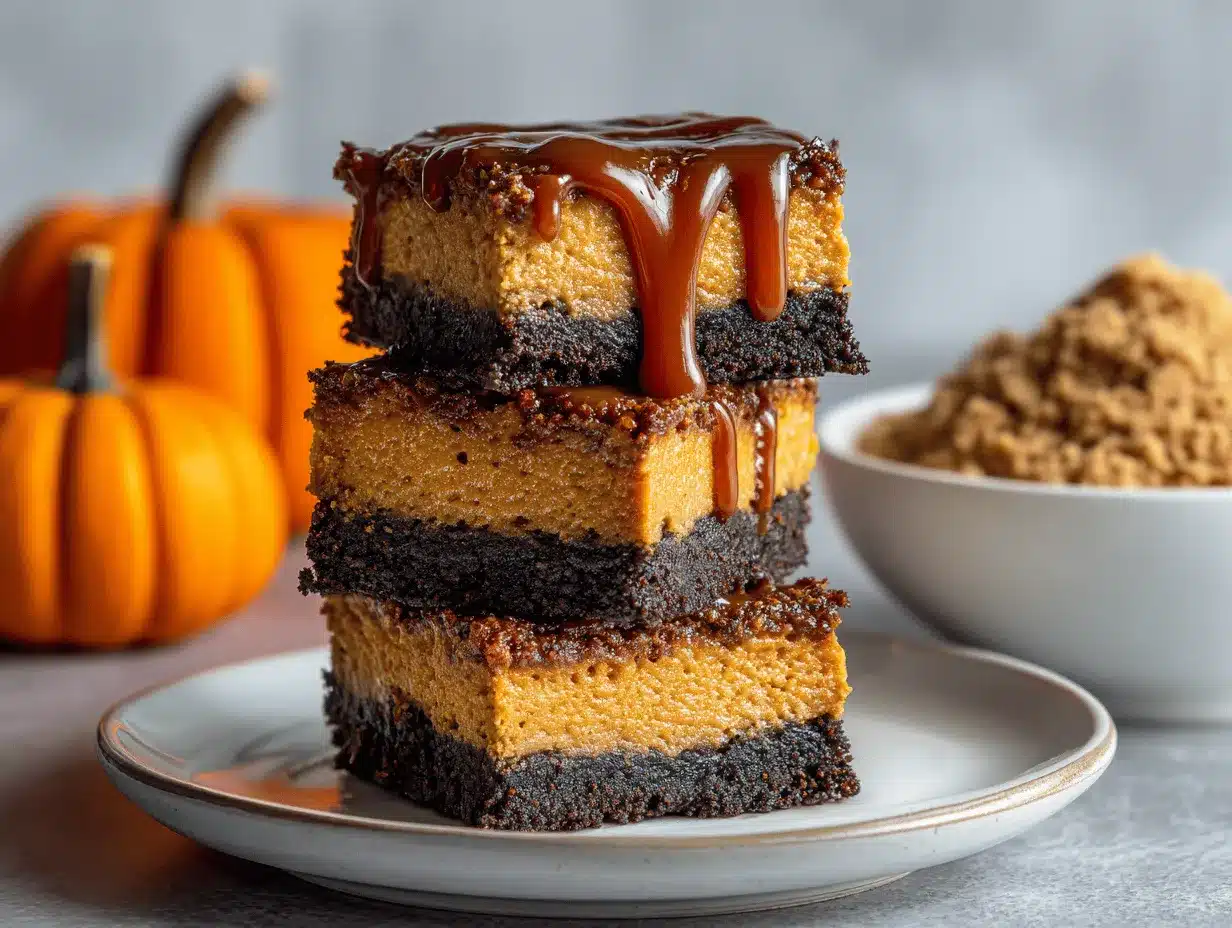
- Chocolate Swirl: Melt 1/2 cup (90g) semisweet chocolate chips and drizzle over the filling before baking. Swirl with a knife for a marbled effect—kids love it.
- Spiced Nut Crust: Add 1/3 cup chopped pecans or walnuts to the crust for extra crunch and flavor.
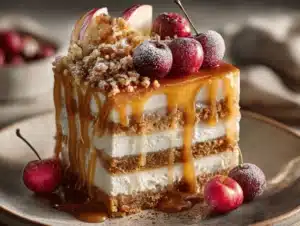
- Seasonal Fruit: Top finished bars with sugared cranberries or a dollop of apple compote for a festive touch.
- Vegan Option: Use vegan cream cheese, plant-based yogurt, and flax eggs (1 tbsp flaxseed meal + 2.5 tbsp water per egg). The bars come out a bit softer, but hold together nicely.
One of my personal favorites? Adding a layer of caramel drizzle before serving. It’s a little decadent, but hey, holidays are meant for treats! Don’t be afraid to experiment—these bars are forgiving, and you might just discover your new signature dessert.
Serving & Storage Suggestions
Serve these pumpkin cheesecake bars chilled—straight from the fridge is best. The texture firms up nicely and the flavors meld together overnight. For a show-stopping presentation, add a swirl of whipped cream, sprinkle with cinnamon, and garnish with toasted pecans. They look gorgeous on a rustic wood board or your favorite holiday platter.
Pair with a hot cup of coffee, chai latte, or spiced cider for extra coziness (seriously, so good!). They’re the perfect finish to a Thanksgiving feast but work just as well for brunch or an afternoon snack.
Storage Tips: Store leftovers in an airtight container in the refrigerator for up to 5 days. Bars freeze well—wrap tightly in plastic wrap and place in a freezer-safe bag for up to 2 months. Thaw overnight in the fridge, then serve cold or let come to room temperature for about 30 minutes.
Reheat gently in the microwave (10-15 seconds per bar) if you prefer them slightly warm, but they’re best cold in my opinion. I find the spices get even more pronounced after a day or two—so don’t worry if you’re prepping ahead!
Nutritional Information & Benefits
Each pumpkin cheesecake bar (based on 24 bars per batch) contains approximately:
- Calories: 180
- Protein: 3g
- Fat: 12g
- Carbohydrates: 16g
- Sugar: 11g
Pumpkin is loaded with vitamin A, fiber, and antioxidants, while cream cheese provides calcium and a little protein. If you use Greek yogurt, you’ll get an extra boost of probiotics. These bars are easily adaptable for gluten-free or lower-carb diets (just swap the crust).
Potential allergens: dairy, eggs, gluten (unless adapted). Always check ingredient labels if you’re baking for folks with sensitivities. From a wellness perspective, these pumpkin cheesecake bars are a lighter alternative to full-fat cheesecake or heavy pies, and they satisfy a sweet craving without going overboard. Moderation, as always!
Conclusion
So, there you have it—my ultimate pumpkin cheesecake bars recipe, perfect for Thanksgiving (or honestly, any time you need a little seasonal comfort). These bars deliver on flavor, texture, and simplicity, making them a must-try for any home baker. Whether you stick with the classic version or try one of the fun adaptations, you’re guaranteed a dessert that looks as good as it tastes.
I love this recipe because it’s so forgiving—there’s room to play with flavors and textures, and it always brings smiles to the table. Give it a go, share your twist, and let me know what you think! Leave a comment below with your favorite variations, or tag me with your creations on social (I love seeing your bakes!).
Wishing you a warm, delicious Thanksgiving filled with good food and great company. Happy baking—you’ve got this!
Frequently Asked Questions
Can I make pumpkin cheesecake bars ahead of time?
Absolutely! These bars taste even better after chilling overnight. Prep them a day before your event and store in the fridge until ready to serve.
Can I freeze pumpkin cheesecake bars?
Yes, they freeze beautifully. Wrap tightly in plastic and store in a freezer-safe bag for up to 2 months. Thaw in the fridge before serving.
Can I use fresh pumpkin instead of canned?
You sure can. Just make sure your pumpkin puree is thick and not watery, or the bars may turn out mushy.
How do I avoid cracks in cheesecake bars?
Don’t overmix the batter once you add the eggs, and bake until just set. Cooling slowly helps too—don’t rush the chill!
Can I make these gluten-free?
Definitely! Use gluten-free graham crackers or swap in almond flour for the crust. The filling is naturally gluten-free.
Pin This Recipe!
Pumpkin Cheesecake Bars
- Total Time: 4 hours
- Yield: 20-24 bars 1x
Description
These creamy pumpkin cheesecake bars feature a buttery graham cracker crust and a velvety pumpkin-spiced filling, making them an easy and crowd-pleasing Thanksgiving dessert. Perfect for sharing, these bars are less fussy than pie and deliver all the cozy flavors of autumn.
Ingredients
- 1 1/2 cups graham cracker crumbs (about 12 full sheets)
- 1/4 cup granulated sugar
- 1/2 cup unsalted butter, melted
- 1/2 tsp ground cinnamon (optional)
- 16 oz cream cheese, softened (full-fat recommended)
- 1 cup canned pumpkin puree (not pumpkin pie filling)
- 3/4 cup granulated sugar
- 1/4 cup sour cream (or Greek yogurt)
- 2 large eggs, room temperature
- 2 tsp vanilla extract
- 1 1/2 tsp ground cinnamon
- 1/2 tsp ground nutmeg
- 1/4 tsp ground ginger (optional)
- Pinch of salt
- Whipped cream, for serving (optional)
- Toasted pecans or walnuts, chopped (optional)
- Extra sprinkle of cinnamon or pumpkin spice (optional)
Instructions
- Line a 9×13-inch baking pan with parchment paper, leaving an overhang for easy removal. Preheat oven to 325°F (163°C).
- In a medium bowl, combine graham cracker crumbs, sugar, melted butter, and cinnamon. Stir until mixture resembles wet sand. Press firmly into prepared pan for an even layer. Bake for 8 minutes, then set aside to cool slightly.
- In a large bowl, beat cream cheese until smooth (about 2 minutes). Add sugar and mix until combined. Blend in pumpkin puree, sour cream, and vanilla extract until silky and lump-free.
- Add eggs one at a time, beating on low after each addition. Sprinkle in cinnamon, nutmeg, ginger, and a pinch of salt. Mix just until combined; do not overbeat.
- Pour pumpkin cheesecake filling over cooled crust. Smooth top with spatula and tap pan lightly to release air bubbles.
- Bake for 35-40 minutes, or until edges are set and center jiggles slightly. Tent with foil if browning occurs.
- Remove from oven and cool to room temperature (about 1 hour). Refrigerate for at least 3 hours, preferably overnight.
- Lift bars from pan using parchment overhang. Cut into squares (20-24 pieces), wiping knife between cuts.
- Top with whipped cream, toasted pecans, and a sprinkle of cinnamon if desired. Serve chilled.
Notes
For best texture, use room temperature cream cheese and eggs. Do not overmix after adding eggs to prevent cracks. For gluten-free, use GF graham crackers or almond flour in the crust. Bars freeze well for up to 2 months. Chill overnight for clean slices. Add chopped nuts to the crust for extra crunch.
- Prep Time: 15 minutes
- Cook Time: 40 minutes
- Category: Dessert
- Cuisine: American
Nutrition
- Serving Size: 1 bar (based on 24 bars per batch)
- Calories: 180
- Sugar: 11
- Sodium: 120
- Fat: 12
- Saturated Fat: 7
- Carbohydrates: 16
- Fiber: 1
- Protein: 3
Keywords: pumpkin cheesecake bars, Thanksgiving dessert, easy cheesecake, pumpkin bars, autumn baking, holiday dessert, creamy cheesecake, graham cracker crust