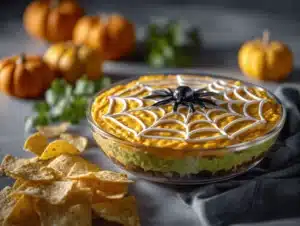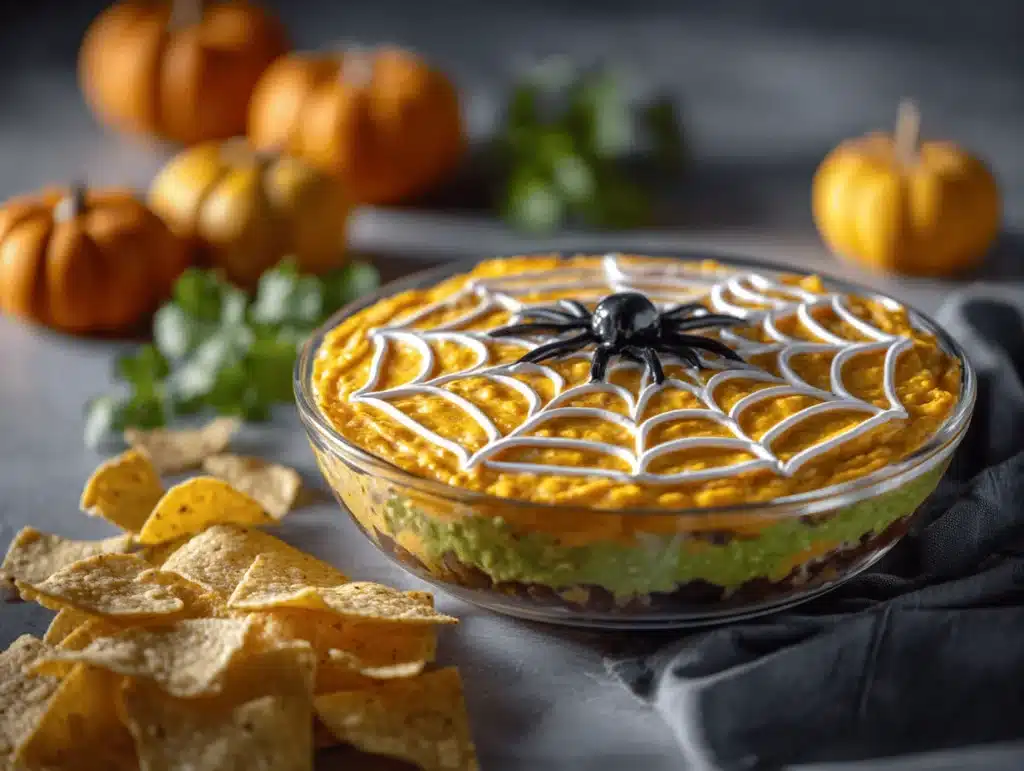
The first time I made this Halloween Spiderweb Layered Dip, the reaction from my guests was hilarious—they couldn’t decide whether to snap a photo or dig in first! Let’s be real: the best Halloween recipes are those that look spooky but taste seriously good. Imagine a creamy, zesty dip with vibrant layers bursting with flavor, all topped off with a sour cream spiderweb (yes, it’s easier than you think). The colors pop—orange, black, green—and it’s honestly the kind of appetizer that gets people talking.
This dip came to life during a particularly busy October when I was hunting for something festive but fuss-free. My kids wanted something “creepy but yummy,” and I wanted a make-ahead option for our annual costume party. So, I took inspiration from classic seven-layer dips and gave it a ghoulish twist. The result? The ultimate Halloween Spiderweb Layered Dip—perfect for parties, potlucks, or even a fun family movie night.
Why do I keep coming back to this recipe every year? It’s reliable, crowd-pleasing, and customizable (plus, you can make it as spooky as you want). Whether you’re throwing the biggest bash on the block or just want a festive snack while carving pumpkins, this layered dip hits all the right notes. I’ve tested it with different toppings, played around with the layers, and it always comes out looking (and tasting) awesome. So grab your chips and get ready to wow your guests with a Halloween Spiderweb Layered Dip that’s just as fun as the holiday itself!
Why You’ll Love This Recipe
- Super Festive: The spiderweb design turns a classic layered dip into a showstopper for any Halloween gathering.
- Quick to Assemble: Ready in about 20 minutes—no oven required! Perfect for busy party prep or last-minute invites.
- Simple Ingredients: Everything you need is at your local grocery store. No weird specialty items (unless you want to get wild with the toppings).
- Customizable Layers: You can swap layers to fit your taste or dietary needs—veggie, spicy, or even vegan.
- Kid and Adult Approved: My kids love helping with the spiderweb, and adults always go back for seconds.
- Make-Ahead Friendly: Prep the dip early, cover, and chill. It’s still delicious hours later (actually, the flavors meld even better).
- Eye-Catching for Pinterest: The bold layers and dramatic web design are a guaranteed hit for your feed—who doesn’t love a recipe that doubles as party decor?
What sets this Halloween Spiderweb Layered Dip apart? For starters, blending the refried beans with taco seasoning gives the base a flavorful kick. I use a sturdy piping bag (or a zip-top bag with the corner snipped off—real life hack) to pipe the sour cream spiderweb on top. It’s forgiving, trust me! Sometimes my lines wobble, but it always looks festive. If you want, you can add olive “spiders” or jalapeño slices for extra detail.
This isn’t just another layered dip; it’s the one that brings people together, starts conversations, and makes your party feel like an event. It’s comfort food with a Halloween twist. Whether you’re a seasoned host or just dipping your toes into party planning, this recipe is your secret weapon for effortless fun.
Ingredients Needed
This Halloween Spiderweb Layered Dip uses familiar ingredients for bold flavor and eye-catching presentation. Most are pantry staples or easy to find—no running around for obscure items!
- For the Layered Dip:
- 1 (16 oz / 450 g) can refried beans (I like vegetarian style for a lighter taste)
- 2 tbsp taco seasoning (homemade or store-bought—adds depth)
- 1 cup (240 ml) sour cream (full-fat for best texture; divided for web and layer)
- 1 (8 oz / 225 g) package cream cheese, softened (gives a creamy, tangy middle)
- 1 cup (110 g) shredded cheddar cheese (sharp or mild, your call)
- 1 cup (100 g) guacamole (homemade or store-bought—green for the web background)
- 1 cup (240 g) salsa (chunky or smooth; choose a flavor profile that suits your crowd)
- 1 (4 oz / 115 g) can sliced black olives, drained (for “spiders” and extra Halloween vibes)
- 1/2 cup (50 g) chopped green onions (for freshness and color)
- 1/2 cup (50 g) diced tomatoes (optional, for extra color and juiciness)
- 1/2 cup (50 g) chopped cilantro (adds brightness; skip if you’re not a fan)
- 1 jalapeño, sliced thin (optional, for heat and garnish)
- For the Spiderweb & Decorations:
- 1/2 cup (120 ml) sour cream (for piping the web—use a piping bag or a sturdy zip-top bag)
- Black olives, whole and sliced (for spider bodies and legs)
- Fresh cilantro leaves (for a “creepy” green garnish—optional)
- Serving:
- Tortilla chips (sturdy ones work best for scooping)
- Veggie sticks (carrots, celery, bell peppers—for a healthy option)
Ingredient Notes: For the refried beans, I sometimes blend in a splash of lime juice for extra zing. If you want it spicier, pick a hot salsa or add chopped jalapeños. For vegan guests, swap the cream cheese and cheddar with plant-based alternatives (they melt and taste great, honestly!).
Fresh guacamole brings color and creaminess. If you’re making it yourself, ripe avocados, lime, salt, and a little garlic are all you need. The sour cream web is easiest with full-fat sour cream; it pipes smoothly and holds its shape. For the “spiders,” slice black olives into rings and use whole olives for bodies (kids love making these!).
Feel free to get creative—use what you have, and don’t sweat the small stuff. This dip is forgiving, and everyone’s just here to have fun!
Equipment Needed
Here’s what you’ll need to bring your Halloween Spiderweb Layered Dip to life. Most of it is basic kitchen gear, so don’t worry if you’re not loaded up with fancy gadgets!
- 1 large shallow serving dish (glass pie plate or platter): Clear glass works best for showing off those bright layers.
- Mixing bowls: For blending beans, mixing cheese, and prepping veggies.
- Rubber spatula or offset spatula: For smooth, even spreading of each layer (offset spatulas make life easier, but a butter knife works in a pinch).
- Piping bag or sturdy zip-top bag: For piping the sour cream spiderweb. Snip the corner for a DIY hack. (I’ve done this with a sandwich bag and it’s always fine!)
- Small spoon or toothpick: For guiding lines or fixing web mistakes (trust me, you’ll want one handy).
- Sharp knife and cutting board: For prepping veggies and olives.
- Measuring cups and spoons: Accurate layers help the dip look and taste great.
Alternatives and Tips: If you don’t have a glass dish, any shallow pan works. For the web, a squeeze bottle is fantastic if you have one (less mess, more control). When cleaning piping bags, soak them right away to avoid dried-on sour cream—learned that the hard way! If you’re on a budget, stick to zip-top bags and simple utensils. This recipe isn’t fussy about equipment.
Preparation Method

- Blend the Beans:
In a medium bowl, mix together 1 can (16 oz / 450 g) refried beans and 2 tablespoons taco seasoning. Stir until fully combined and smooth. If the beans seem stiff, add 1-2 teaspoons of water or lime juice. This should take about 2 minutes. The mixture should smell savory and spicy.
- Prepare the Creamy Layer:
In another bowl, blend 1 cup (240 ml) sour cream and 8 oz (225 g) softened cream cheese. Beat with a fork or hand mixer until fluffy and well combined, about 3 minutes. If you want a tangier dip, add a squeeze of lime. This layer adds rich, smooth texture.
- Layer the Base:
Spread the bean mixture evenly over the bottom of your serving dish. Use a spatula to smooth it out. Next, spread the cream cheese and sour cream mixture over the beans in an even layer. Each layer should be about 1/2 inch thick—don’t stress if it’s not perfect.
- Add the Salsa:
Spread 1 cup (240 g) salsa over the creamy layer. Use the back of a spoon to gently smooth it out, being careful not to disturb the layers below. If the salsa is watery, drain some liquid before adding to prevent soggy dip.
- Guacamole Layer:
Carefully spoon 1 cup (100 g) guacamole over the salsa. Spread gently for a bright, green layer. The guacamole should be thick enough to hold the web design later. If making ahead, squeeze a tiny bit of lime over the guac to prevent browning.
- Cheese and Veggies:
Sprinkle 1 cup (110 g) shredded cheddar cheese over the guacamole. Top with chopped tomatoes, black olives, green onions, and cilantro. Layer colors for the best visual effect. Add jalapeño slices if you like a kick.
- Make the Spiderweb:
Spoon 1/2 cup (120 ml) sour cream into a piping bag or zip-top bag. Snip a small tip off the corner. Starting from the center of the dip, pipe concentric circles (about 4-5 rings). Then use a toothpick or knife to drag lines outward from the center, creating a web effect. If your lines aren’t perfect, don’t worry—spooky is good!
- Add the Spiders:
Slice black olives into rings for spider legs and use whole olives for bodies. Arrange them on the web for extra Halloween flair. Kids love helping with this step!
- Chill and Serve:
Cover the dish loosely and refrigerate for at least 30 minutes to let flavors meld. Serve with sturdy tortilla chips and veggie sticks. Tastes best when slightly chilled but not cold. If making ahead, add spiderweb and decorations right before serving for best appearance.
Troubleshooting: If layers blend together, use a spatula to gently even out. If the web smudges, wipe with a damp paper towel and re-pipe. Sometimes my sour cream gets runny—using full-fat and piping cold helps. The dip is forgiving, so relax and have fun!
Cooking Tips & Techniques
Making the Halloween Spiderweb Layered Dip is mostly about assembly, but a few tricks can help your dip shine (and avoid common party mishaps).
- Layering Order Matters: Always start with the beans on the bottom. They’re sturdy and keep the other layers from sinking or mixing.
- Pipe the Web Cold: Chill your sour cream before piping. Warm sour cream gets runny and the web lines blur (voice of experience here—learned the hard way!).
- Don’t Rush the Assembly: Let each layer settle for a minute before adding the next. This keeps colors distinct and the dip looking sharp.
- Use a Clear Dish: A glass pie plate or trifle dish shows off the layers and makes your dip Pinterest-worthy.
- Chill for Flavor: If you have time, refrigerate the dip for at least 30 minutes before serving. The flavors meld and the texture improves.
- Fixing Mistakes: If your spiderweb lines wobble or smudge, just use a toothpick to clean them up. No one expects perfection at a Halloween party!
- Multitasking: Prep toppings while the base chills. Assembly goes faster and you’re not scrambling for garnish at the last minute.
- Consistency Tips: Stick with full-fat dairy for the best piping texture. Low-fat sour cream or cream cheese tends to get watery and doesn’t hold the web shape.
Honestly, my first time piping the web, I made a real mess (my youngest called it a “ghost tornado”). But it still looked festive and tasted amazing. The trick is to enjoy the process—imperfections just make it more fun!
Variations & Adaptations
Want to make this dip your own? Here are a few tried-and-true variations to keep things interesting and cater to your crowd:
- Vegan Spiderweb Dip: Swap sour cream and cream cheese for plant-based alternatives. Use vegan cheddar and a dairy-free guac. The taste is still creamy and satisfying, and the web pipes just fine.
- Spicy Southwest Style: Add a layer of diced jalapeños, use pepper jack cheese, and choose a fiery salsa. Top with sliced pickled peppers for extra heat.
- Low-Carb/Keto Version: Replace refried beans with mashed avocados or seasoned cauliflower puree. Use full-fat cheeses and serve with sliced bell peppers or cucumber rounds instead of chips.
- Seasonal Twist: For autumn vibes, add roasted pumpkin puree to the bean layer or sprinkle toasted pumpkin seeds on top.
- Allergen-Friendly: For gluten-free guests, double-check salsa and seasoning labels. For nut-free, skip any nut-based garnishes (rare, but sometimes used in dips).
My personal favorite? The spicy version with extra jalapeños and a smoky chipotle salsa. It’s a hit with adults and can be dialed down for kids. Don’t be afraid to experiment—Halloween is all about creativity!
Serving & Storage Suggestions
Serve your Halloween Spiderweb Layered Dip chilled but not icy cold—the flavors pop best at just below room temp. I love presenting it in a clear glass dish surrounded by colorful veggie sticks and tortilla chips (makes for a gorgeous party table photo!).
Pair with festive drinks: try a blood orange punch or sparkling apple cider. If you’re setting up a snack table, arrange bowls of mini pretzels, popcorn, and candy eyeballs for extra Halloween energy.
Storage Tips: Cover leftovers tightly with plastic wrap or a lid. Store in the fridge for up to 2 days. The guacamole may brown slightly, but a squeeze of lime helps. For best flavor, add fresh toppings before serving again. I don’t recommend freezing—dairy layers and guac just don’t thaw well.
To reheat (if desired), scoop out a portion and microwave on low for 30 seconds, but honestly, this dip is meant to be enjoyed cold or at room temp. Over time, the flavors meld and get even better—so a little overnight rest in the fridge is totally fine.
Nutritional Information & Benefits
Here’s a quick nutritional snapshot for one serving (about 1/8 of the dip):
- Calories: approx. 210
- Protein: 6g
- Fat: 14g
- Carbs: 14g
- Fiber: 3g
This dip packs protein from beans and cheese, plus fiber from veggies and guacamole. It’s naturally gluten-free if you use GF chips and seasonings. For low-carb, swap beans for avocado and skip the chips. There are potential allergens: dairy (cheese, sour cream, cream cheese) and nightshades (tomato, salsa, jalapeño), so adjust as needed for your guests.
From a wellness perspective, I appreciate how you can sneak in extra veggies—bell peppers, tomatoes, even spinach—without anyone complaining. It’s hearty enough to keep party-goers satisfied and balanced enough for a guilt-free treat.
Conclusion
If you’re looking for a Halloween appetizer that’s equal parts fun and delicious, the Halloween Spiderweb Layered Dip is the answer. It’s easy to customize, visually impressive, and absolutely addictive. Whether you’re hosting a big bash or just celebrating with family, this dip brings spooky flair and comfort food goodness to the table.
<pi’ve and="" best="" can="" crowd—creativity="" disappoints.="" everything="" fit="" for="" from="" fun!
So, grab your chips, gather your crew, and give this recipe a whirl. I’d love to hear how you make it your own—drop a comment below with your favorite twist, share your photos, or let me know how it turned out. Happy haunting, and happy dipping!
Frequently Asked Questions
Can I make this Halloween Spiderweb Layered Dip ahead of time?
Yes! You can assemble the layers up to one day in advance. Add the spiderweb and decorations just before serving for best appearance.
What’s the best way to pipe the spiderweb if I don’t have a piping bag?
A zip-top bag works great—just fill with sour cream and snip a small corner. Squeeze gently for thin web lines.
Can I make this dip vegan?
Absolutely! Use plant-based sour cream, cream cheese, and shredded cheese. Guacamole and beans are already vegan-friendly.
How do I keep the guacamole layer from turning brown?
Squeeze a little lime juice over the guac before adding it to the dip. Cover tightly with plastic wrap, pressing it directly onto the surface.
Is this dip gluten-free?
Yes, as long as you use gluten-free chips and double-check your taco seasoning and salsa labels for hidden gluten.
Pin This Recipe!


Halloween Spiderweb Layered Dip
- Total Time: 45 minutes
- Yield: 8 servings 1x
Description
A festive, crowd-pleasing layered dip with creamy, zesty flavors and a spooky sour cream spiderweb design—perfect for Halloween parties, potlucks, or family gatherings. Customizable, make-ahead friendly, and guaranteed to wow your guests.
Ingredients
- 1 (16 oz) can refried beans (vegetarian style recommended)
- 2 tbsp taco seasoning
- 1 cup sour cream (full-fat, divided for web and layer)
- 1 (8 oz) package cream cheese, softened
- 1 cup shredded cheddar cheese
- 1 cup guacamole
- 1 cup salsa (chunky or smooth)
- 1 (4 oz) can sliced black olives, drained
- 1/2 cup chopped green onions
- 1/2 cup diced tomatoes (optional)
- 1/2 cup chopped cilantro (optional)
- 1 jalapeño, sliced thin (optional)
- 1/2 cup sour cream (for piping the web)
- Black olives, whole and sliced (for spider bodies and legs)
- Fresh cilantro leaves (optional, for garnish)
- Tortilla chips (for serving)
- Veggie sticks (carrots, celery, bell peppers, for serving)
Instructions
- In a medium bowl, mix together refried beans and taco seasoning until smooth. Add 1-2 teaspoons water or lime juice if needed.
- In another bowl, blend 1 cup sour cream and softened cream cheese until fluffy and well combined.
- Spread the bean mixture evenly over the bottom of a large shallow serving dish.
- Spread the cream cheese and sour cream mixture over the beans in an even layer.
- Spread salsa over the creamy layer, draining excess liquid if needed.
- Carefully spoon guacamole over the salsa and spread gently.
- Sprinkle shredded cheddar cheese over the guacamole. Top with tomatoes, black olives, green onions, cilantro, and jalapeño slices as desired.
- Spoon 1/2 cup sour cream into a piping bag or zip-top bag. Pipe concentric circles on top of the dip, then drag lines outward with a toothpick or knife to create a spiderweb.
- Slice black olives into rings for spider legs and use whole olives for bodies. Arrange on the web.
- Cover and refrigerate for at least 30 minutes. Serve chilled with tortilla chips and veggie sticks.
Notes
Chill sour cream before piping for best web texture. Use full-fat dairy for optimal consistency. Customize layers and toppings to suit dietary needs. For vegan, use plant-based dairy alternatives. For gluten-free, double-check chips and seasoning labels. Make up to one day ahead, but add web and decorations just before serving.
- Prep Time: 15 minutes
- Cook Time: 0 minutes
- Category: Appetizer
- Cuisine: American
Nutrition
- Serving Size: About 1/8 of the dip
- Calories: 210
- Sugar: 2
- Sodium: 480
- Fat: 14
- Saturated Fat: 7
- Carbohydrates: 14
- Fiber: 3
- Protein: 6
Keywords: Halloween, layered dip, party appetizer, spiderweb dip, festive, vegetarian, gluten-free, make-ahead, kid-friendly, spooky