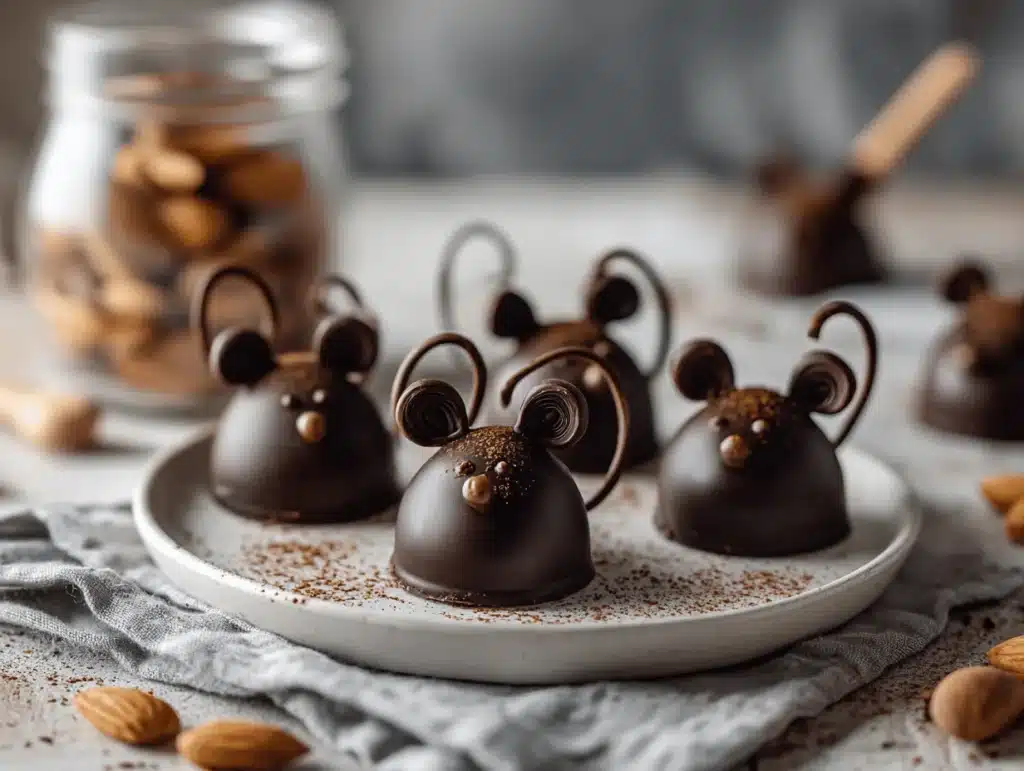
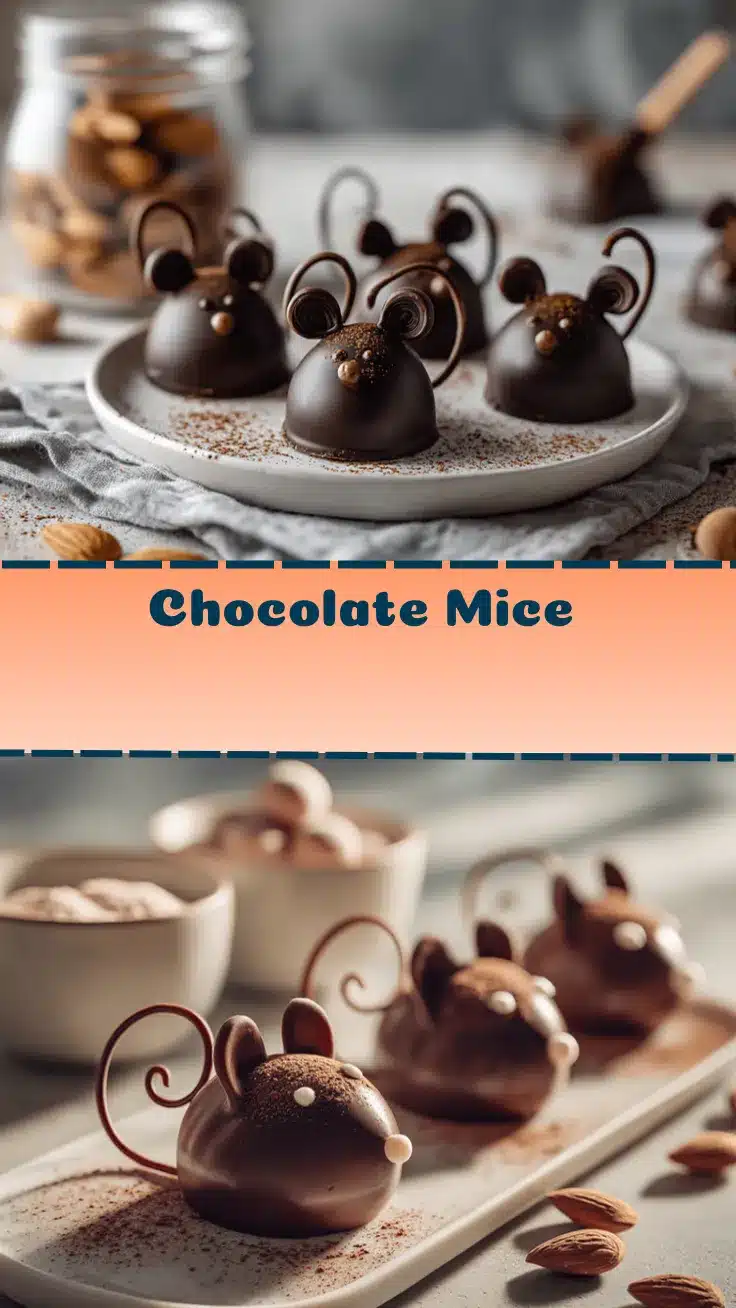
Imagine a tray full of adorable chocolate mice—shiny, sweet, and just begging to be picked up! The first time I made these Chocolate Mice, my kitchen was filled with giggles and little hands sneaking tastes of melted chocolate. (Honestly, I did the same.) There’s something magical about transforming simple ingredients into playful treats that delight kids and adults alike. I stumbled on this idea years ago after spotting whimsical chocolate animals at a local bakery, and I couldn’t resist trying my own version at home. Over time, my Chocolate Mice recipe has become a go-to for birthday parties, classroom celebrations, and rainy-day baking projects.
Not only are these chocolate mice easy to make, they’re absolutely irresistible—rich chocolate, creamy filling, and those charming little almond ears! If you want a treat that’s both fun to make and impressive to serve, you can’t go wrong here. Whether you need a creative dessert for a kids’ party or just want to brighten up your weekend, these homemade chocolate mice hit every mark. They’re perfect for beginner bakers (no fancy skills required), and I’ve tested them so many times, I can promise they turn out great every single time. As a mom and recipe developer, I love recipes that bring out smiles and make memories—this one does both.
Chocolate Mice have a special place in our family celebrations, and if you’re looking for a homemade treat that stands out on a Pinterest board or dessert table, you’ve struck gold. Let’s dive into the details and get those whiskers twitching with anticipation!
Why You’ll Love This Chocolate Mice Recipe
- Quick & Easy: You can whip up a batch of chocolate mice in under an hour—perfect for busy days or spontaneous baking sessions.
- Simple Ingredients: No need for a grocery run; most of what you need is already in your pantry.
- Perfect for Parties: These whimsical treats steal the show at birthday parties, holiday gatherings, and school events.
- Crowd-Pleaser: Kids go wild for them, and adults can’t resist sneaking one (or three) when no one’s looking.
- Unbelievably Delicious: Creamy, rich chocolate and the crunch of almonds—seriously, it’s a combination that makes you pause and savor.
I’ve made dozens of chocolate mouse recipes over the years, and this version is hands-down my favorite. The trick is blending silky chocolate with a hint of cream cheese to get that classic truffle vibe—plus, the almond slivers for ears add just the right crunch. What sets this apart? You don’t need fancy molds or chef-level skills. Just a bit of patience and a playful attitude, and you’ll have a dessert that looks straight out of a storybook.
These treats aren’t just cute—they’re the kind that make you close your eyes and smile after the first bite. The chocolate mice recipe is about more than taste; it’s a little bit of magic for any occasion. I love that you can customize them (think white chocolate or peanut butter fillings), and they’re always a conversation starter. Whether you’re baking with kids, searching for a Pinterest-worthy dessert, or just need a pick-me-up, these chocolate mice are your ticket.
Trust me, after seeing how quickly they disappear, you’ll want to double the batch. Let’s face it: sometimes, the best treats are the ones that make people grin and reach for seconds.
Ingredients Needed
This Chocolate Mice recipe uses simple, wholesome ingredients to deliver both whimsy and flavor. You probably already have most of what you need, but I’ll share a few notes on what works best (and what you can swap in a pinch).
- Semi-sweet chocolate chips (about 1 1/2 cups / 270g) – Melted for the outer coating; I like Ghirardelli or Nestlé.
- Milk chocolate chips (1/2 cup / 90g) – For extra sweetness and smoothness.
- Cream cheese (4 oz / 113g, softened) – Adds richness and helps bind the filling.
- Powdered sugar (1/2 cup / 60g) – Sweetens the filling and keeps it creamy.
- Vanilla extract (1/2 tsp) – You know, just that classic hint of flavor.
- Almonds, slivered (about 1/2 cup / 50g) – These make the cutest little ears! You can use sliced almonds if needed.
- Chocolate sprinkles or mini chocolate chips (for eyes and noses, about 1/4 cup / 45g) – Adds personality and crunch.
- Licorice strings or thin pretzel sticks (for tails, about 12 pieces) – Licorice looks adorable, but pretzels work for a salty twist.
Optional Ingredients & Substitutions:
- White chocolate chips – Swap out for a lighter look, or add a swirl for “fancy” mice.
- Peanut butter (2 tbsp mixed into the filling) – Adds a nutty twist; ideal for peanut butter lovers.
- Gluten-free pretzel sticks – Makes the recipe safe for gluten-sensitive friends.
- Coconut flakes – Roll the finished mice in coconut for a furry effect.
- Food coloring gels – Tint the filling for colored mice (great for themed parties).
When picking chocolate, go for brands you trust—cheap chocolate can taste waxy and doesn’t melt as smoothly. For cream cheese, stick with regular (not whipped) for best texture. If you need dairy-free, swap in vegan cream cheese and dairy-free chocolate chips (I’ve had good luck with Enjoy Life brand).
The ingredients here are flexible, so don’t stress if you’re missing one or two things. I’ve even used chopped dried fruit for tails in a pinch! The main thing is to have fun—these chocolate mice are about joy as much as taste.
Equipment Needed
- Microwave-safe bowl or a double boiler – For melting chocolate; a glass Pyrex bowl works great.
- Mixing bowl (medium-sized) – To blend the filling.
- Hand mixer or sturdy whisk – Makes mixing a snap, but a wooden spoon works in a pinch.
- Small cookie scoop or tablespoon – For forming the mice bodies; keeps sizes consistent.
- Baking sheet – Line it with parchment paper for easy cleanup.
- Parchment paper – Helps prevent sticking.
- Toothpicks – Handy for attaching eyes, noses, and tails.
If you don’t have a double boiler, just use a microwave. I’ve melted chocolate in countless ways—sometimes you just go with what works! For budget-friendly options, dollar store mixing bowls and spoons do the trick. Just give them a good scrub before and after. Toothpicks are my secret weapon for making the mice look “just right.”
Pro tip: If your baking sheet is older, line with parchment to avoid sticking. I once tried wax paper (big mistake—chocolate stuck everywhere!). Stick with parchment or silicone mats.
Preparation Method
-
Prepare the baking sheet:
Line a baking sheet with parchment paper and set aside. This keeps your chocolate mice from sticking (and makes cleanup a breeze). -
Make the filling:
In a medium mixing bowl, beat together 4 oz (113g) cream cheese and 1/2 cup (60g) powdered sugar until smooth and creamy. Add 1/2 tsp vanilla extract and mix until combined. If adding peanut butter or colored gels, stir them in now.
Note: The filling should be thick enough to hold its shape. If it feels too soft, pop it in the fridge for 10 minutes. -
Shape the mice bodies:
Using a small cookie scoop or tablespoon, scoop out balls of filling (about 1 tbsp each). Roll gently between your palms to form a rough oval—a mouse’s body isn’t perfectly round! Place each on the parchment-lined sheet.
Time-saving tip: If the filling sticks, dust your hands lightly with powdered sugar. -
Chill the mice bodies:
Transfer the tray to the refrigerator for 20-30 minutes. This helps the bodies firm up and makes dipping easier. -
Melt the chocolate:
Combine 1 1/2 cups (270g) semi-sweet chocolate chips and 1/2 cup (90g) milk chocolate chips in a microwave-safe bowl. Heat in 30-second intervals, stirring each time, until smooth. (Or, use a double boiler over gently simmering water.)
Warning: Don’t overheat the chocolate! If it looks grainy or scorched, it’s cooked too long. -
Dip and coat:
Using a fork or toothpick, carefully dip each chilled mouse body into the melted chocolate, turning to coat. Lift out, let excess chocolate drip off, and place back on the parchment paper.
Personal tip: Work in batches—if the filling gets too soft, chill again before dipping. -
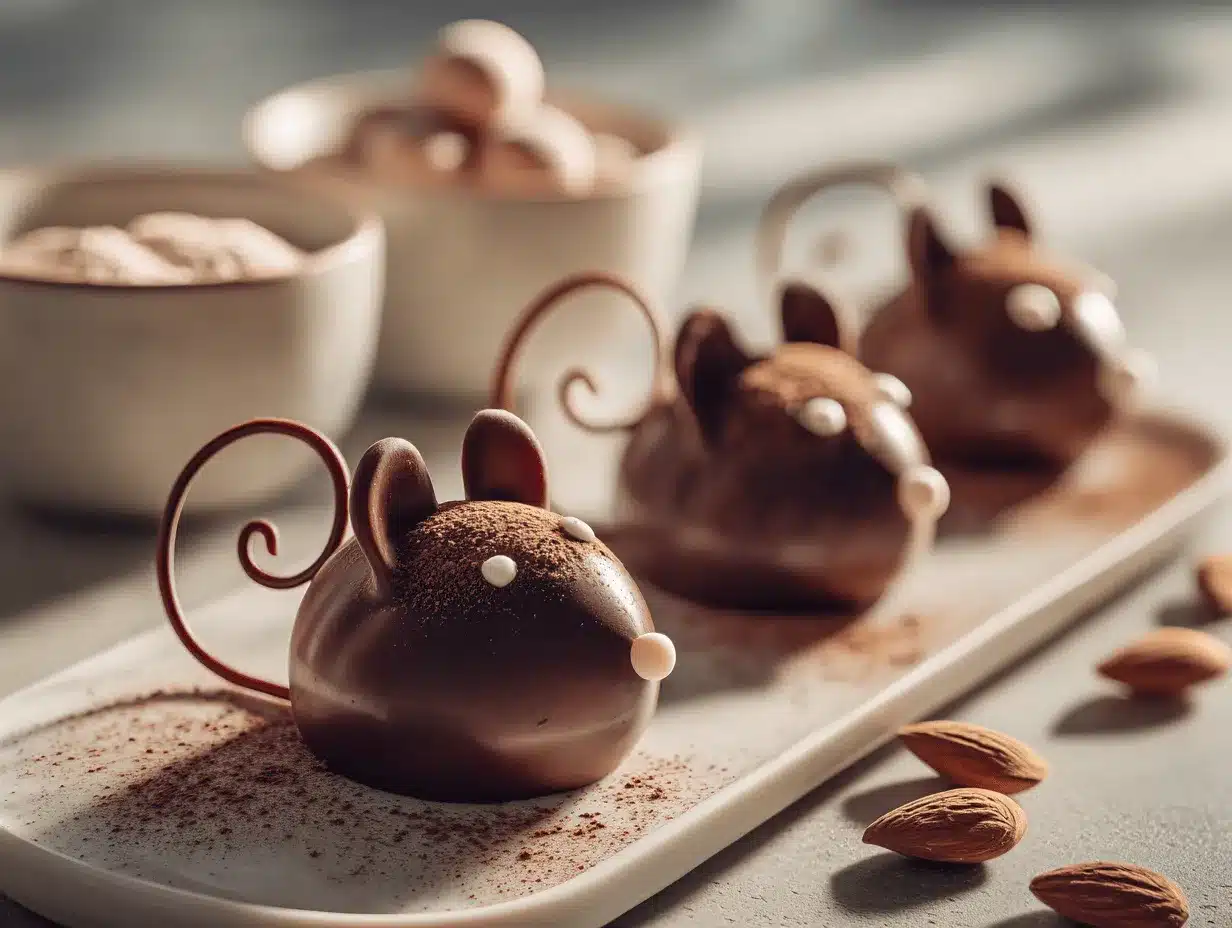
Add ears and tails:
While the chocolate is still soft, press two slivered almonds into the “head” area for ears. Gently push a licorice string or pretzel stick into the back for the tail.
Efficiency tip: Set up a “toppings station” before you start so you can work quickly. -
Decorate faces:
Using toothpicks, attach chocolate sprinkles or mini chips for the eyes and nose.
Sensory cue: The chocolate should be glossy and just beginning to firm up—don’t wait too long or your toppings won’t stick! -
Chill to set:
Pop the tray back in the fridge for 15-20 minutes, until chocolate is fully set. -
Serve and enjoy!
Carefully lift each mouse off the parchment. Arrange on a pretty plate or cupcake liners. Watch the smiles appear!
If you notice chocolate pooling at the base, don’t stress—it happens! Sometimes, I use a toothpick to “trim” the excess once set. If a mouse loses an ear, just press another in while the chocolate’s still soft. The imperfect ones are always the most charming, anyway.
Cooking Tips & Techniques
Here are a few pro tips and honest lessons learned from years of making chocolate mice:
- Don’t rush the chilling: If your mouse bodies are too soft, dipping gets messy fast. Give them plenty of time to firm up (I’ve tried to skip this step, and…well, it was a chocolate disaster).
- Use good-quality chocolate: Cheap chocolate chips sometimes don’t melt smoothly or taste waxy. Splurge on the good stuff—you’ll taste the difference.
- Work quickly after dipping: The chocolate firms up fast, so have your almonds, tails, and sprinkles ready to go. Set up a “decorating station” for assembly-line efficiency.
- If chocolate thickens: Reheat gently, stirring often. A splash of oil (like coconut or vegetable) can thin it out if needed.
- Troubleshooting: If your mice look lumpy, try smoothing the filling with wet fingers before chilling. If you drop one in the chocolate (oops!), fish it out and try again—imperfect mice are still delicious!
- For consistency: Use a cookie scoop for uniform sizes. You’ll get a Pinterest-worthy tray and more even chilling.
- Multitasking: While one batch chills, melt your chocolate or prep toppings. This keeps things moving and makes the process feel less chaotic.
I once tried making these with kids running around—lesson learned: prep everything in advance. (Otherwise, you end up with sticky fingers everywhere!) If you want glossy chocolate, don’t let water near it. Even a drop can cause seizing. And honestly, don’t sweat the details—each mouse has its own personality. That’s half the fun!
Variations & Adaptations
One of the best things about this chocolate mice recipe is how versatile it is. Here are some of my favorite tweaks and swaps:
- Dietary Variation: Swap in dairy-free cream cheese and vegan chocolate chips for a completely plant-based treat. Use gluten-free pretzel sticks for tails if needed.
- Seasonal Twist: Add a pinch of cinnamon and nutmeg to the filling for a cozy autumn vibe, or roll finished mice in crushed peppermint candies for a winter wonderland look.
- Flavor Customization: Try adding orange zest to the filling for a citrusy kick or mix in a tablespoon of peanut butter for a nutty twist. Want extra richness? Use dark chocolate chips instead of semi-sweet.
- Cooking Methods: If you don’t want to dip, drizzle melted chocolate over the shaped mice instead—less fuss, but just as tasty.
- Allergen Substitutes: Use sunflower seed butter instead of peanut butter, and swap almonds for pumpkin seeds for nut-free mice.
Personally, I’ve tried rolling the finished mice in toasted coconut for a “furry” look. The kids loved it, and it added a fun texture. You can also color the filling with food gels for themed parties—pink mice for Valentine’s, green for St. Patrick’s, and so on. Don’t be afraid to get creative; half the joy is making these treats your own.
Serving & Storage Suggestions
Chocolate mice are best served chilled, straight from the fridge. The chocolate shell is crisp, and the filling is creamy—trust me, they disappear fast! For presentation, arrange them on a cake stand or line up in pastel cupcake liners for a Pinterest-worthy effect.
They pair perfectly with a glass of cold milk or hot cocoa for kids, while adults might love them alongside coffee or dessert wine. If you’re serving them at a party, add a little “nest” of shredded coconut or green-tinted coconut flakes for extra whimsy.
To store, keep chocolate mice in an airtight container in the refrigerator for up to 5 days. If you want to freeze them, layer between wax or parchment paper to prevent sticking. Let thaw in the fridge before serving—otherwise, the chocolate may crack. For reheating, simply let them sit at room temp for 10-15 minutes, but don’t microwave (the chocolate melts and the filling gets messy).
I’ve noticed the flavor deepens after a day or two in the fridge, so don’t worry about making them ahead. Just keep them cool and covered, and you’ll have adorable treats ready whenever the craving hits.
Nutritional Information & Benefits
Each chocolate mouse (about 30g) contains roughly:
- Calories: 120
- Protein: 2g
- Fat: 7g
- Carbohydrates: 12g
- Sugar: 9g
The main health benefit here comes from the almonds (rich in vitamin E and healthy fats) and dark chocolate (antioxidants galore!). You can make these treats lower in sugar by using sugar-free chocolate chips and reducing powdered sugar. For gluten-free diets, use gluten-free pretzel sticks or licorice. Allergens to watch for: dairy (cream cheese, chocolate), nuts (almonds), and gluten (pretzels).
As someone who tries to balance wellness and treats, I see these chocolate mice as a “happy-medium” dessert. They’re portion-controlled, packed with flavor, and easy to adapt. If you have food sensitivities, just swap ingredients as needed. And, hey, a little chocolate joy is good for the soul!
Conclusion
So, why make these irresistible chocolate mice? They’re playful, delicious, and guaranteed to spark joy with every bite. Whether you’re baking for a celebration or just want to brighten a gloomy afternoon, these little critters are always a hit. I love how easy it is to personalize them—no two batches ever look the same, and that’s part of the charm.
If you’re searching for a kid-friendly, whimsical treat that stands out on any dessert table (or Pinterest board!), this chocolate mice recipe is your new best friend. Make them once, and you’ll see why they’ve become a classic in my house. The best part? Watching everyone’s reaction when they spot these chocolate mice—pure delight!
Give them a try, share your creations, and let me know how you customize your batch. Leave a comment below, tag me on social, or send a photo—seriously, I love seeing all those mousey faces. Happy baking, and may your kitchen always be filled with laughter and a little bit of chocolate magic!
Frequently Asked Questions
How long do chocolate mice keep in the fridge?
Chocolate mice stay fresh for up to 5 days in an airtight container in the refrigerator. If you want to make them ahead, they’re perfect for weekend prep!
Can I use white chocolate instead of milk or semi-sweet?
Absolutely! White chocolate works well—just melt as directed and dip the mice. It gives them a cute, “albino” look kids love.
What’s the best way to attach the ears and tails?
Press almond slivers and licorice strings into the still-soft chocolate right after dipping. If the chocolate starts to set, use a toothpick to make a small hole first.
Are these chocolate mice gluten-free?
Yes, if you use gluten-free pretzel sticks or licorice for tails. Always check your chocolate and filling ingredients for hidden gluten.
Can I freeze chocolate mice for later?
Yes! Layer them between parchment or wax paper in an airtight container. Thaw in the fridge before serving to prevent cracking.
Pin This Recipe!

Chocolate Mice Recipe: Easy Homemade Treats Kids Love
- Total Time: 1 hour
- Yield: 12 mice 1x
Description
Adorable chocolate mice with creamy filling and crunchy almond ears, perfect for kids’ parties or whimsical dessert tables. These treats are easy to make, customizable, and guaranteed to bring smiles to everyone.
Ingredients
- 1 1/2 cups semi-sweet chocolate chips (about 270g)
- 1/2 cup milk chocolate chips (about 90g)
- 4 oz cream cheese, softened (about 113g)
- 1/2 cup powdered sugar (about 60g)
- 1/2 teaspoon vanilla extract
- 1/2 cup slivered almonds (about 50g)
- 1/4 cup chocolate sprinkles or mini chocolate chips (about 45g)
- 12 licorice strings or thin pretzel sticks
Instructions
- Line a baking sheet with parchment paper and set aside.
- In a medium mixing bowl, beat together cream cheese and powdered sugar until smooth and creamy. Add vanilla extract and mix until combined. If using peanut butter or food coloring gels, stir them in now.
- Using a small cookie scoop or tablespoon, scoop out balls of filling (about 1 tablespoon each). Roll gently between your palms to form a rough oval shape and place on the parchment-lined sheet.
- Transfer the tray to the refrigerator for 20-30 minutes to firm up the bodies.
- Combine semi-sweet and milk chocolate chips in a microwave-safe bowl. Heat in 30-second intervals, stirring each time, until smooth. Alternatively, melt using a double boiler.
- Using a fork or toothpick, carefully dip each chilled mouse body into the melted chocolate, turning to coat. Let excess chocolate drip off and place back on the parchment paper.
- While the chocolate is still soft, press two slivered almonds into the head area for ears and gently push a licorice string or pretzel stick into the back for the tail.
- Using toothpicks, attach chocolate sprinkles or mini chips for the eyes and nose.
- Pop the tray back in the fridge for 15-20 minutes, until chocolate is fully set.
- Carefully lift each mouse off the parchment and arrange on a plate or cupcake liners. Serve and enjoy!
Notes
For best results, chill the filling thoroughly before dipping. Use good-quality chocolate for smooth melting and rich flavor. Customize with white chocolate, peanut butter, or colored fillings for themed parties. Gluten-free and vegan adaptations are easy—just swap ingredients as needed. Imperfect mice are part of the charm!
- Prep Time: 20 minutes
- Cook Time: 10 minutes
- Category: Dessert
- Cuisine: American
Nutrition
- Serving Size: 1 mouse (about 30g)
- Calories: 120
- Sugar: 9
- Sodium: 40
- Fat: 7
- Saturated Fat: 4
- Carbohydrates: 12
- Fiber: 1
- Protein: 2
Keywords: chocolate mice, kid-friendly dessert, party treats, homemade chocolate, whimsical dessert, chocolate truffles, easy baking, birthday party, classroom treat