Introduction
The first taste of creamy classic pumpkin pie with whipped cream always makes me think of crisp autumn air and cozy kitchen gatherings. There’s just something magical about the scent of spices wafting through the house as the pie bakes (it’s like a warm hug for your senses, honestly!). My journey with pumpkin pie started way back, helping my grandmother mix the filling, sneaking cinnamon sprinkles when she wasn’t looking. This pumpkin pie recipe brings together that nostalgia and the ease we all crave—especially when the holidays get a little wild.
I’ve baked this creamy pumpkin pie more times than I can count—sometimes for Thanksgiving, sometimes just because a chilly evening calls for it. The recipe has seen tweaks, like swapping in fresh pumpkin puree or experimenting with different crusts, but the heart of it always stays the same: that silky, spiced filling and a cloud of homemade whipped cream on top. It’s comfort food, pure and simple, and you don’t need fancy pastry skills to nail it. Anyone can make this pumpkin pie recipe, even if you’re new to baking (trust me, I’ve guided plenty of first-timers through it over the years).
Whether you’re baking for a crowd, prepping ahead for holiday dinners, or just want something sweet to go with your coffee, this creamy classic pumpkin pie delivers. It’s rich but not heavy, perfectly spiced, and—let’s face it—whipped cream on top is basically non-negotiable. If you’ve ever worried about a soggy crust or curdled filling, I’ve got tried-and-true tips that’ll make this your go-to fall dessert. So grab your mixing bowl, and let’s make the pumpkin pie that will have everyone asking for seconds!
Why You’ll Love This Recipe
- Quick & Easy: Comes together in just under an hour, with mostly hands-off time. Perfect for busy weeknights or when you need a last-minute dessert.
- Simple Ingredients: No need for a special grocery run—most of what you need is already in your pantry. Just grab a can of pumpkin puree and you’re halfway there.
- Perfect for Any Occasion: This creamy classic pumpkin pie fits right in at holiday feasts, casual get-togethers, or even a quiet afternoon treat with coffee.
- Crowd-Pleaser: Kids love it, adults rave about it, and picky eaters always seem to sneak an extra slice (I’ve seen it happen at more than one family gathering!).
- Unbelievably Delicious: The custardy texture and well-balanced spices make each bite pure comfort. It’s got just the right amount of sweetness and warmth.
What sets this pumpkin pie recipe apart is the ultra-creamy filling—thanks to a splash of heavy cream and a blend of spices that’s bold but not overpowering. I always blend my filling until it’s completely smooth, so there are no grainy bits (one of my biggest pet peeves with pumpkin pie!). And the whipped cream? It’s homemade, lightly sweetened, and piled high for that picture-perfect finish. This isn’t just another pumpkin pie—it’s the one you’ll want to make again and again.
There’s something about pumpkin pie that feels like a celebration, even if it’s just a regular Tuesday. It’s the kind of dessert that makes you pause, savor, and maybe even close your eyes for a second. Healthier than most pies, easy to adapt, and packed with autumn flavor—this creamy classic pumpkin pie is truly a treat you’ll love sharing. I’ve baked it for friends, family, and even a bake sale (sold out in minutes!), and every single time, it’s been a hit. If you’re looking for a fall dessert that checks all the boxes, this is it!
What Ingredients You Will Need
This recipe uses classic, wholesome ingredients to deliver bold flavor and a silky, comforting texture—no frills, just the good stuff. Most items are pantry staples, and there’s plenty of room for swaps if you’re feeling adventurous or need to work around allergies.
- For the Pie Filling:
- Pumpkin puree (1 can, 15 oz / 425g; use homemade or canned, but make sure it’s pure pumpkin, not pie filling)
- Granulated sugar (3/4 cup / 150g; for sweetness and structure)
- Light brown sugar (1/4 cup / 50g; adds depth and a subtle molasses note)
- Large eggs (2, room temperature; help set the custard)
- Heavy cream (1 cup / 240ml; creates a silky, rich filling)
- Whole milk (1/2 cup / 120ml; balances richness)
- Vanilla extract (1 tsp / 5ml; I like Nielsen-Massey for a true vanilla punch)
- Cinnamon (2 tsp / 5g; classic pumpkin spice vibe)
- Ground ginger (1/2 tsp / 1g; for warmth)
- Ground nutmeg (1/4 tsp / 0.5g; adds a subtle, earthy note)
- Ground cloves (1/8 tsp / 0.25g; don’t overdo it—just a pinch)
- Salt (1/4 tsp / 1g; rounds out the flavors)
- For the Pie Crust:
- Unbaked 9-inch pie crust (store-bought or homemade; I recommend making your own if you have time—try my all-butter crust recipe!)
- Optional: Egg wash (1 egg yolk mixed with 1 tbsp water; for brushing the crust)
- For the Whipped Cream:
- Heavy cream (1 cup / 240ml; must be cold for perfect whip)
- Powdered sugar (2–3 tbsp / 16–24g; adjust to taste)
- Vanilla extract (1/2 tsp / 2.5ml; rounds out the flavor)
Ingredient Tips: For best results, use firm, deep-orange pumpkin puree. If you’re gluten-free, swap the crust for your favorite GF version. Dairy-free? Try coconut cream instead of heavy cream. I’ve used both Libby’s and Trader Joe’s pumpkin puree—Libby’s is a classic, but TJ’s is a bit more vibrant in color. Don’t hesitate to adjust the spices to suit your family’s tastes (some folks like more cinnamon, some less nutmeg). If you’re short on time, a refrigerated crust works just fine, but homemade is always a bit flakier!
Equipment Needed
- 9-inch pie dish (glass or ceramic works best; metal is fine for a slightly crispier crust)
- Mixing bowls (medium and large; I use one for wet and one for dry ingredients)
- Whisk (for blending filling)
- Spatula (to scrape the bowl and get every bit of filling into the crust)
- Electric mixer or hand whisk (for whipped cream; stand mixers make it super fast)
- Measuring cups and spoons (accuracy matters—especially for the spices!)
- Parchment paper and pie weights (if you’re blind baking the crust; dried beans work in a pinch)
- Cooling rack (for bringing the pie down to room temperature evenly)
If you don’t have a pie dish, a cake pan will do in a pinch—just watch the baking time. I’ve tried both hand whisking and electric mixers for whipped cream; trust me, the mixer saves your arm. For pie weights, I started out using dried lentils—cheap and effective! Keep your measuring tools dry and clean for best results (wet spoons can mess up your spices). No need to buy expensive gear; most of these are basic kitchen tools you probably already own.
Preparation Method
- Prep the Pie Crust: If using homemade, roll out your dough to fit a 9-inch (23cm) pie dish. Gently fit it into the dish, trimming excess and crimping edges. Chill in the fridge for 30 minutes while you prep the filling. If you want a crispier bottom, preheat oven to 400°F (200°C), line the crust with parchment, fill with pie weights, and bake for 10 minutes. Remove weights, bake another 5 minutes until just set. Let cool slightly.
- Make the Pumpkin Filling: In a large bowl, whisk together pumpkin puree (425g), granulated sugar (150g), and light brown sugar (50g) until smooth. Add eggs (2, room temp) and whisk until fully incorporated. Pour in heavy cream (240ml), whole milk (120ml), and vanilla extract (5ml). Mix until creamy and uniform.
- Add the Spices: Sprinkle in cinnamon (5g), ginger (1g), nutmeg (0.5g), cloves (0.25g), and salt (1g). Whisk thoroughly—no lumps! The filling should be glossy and thick, with a rich orange color. If it seems runny, let it sit for 5 minutes; the sugars will help thicken it slightly.
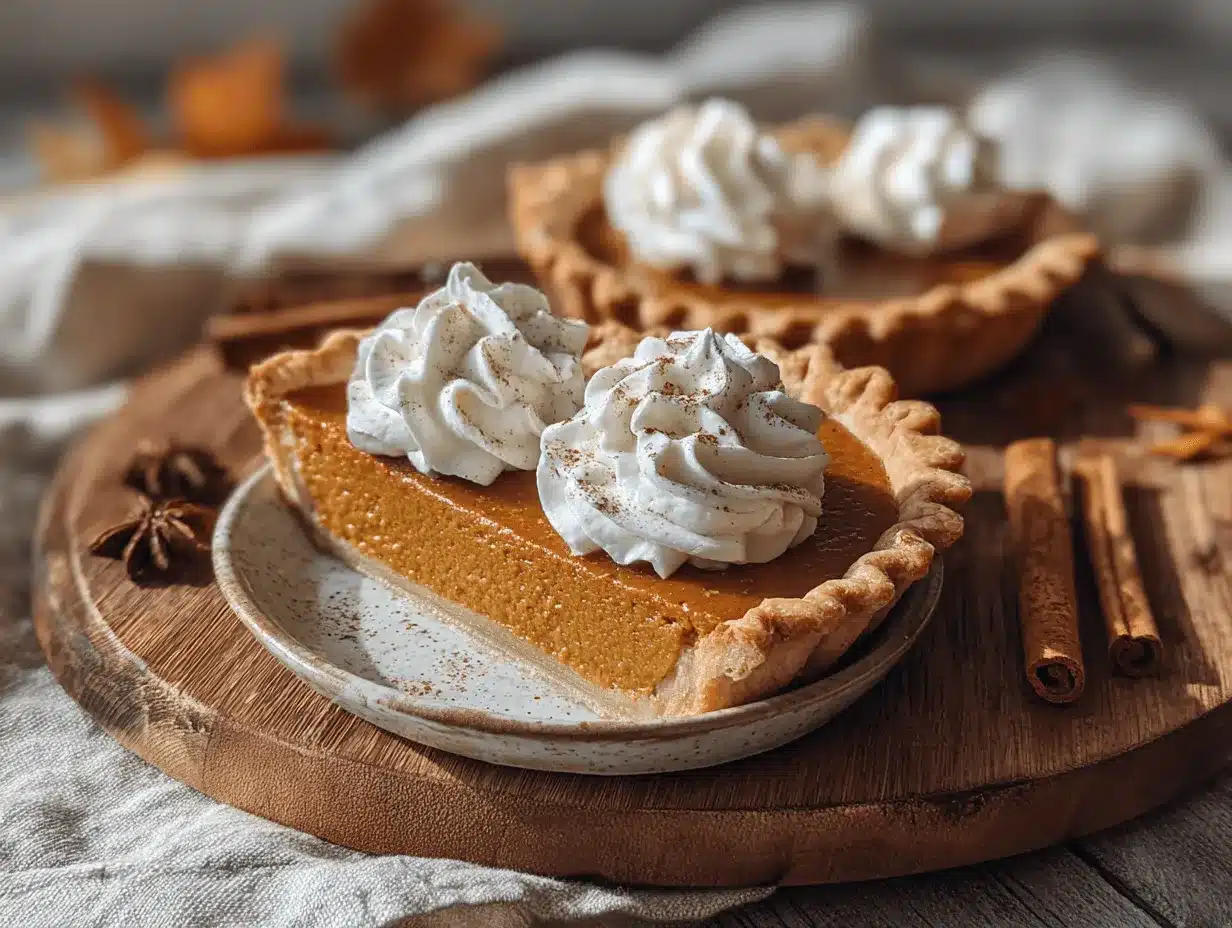
- Pour and Bake: Pour filling into prepared crust. Tap gently on the counter to release air bubbles. Brush edges with egg wash if desired. Bake at 375°F (190°C) for 45–55 minutes. The center should jiggle just a bit when you shake the dish (think: set edges, custardy middle).
- Cool Completely: Remove pie from oven and place on a cooling rack. Let it cool for at least 2 hours before slicing—this helps the filling firm up. Resist the urge to cut early, or the slices might be messy (learned that one the hard way!).
- Whip the Cream: In a chilled bowl, beat heavy cream (240ml), powdered sugar (16–24g), and vanilla extract (2.5ml) on medium-high until soft peaks form—about 2–3 minutes. Watch closely; overwhipping turns it grainy.
- Serve: Slice pie using a sharp knife, wiping between cuts for clean edges. Dollop with whipped cream generously. If you like, sprinkle a dash of cinnamon on top for color and aroma.
Troubleshooting: If your pie cracks, don’t worry—it’s usually overbaking or cooling too quickly. A cracked pie tastes just as good! For soggy crust, blind bake a little longer next time. If filling is loose, let it cool completely; it’ll set as it rests. My top tip: use room temperature eggs and dairy—they blend much better and make the filling smooth.
Personal Efficiency Tip: Prep crust and filling the night before, then bake fresh in the morning. Makes holiday mornings way less hectic!
Cooking Tips & Techniques
- Blend for Smooth Filling: Don’t just stir—give the filling a good whisk or even a quick blend with a stick blender. It makes the texture ultra creamy and prevents any pumpkin lumps.
- Avoid Overbaking: The center of the pie should still wobble a bit when you pull it out. It finishes setting as it cools. Overbaking can cause cracks and a rubbery texture (been there, done that!).
- Room Temperature Ingredients: Eggs and dairy blend best when not cold. I used to skip this step out of impatience, but it really makes a difference in texture.
- Pie Shield for Crust: If edges start to brown too fast, cover them with foil or a pie shield about halfway through baking. Saves the crust from burning while the filling cooks.
- Blind Baking: If you want a super crisp crust, blind bake before adding filling. It prevents sogginess, especially with homemade crusts.
Common Mistakes: Under-mixing spices can leave pockets of flavor (not fun when you bite into a clove bomb). Overwhipped cream gets grainy—stop at soft peaks. I once forgot to tap the pie before baking and ended up with air bubbles that looked funny but tasted fine.
Timing & Multitasking: While the pie bakes, whip up the cream and clean the kitchen. Set a timer for every major step—distractions happen, especially on busy holidays! Consistency comes from measuring carefully and trusting your oven (but checking early, just in case).
Variations & Adaptations
- Gluten-Free Pumpkin Pie: Swap the regular crust for a gluten-free version—either store-bought or homemade with almond flour. The filling stays exactly the same!
- Dairy-Free Option: Use coconut cream and almond milk in place of heavy cream and whole milk. Top with coconut whipped cream for a tropical twist.
- Spiced Maple Pumpkin Pie: Replace half the granulated sugar with pure maple syrup for extra autumn flavor. Add a pinch more cinnamon if you’re into the spicy side.
- No-Bake Variation: Make the filling with gelatin and chill in a prebaked crust. Perfect for warm days or when oven space is limited.
- Personal Twist: I’ve added a handful of chopped candied ginger to the filling for a zingy, surprising bite. Not everyone loves it, but it’s a fun change!
Adjust spices to your taste—some families love extra nutmeg, others prefer less clove. For nut allergies, use a graham cracker crust instead of anything with nuts. You can also fold in chocolate chips or swirl in caramel before baking for a decadent upgrade. This pumpkin pie recipe is flexible, so don’t be afraid to make it your own!
Serving & Storage Suggestions
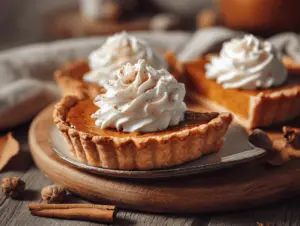
Serve pumpkin pie chilled or at room temperature—either way, it’s delicious. For presentation, I like to pipe the whipped cream in pretty swirls or just dollop it on thick (rustic style is my vibe). Add a sprinkle of cinnamon or even a few toasted pecans for crunch.
Pair with hot coffee, spiced chai, or a scoop of vanilla ice cream for a true fall feast. Pumpkin pie plays well with savory dishes like roasted turkey or creamy potato gratin at holiday dinners.
To store, cover pie tightly with plastic wrap or foil. Keep in the fridge for up to 4 days (the flavors actually get richer overnight!). For longer storage, wrap slices individually and freeze for up to 2 months. Thaw in the fridge and reheat gently in the oven at 300°F (150°C) for 10 minutes if you like it warm. Whipped cream is best fresh, but you can whip a batch and keep it covered in the fridge for a couple days.
One note: the crust softens a bit after freezing, but it’s still tasty. If you want crisp slices, reheat briefly in the oven. Trust me, pumpkin pie makes a great breakfast (don’t judge—I’ve done it more than once!).
Nutritional Information & Benefits
Each slice of creamy classic pumpkin pie (1/8 of a 9-inch pie, with crust and whipped cream) contains roughly:
- Calories: 320
- Fat: 16g
- Carbohydrates: 39g
- Protein: 5g
- Fiber: 2g
Pumpkin is packed with vitamin A, beta-carotene, and fiber—so it’s not just delicious but also gives your body a little boost. Using heavy cream and eggs adds healthy fats and protein, making the pie more satisfying. The recipe can be adapted for gluten-free or dairy-free diets (just switch the crust and cream as needed). Allergens include dairy, eggs, and gluten (unless using substitutions).
I love that this pie is indulgent but not heavy—perfect for a treat that doesn’t leave you feeling weighed down. If you’re watching sugar, you can reduce the sweeteners a bit or use a natural alternative. For me, pumpkin pie is a fall staple that fits right into a balanced diet, especially when enjoyed mindfully.
Conclusion
This creamy classic pumpkin pie with whipped cream is more than just a dessert—it’s a slice of fall comfort, the kind that brings people together. Whether you’re a pie newbie or a seasoned baker, this recipe is easy to follow and always impresses (I’ve seen it disappear faster than any other pie at family gatherings!).
Don’t be afraid to make it your own—add extra spices, swap the crust, or try a dairy-free version. I love this recipe for its simplicity and nostalgic flavor, but also because it’s forgiving and flexible. If you make it, drop a comment below and share your tips or twists!
So, next time you want a perfect fall dessert, give this pumpkin pie recipe a whirl. Tag me on social media with your creations—I’d love to see them. Here’s to more cozy moments and sweet bites!
FAQs
Can I use fresh pumpkin instead of canned puree?
Absolutely! Roast and puree your own pumpkin—just make sure it’s well-drained for a creamy, non-watery filling.
How do I prevent my pumpkin pie from cracking?
Don’t overbake, and let the pie cool slowly. If cracks happen, just cover them with whipped cream—no one will notice!
Can I make pumpkin pie ahead of time?
Yes, you can make it a day or two in advance. Store in the fridge and add whipped cream just before serving.
Is this pumpkin pie recipe gluten-free?
The filling is naturally gluten-free. Just use a gluten-free crust to make the whole pie safe for gluten-sensitive guests.
Can I freeze pumpkin pie?
Sure! Wrap slices tightly and freeze for up to 2 months. Thaw in the fridge and reheat in the oven for best texture.
Pin This Recipe!


Pumpkin Pie Recipe: Easy Creamy Classic Tutorial for Perfect Fall Dessert
- Total Time: 2 hours 20 minutes
- Yield: 8 servings 1x
Description
This creamy classic pumpkin pie features a silky, spiced filling and a flaky crust, topped with homemade whipped cream. It’s an easy, crowd-pleasing fall dessert perfect for holidays or cozy evenings.
Ingredients
- 1 can (15 oz) pumpkin puree (or 1 3/4 cups homemade puree)
- 3/4 cup granulated sugar
- 1/4 cup light brown sugar
- 2 large eggs, room temperature
- 1 cup heavy cream
- 1/2 cup whole milk
- 1 teaspoon vanilla extract
- 2 teaspoons ground cinnamon
- 1/2 teaspoon ground ginger
- 1/4 teaspoon ground nutmeg
- 1/8 teaspoon ground cloves
- 1/4 teaspoon salt
- 1 unbaked 9-inch pie crust (store-bought or homemade)
- Optional: 1 egg yolk mixed with 1 tablespoon water (for egg wash)
- For Whipped Cream:
- 1 cup heavy cream, cold
- 2–3 tablespoons powdered sugar
- 1/2 teaspoon vanilla extract
Instructions
- Prep the Pie Crust: Roll out dough to fit a 9-inch pie dish. Fit into dish, trim excess, and crimp edges. Chill for 30 minutes. For a crispier crust, preheat oven to 400°F, line crust with parchment, fill with pie weights, and bake for 10 minutes. Remove weights and bake another 5 minutes. Let cool slightly.
- Make the Pumpkin Filling: In a large bowl, whisk together pumpkin puree, granulated sugar, and light brown sugar until smooth. Add eggs and whisk until fully incorporated. Pour in heavy cream, whole milk, and vanilla extract. Mix until creamy and uniform.
- Add the Spices: Sprinkle in cinnamon, ginger, nutmeg, cloves, and salt. Whisk thoroughly until no lumps remain.
- Pour and Bake: Pour filling into prepared crust. Tap gently to release air bubbles. Brush edges with egg wash if desired. Bake at 375°F for 45–55 minutes, until edges are set and center jiggles slightly.
- Cool Completely: Remove pie from oven and place on a cooling rack. Cool for at least 2 hours before slicing.
- Whip the Cream: In a chilled bowl, beat heavy cream, powdered sugar, and vanilla extract on medium-high until soft peaks form (about 2–3 minutes).
- Serve: Slice pie with a sharp knife, wiping between cuts for clean edges. Top generously with whipped cream and a sprinkle of cinnamon if desired.
Notes
For best results, use room temperature eggs and dairy. Blind bake the crust for a crispier bottom. Adjust spices to taste. If making gluten-free, use a GF crust. Dairy-free options include coconut cream and almond milk. Pie can be made ahead and stored in the fridge or frozen. Whipped cream is best fresh. If pie cracks, cover with whipped cream.
- Prep Time: 20 minutes
- Cook Time: 50 minutes
- Category: Dessert
- Cuisine: American
Nutrition
- Serving Size: 1 slice (1/8 of a 9-inch pie)
- Calories: 320
- Sugar: 24
- Sodium: 220
- Fat: 16
- Saturated Fat: 10
- Carbohydrates: 39
- Fiber: 2
- Protein: 5
Keywords: pumpkin pie, fall dessert, Thanksgiving, creamy pumpkin pie, classic pumpkin pie, easy pumpkin pie, holiday pie, whipped cream, autumn baking