Introduction
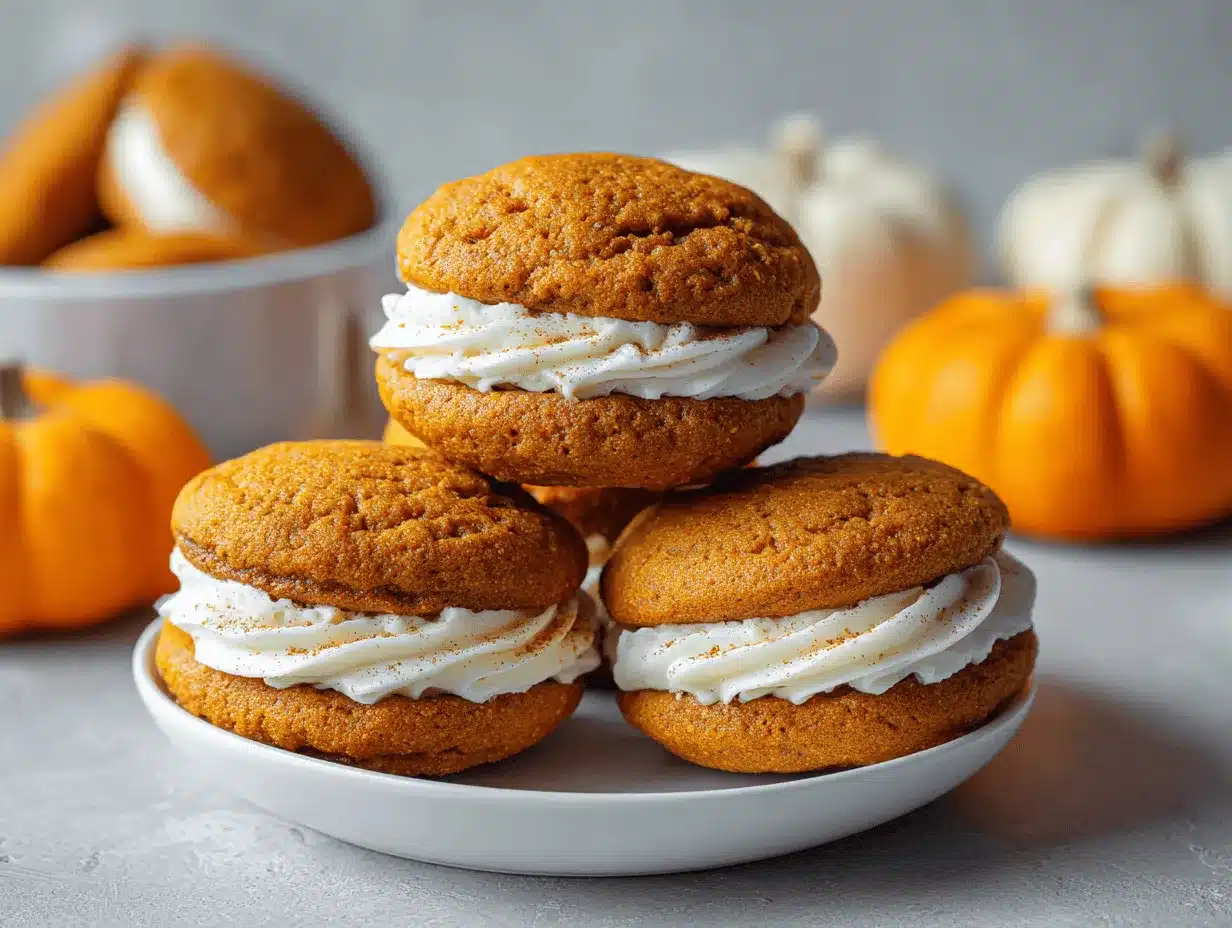
The first time I bit into a pumpkin whoopie pie, I swear it was like autumn exploded in my mouth—soft cake-like cookies, creamy spiced filling, and that unmistakable pumpkin warmth. You know how some desserts just wrap you up in nostalgia? These pumpkin whoopie pies do that for me every time. I started baking them one chilly October evening when the leaves outside were fiery orange, and from that moment, my family begged for them on repeat.
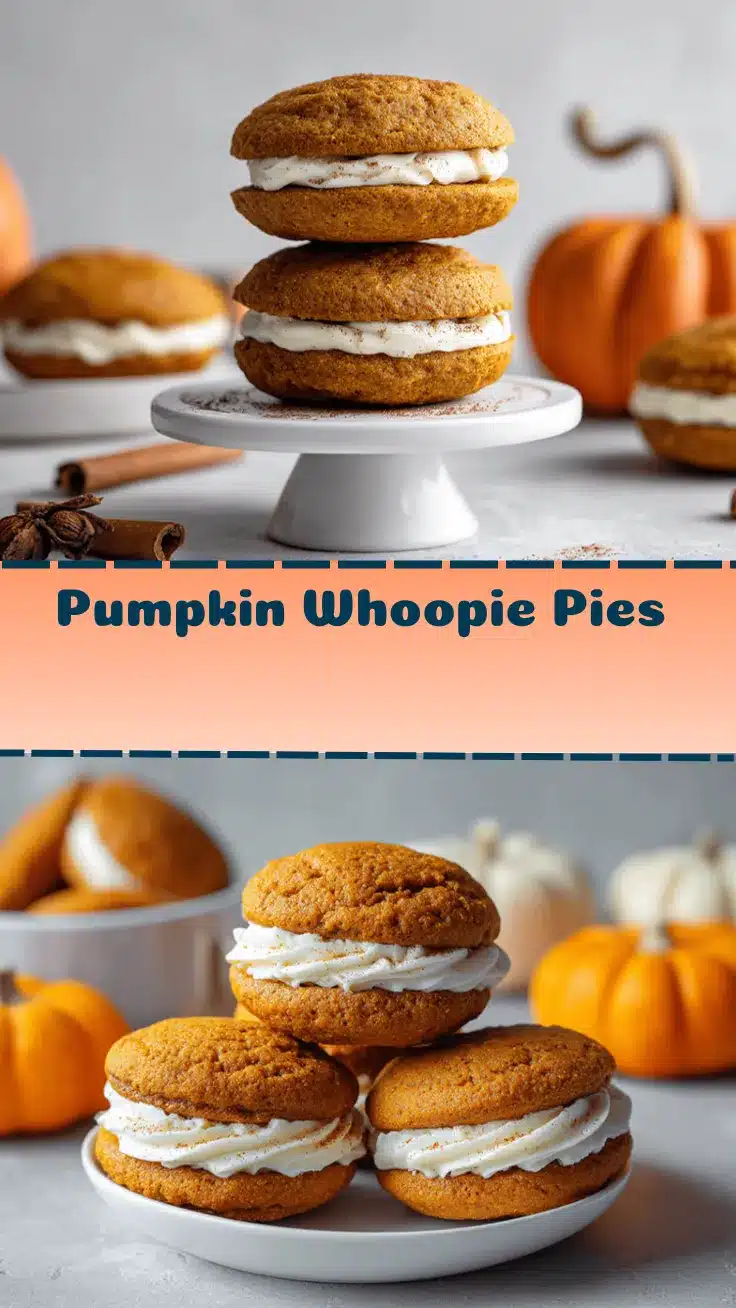
Honestly, pumpkin whoopie pies are my secret weapon for fall gatherings. They’re way easier than they look, and people flip for them (kids, adults, even that friend who claims not to like pumpkin). I’ve tweaked this pumpkin whoopie pies recipe over the years—sometimes adding a dash more spice, sometimes swapping out the filling for a tangy twist. But the heart of it stays the same: pillowy pumpkin cookies sandwiched around a spiced creamy filling you’ll want to eat by the spoonful.
Whether you’re celebrating Halloween, hosting a cozy brunch, or just want to bring a little autumn magic to your kitchen, these pumpkin whoopie pies are a guaranteed hit. They’re packed with real pumpkin, warming spices, and that luscious filling that sets them apart from other treats. If you’ve never made homemade whoopie pies, don’t worry—I’ll walk you through every step. As a longtime baker (and confessed pumpkin fanatic), I’ve baked these pies more times than I can count, and I’m sharing all my best tips right here. Let’s get baking and make your kitchen smell amazing!
Why You’ll Love This Recipe
- Quick & Easy: Pumpkin whoopie pies come together in just about 45 minutes. Ideal for last-minute parties, busy weekends, or when your sweet tooth can’t wait.
- Simple Ingredients: No tricky stuff! You probably have most of what you need right in your pantry—pumpkin puree, flour, spices, and a few baking basics.
- Perfect for Fall Gatherings: These treats are made for autumn—think Halloween parties, Thanksgiving dessert tables, or a weekend baking session with friends.
- Crowd-Pleaser: I’ve never met anyone who didn’t love these. Even folks who don’t go crazy for pumpkin come back for seconds (and thirds, let’s be honest).
- Unbelievably Delicious: The combination of moist pumpkin cookies and creamy spiced filling hits every comfort food button. It’s a flavor and texture dream!
What makes my pumpkin whoopie pies recipe stand out? It’s all about the details. Blending real pumpkin with the perfect spice blend (cinnamon, ginger, nutmeg, cloves) gives these cookies that deep, cozy flavor. The filling isn’t just sweet—it’s got a hint of tang from cream cheese, balanced with a touch of cinnamon and vanilla. Honestly, you’ll want to lick the bowl clean.
My secret? I use a slightly higher ratio of pumpkin puree for extra moisture and softness in the cookies, and I always chill the filling before assembling to make it perfectly pipeable. These aren’t just any pumpkin whoopie pies—they’re the kind you crave long after the last bite. Whether you’re a pumpkin pro or a total newbie, you’ll love how easy and rewarding this recipe is. Trust me, your kitchen will smell like heaven, and you’ll have a treat everyone talks about!
Ingredients Needed
This pumpkin whoopie pies recipe uses straightforward, wholesome ingredients for big flavor and pillowy texture. Most items are easy to find, and I’ll share a few tips for getting the best results (plus swaps where needed).
For the Pumpkin Cookies:
- 2 cups (240g) all-purpose flour (or use a gluten-free blend for allergies)
- 1 teaspoon baking powder
- 1 teaspoon baking soda
- 1/2 teaspoon salt
- 2 teaspoons ground cinnamon
- 1/2 teaspoon ground ginger
- 1/4 teaspoon ground nutmeg
- 1/4 teaspoon ground cloves
- 1 cup (200g) packed light brown sugar
- 1/2 cup (100g) granulated sugar
- 1/2 cup (120ml) vegetable oil (can sub melted coconut oil for a different flavor)
- 1 1/2 cups (360g) pumpkin puree (not pumpkin pie filling—Libby’s is my go-to)
- 2 large eggs, room temperature
- 1 teaspoon vanilla extract
For the Spiced Creamy Filling:
- 4 ounces (115g) cream cheese, softened (use dairy-free if needed)
- 1/4 cup (60g) unsalted butter, softened
- 2 cups (240g) powdered sugar, sifted
- 1/2 teaspoon ground cinnamon
- 1/4 teaspoon ground ginger
- 1 teaspoon vanilla extract
- Pinch of salt
Optional Add-Ins or Toppings:
- Chopped toasted pecans (for crunch)
- Mini chocolate chips (kids love these)
- Extra cinnamon sugar for dusting
Ingredient Notes: If you want super-soft cookies, make sure your pumpkin puree is nice and thick (sometimes homemade can be watery—just drain it a bit). For the filling, a block cream cheese works best for structure, not the whipped kind. And if you’re looking for a dairy-free version, swap in vegan cream cheese and plant-based butter. I’ve tried all the combos, and it still turns out dreamy!
Equipment Needed
- Mixing bowls: One large for the batter, one medium for the filling.
- Whisk and spatula: For mixing and scraping down the bowl (a silicone spatula is my favorite—makes cleanup easier).
- Electric mixer: Stand or hand mixer works for creaming the filling. You can use a whisk, but it’ll take some muscle!
- Baking sheets: Two standard-size, lined with parchment paper or silicone baking mats.
- Cookie scoop: A medium (1.5 tablespoon) scoop keeps cookies uniform. If you don’t have one, two spoons work fine.
- Wire cooling rack: For cooling cookies quickly and evenly.
- Piping bag or zip-top bag: Makes filling easy and neat. You can also just use a spoon—it’s a little messier, but works.
I’ve made these pumpkin whoopie pies with just basic kitchen stuff, and they turn out great every time. If your baking sheets are older, just line them well and watch for sticking. Don’t stress if you don’t have a mixer—the filling just needs a little elbow grease. For budget-friendly options, I’ve picked up cookie scoops and racks at the dollar store (they do the job!).
Preparation Method
- Preheat your oven: Set to 350°F (175°C). Line two baking sheets with parchment paper. This helps the cookies bake evenly and prevents sticking.
- Mix dry ingredients: In a large bowl, whisk together flour, baking powder, baking soda, salt, cinnamon, ginger, nutmeg, and cloves. Make sure your spices are fresh for the best flavor!
- Combine sugars, oil, and pumpkin: In another bowl, add the brown sugar, granulated sugar, and oil. Mix until well blended—about 1-2 minutes. Stir in the pumpkin puree, eggs, and vanilla. The batter will look smooth and smell like fall already.
- Combine wet and dry: Gradually add the dry ingredients to the wet mixture. Stir gently—don’t overmix, or the cookies can get tough. The batter should be thick but scoopable.
- Scoop cookies: Use a medium cookie scoop to drop rounds (about 1.5 tablespoons each) onto the lined baking sheets, spacing about 2 inches apart. If you use spoons, try to make the cookies the same size.
- Bake: Bake for 12-14 minutes, until the cookies are set and a toothpick comes out clean. They’ll puff up and have a soft, cake-like texture. If they spread too much, chill the dough for 15 minutes before baking.
- Cool: Let cookies rest on the baking sheet for 3-5 minutes, then transfer to a wire rack. Cool completely before filling—otherwise, the filling will melt!
- Make the spiced creamy filling: In a medium bowl, beat the softened cream cheese and butter until smooth and creamy, about 2 minutes. Mix in sifted powdered sugar, cinnamon, ginger, vanilla, and a pinch of salt. Beat until light and fluffy. If it’s too soft, chill for 15-20 minutes.
- Fill the pies: Pipe or spoon a generous dollop of filling onto the flat side of half the cookies. Top with the other halves, pressing gently to spread the filling. Wipe any extra filling off the sides for neat edges.
- Optional add-ins: Before sandwiching, sprinkle extra cinnamon sugar or mini chocolate chips on the filling for extra flavor and fun.
- Serve or store: Enjoy right away, or chill for a firmer texture. They’re best eaten within two days, but honestly, they rarely last that long.
Troubleshooting tips: If cookies are too sticky, chill them briefly before handling. If the filling is runny, add a bit more powdered sugar or chill it longer. The key is making sure everything is cool before assembling—hot cookies + soft filling = mess!
I’ve learned (the hard way) not to rush the cooling step. Warm cookies make the filling slide right out! Also, using a cookie scoop is a game-changer for even pies. If you have uneven cookies, just pair similar sizes together—they’ll still taste amazing.
Cooking Tips & Techniques
Here’s what I’ve learned after a dozen batches of pumpkin whoopie pies:
- Don’t overmix the batter: It’s tempting to get every lump out, but gentle mixing keeps the cookies soft and light.
- Chill the filling: If your kitchen is warm, pop the filling in the fridge for 15-20 minutes before piping. It holds its shape better and makes sandwiching easier.
- Uniform size matters: Use a cookie scoop for evenly sized cookies. If you don’t have one, two spoons work—just eyeball it. Pair up similar sizes for neat sandwiches.
- Spices are everything: Fresh ground spices will make your pumpkin whoopie pies recipe pop! I once used old nutmeg and the flavor was flat. Lesson learned.
- Parchment paper saves you: It makes cleanup faster and prevents sticking. I forgot it once—had to scrape cookies off with a spatula. Not my finest moment!
- Don’t rush cooling: Warm cookies = melty filling = a big mess. Wait until they’re room temp, promise it pays off.
- Make ahead for parties: Bake the cookies and prep the filling a day ahead. Assemble just before serving for best texture.
Timing tips? I usually mix the filling while the cookies bake, then chill it while the cookies cool. Multitasking makes the process fly by! For extra flavor, sprinkle cinnamon sugar on top before baking. And if you ever overbake them, don’t worry—just add a little extra filling. No one complains!
Variations & Adaptations
One of the best things about pumpkin whoopie pies is how easy it is to switch things up. I’ve tried all sorts of twists, and here are my favorites:
- Gluten-Free: Swap the all-purpose flour for a gluten-free baking blend (make sure it contains xanthan gum). The texture stays soft, and nobody will miss the gluten!
- Dairy-Free: Use vegan cream cheese and plant-based butter in the filling. Substitute coconut oil for vegetable oil in the cookies. The flavor is just a bit nuttier—so good!
- Chocolate Pumpkin Whoopie Pies: Add 1/4 cup unsweetened cocoa powder to the dry ingredients. The chocolate and pumpkin combo is amazing.
- Maple Filling: Replace half the powdered sugar with pure maple syrup in the filling. It adds a lovely autumn sweetness.
- Nutty Version: Fold in 1/2 cup chopped toasted pecans or walnuts into the cookie batter before scooping.
- Mini Whoopie Pies: Use a smaller scoop and reduce baking time to 8-10 minutes for bite-size treats—perfect for parties.
If you’re baking for allergies, you can swap in flax eggs (1 tablespoon ground flaxseed + 2.5 tablespoons water per egg) with good results. I’ve made a batch with almond flour for a low-carb version—just adjust the liquid slightly since almond flour is more absorbent. My favorite personal twist is the maple filling; it’s outrageously tasty and feels extra special for Thanksgiving!
Serving & Storage Suggestions
Pumpkin whoopie pies are best served slightly chilled or at room temperature. The filling firms up, and the flavors meld together. I love piling them on a rustic wooden platter for a cozy, Pinterest-worthy look—maybe with a sprinkle of cinnamon sugar on top for sparkle.
- Serve with: Hot apple cider, chai tea, or a mug of coffee. They pair beautifully with light soups or autumn salads if you want something savory alongside.
- Storage: Store assembled whoopie pies in an airtight container in the fridge for up to 3 days. Place parchment paper between layers to keep them from sticking.
- Freezing: Freeze unfilled cookies for up to 2 months. Thaw and fill before serving. You can freeze filled pies too, but the texture of the filling may change a bit.
- Reheating: If you want them warm, microwave for 10 seconds—just enough to soften without melting the filling.
- Flavor note: The spices deepen overnight, so leftovers taste even better the next day!
I’ve stored these for a couple of days (hidden from my family, or they vanish), and they truly hold up. If you make them ahead for a party, keep them chilled until serving for the best texture.
Nutritional Information & Benefits
Pumpkin whoopie pies aren’t exactly health food, but they do have a few redeeming qualities! Here’s an estimate per pie (based on 24 pies):
- Calories: ~180
- Fat: ~7g
- Carbs: ~28g
- Protein: ~2g
- Sugar: ~20g
Health benefits: Real pumpkin is a great source of vitamin A, fiber, and potassium. The spices (like cinnamon and ginger) add antioxidants and a little anti-inflammatory boost. If you use dairy-free or gluten-free swaps, these treats fit more dietary needs.
Allergen note: Contains wheat, eggs, and dairy. If you need nut-free, just skip the optional add-ins. From a wellness perspective, I love that these pies use real pumpkin instead of flavoring—they’re a sweet treat with some genuine nutrition tucked in!
Conclusion
If you’re searching for a pumpkin whoopie pies recipe that’s easy, reliable, and totally delicious, this is the one. These homemade treats are soft, spiced, and creamy—the definition of coziness in every bite. Whether you stick with the classic version or try out one of the adaptations, you’ll end up with a dessert that brings smiles and maybe a few happy sighs.
Don’t be afraid to get creative! Switch up the filling, add a dash of extra spice, or sneak in chocolate chips. Baking should be fun, and pumpkin whoopie pies are all about enjoying the process (and sneaking a taste of the filling, if you ask me).
I’ve baked these pies for family parties, school bake sales, and just because I needed a little fall comfort. They never disappoint. If you try the recipe, leave a comment below and share your twist—did you go gluten-free, add maple, or make minis? I’d love to hear your stories. Happy baking, and here’s to making your kitchen smell incredible!
FAQs
Can I make pumpkin whoopie pies ahead of time?
Absolutely! Bake the cookies and prep the filling a day ahead. Assemble right before serving for the freshest texture.
What kind of pumpkin should I use?
Use canned pure pumpkin puree, not pumpkin pie filling. Homemade puree works too—just drain any excess liquid.
Can I freeze pumpkin whoopie pies?
Yes! Freeze unfilled cookies for up to 2 months and fill them after thawing. You can freeze filled pies, but the filling may firm up more.
How do I make them gluten-free?
Just swap the flour for a gluten-free baking blend with xanthan gum. The cookies stay soft and tasty.
Why is my filling runny?
It might be too warm or need more powdered sugar. Chill the filling for 15-20 minutes and add sugar a little at a time until thick.
Pin This Recipe!

Pumpkin Whoopie Pies Recipe: Easy Homemade Treats with Spiced Creamy Filling
- Total Time: 45 minutes
- Yield: 24 pies 1x
Description
These pumpkin whoopie pies feature pillowy pumpkin cookies sandwiched around a creamy, spiced filling. They’re easy to make, perfect for fall gatherings, and packed with real pumpkin and warming spices.
Ingredients
- 2 cups (240g) all-purpose flour (or use a gluten-free blend for allergies)
- 1 teaspoon baking powder
- 1 teaspoon baking soda
- 1/2 teaspoon salt
- 2 teaspoons ground cinnamon
- 1/2 teaspoon ground ginger
- 1/4 teaspoon ground nutmeg
- 1/4 teaspoon ground cloves
- 1 cup (200g) packed light brown sugar
- 1/2 cup (100g) granulated sugar
- 1/2 cup (120ml) vegetable oil (can sub melted coconut oil)
- 1 1/2 cups (360g) pumpkin puree (not pumpkin pie filling)
- 2 large eggs, room temperature
- 1 teaspoon vanilla extract
- 4 ounces (115g) cream cheese, softened (use dairy-free if needed)
- 1/4 cup (60g) unsalted butter, softened
- 2 cups (240g) powdered sugar, sifted
- 1/2 teaspoon ground cinnamon
- 1/4 teaspoon ground ginger
- 1 teaspoon vanilla extract
- Pinch of salt
- Chopped toasted pecans (optional)
- Mini chocolate chips (optional)
- Extra cinnamon sugar for dusting (optional)
Instructions
- Preheat oven to 350°F (175°C). Line two baking sheets with parchment paper.
- In a large bowl, whisk together flour, baking powder, baking soda, salt, cinnamon, ginger, nutmeg, and cloves.
- In another bowl, mix brown sugar, granulated sugar, and oil until well blended. Stir in pumpkin puree, eggs, and vanilla extract.
- Gradually add dry ingredients to wet mixture. Stir gently until just combined; do not overmix.
- Use a medium cookie scoop (about 1.5 tablespoons) to drop rounds onto lined baking sheets, spacing about 2 inches apart.
- Bake for 12-14 minutes, until cookies are set and a toothpick comes out clean. If dough is too soft, chill for 15 minutes before baking.
- Let cookies rest on baking sheet for 3-5 minutes, then transfer to a wire rack to cool completely.
- For the filling: In a medium bowl, beat softened cream cheese and butter until smooth and creamy (about 2 minutes). Mix in powdered sugar, cinnamon, ginger, vanilla, and a pinch of salt. Beat until light and fluffy. Chill for 15-20 minutes if too soft.
- Pipe or spoon a generous dollop of filling onto the flat side of half the cookies. Top with remaining cookies, pressing gently.
- Optional: Sprinkle cinnamon sugar or mini chocolate chips on the filling before sandwiching.
- Serve immediately or chill for a firmer texture. Store in an airtight container in the fridge for up to 3 days.
Notes
For super-soft cookies, use thick pumpkin puree and avoid overmixing. Chill the filling before assembling for best texture. Pair similar-sized cookies for neat sandwiches. Cookies can be made gluten-free or dairy-free with simple swaps. Store pies chilled for best texture and flavor.
- Prep Time: 20 minutes
- Cook Time: 14 minutes
- Category: Dessert
- Cuisine: American
Nutrition
- Serving Size: 1 whoopie pie
- Calories: 180
- Sugar: 20
- Sodium: 120
- Fat: 7
- Saturated Fat: 3
- Carbohydrates: 28
- Fiber: 1
- Protein: 2
Keywords: pumpkin whoopie pies, fall dessert, spiced filling, easy pumpkin recipe, autumn treats, homemade whoopie pies, cream cheese filling, Halloween dessert, Thanksgiving dessert