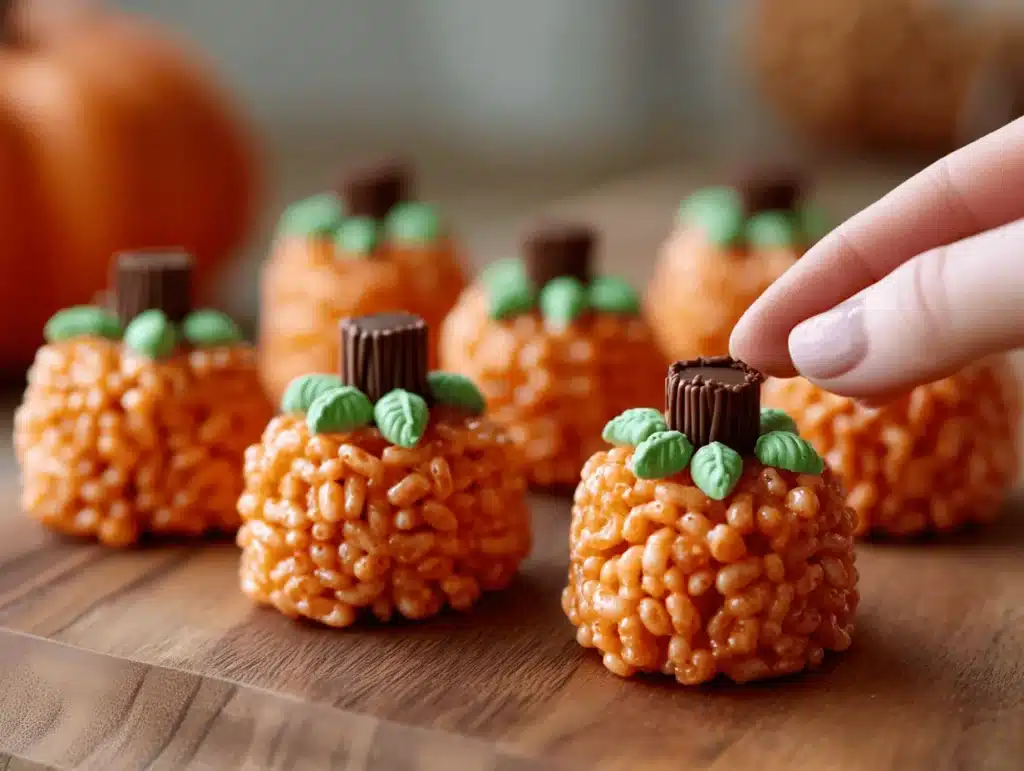
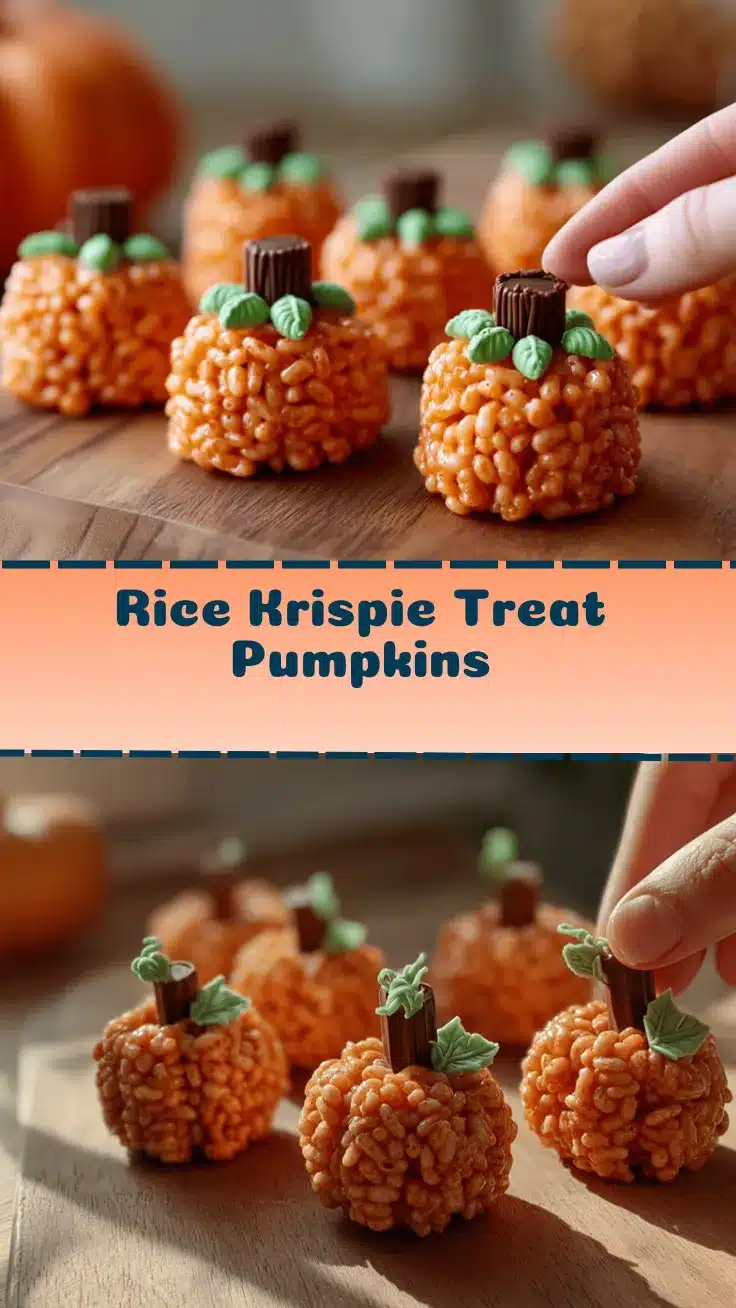
The first time I walked into a Halloween party and spotted a tray of adorable rice krispie treat pumpkins, I couldn’t help but smile. It’s that iconic orange color, the cute green “stem,” and the unmistakable marshmallow aroma that practically shouts, “Let’s celebrate!” Making homemade Rice Krispie treat pumpkins isn’t just about whipping up a quick dessert—it’s a whole vibe, especially when you’re aiming to impress at a Halloween fest or a kid’s costume party. I’ve made these for school gatherings, neighborhood bashes, and even as a fun after-dinner surprise for my own family (my kids ask for them every October, no joke).
What I love is that this recipe brings people together. There’s something so nostalgic about the classic rice krispie treat, right? Now, imagine giving it a seasonal twist—suddenly, it’s not just a snack, it’s a centerpiece. The fact that these Rice Krispie treat pumpkins are homemade makes them even sweeter, honestly. No need for fancy equipment or hours in the kitchen, just simple ingredients and a little creative fun.
As someone who’s tested this recipe a dozen times (I can’t resist tweaking!), I can promise you’ll get that perfect chewy texture and spot-on pumpkin shape—without any fuss. Whether you’re a baking newbie or the go-to party chef in your friend group, these treats deliver every time. So, if you’re looking for a crowd-pleasing, easy homemade Halloween party recipe, Rice Krispie treat pumpkins are about to become your new favorite tradition. Trust me: one bite and you’ll understand why they’re the talk of every festive table!
Why You’ll Love This Recipe
- Super Quick & Easy: You can whip up a batch in under 30 minutes, perfect for last-minute Halloween plans or when you need something fast for a party.
- Simple Ingredients: All you need are pantry staples—no need for any wild grocery runs. If you’ve got marshmallows, Rice Krispies, and a bit of food coloring, you’re set!
- Perfect for Halloween Parties: These homemade Rice Krispie treat pumpkins are a hit at costume parties, potlucks, and school events. They look so festive on a platter, you know?
- Kid-Friendly & Fun: Kids love helping shape the pumpkins and adding their own stem or leaf touches. It’s one of those recipes where little hands are a bonus.
- Always a Crowd-Pleaser: I’ve never seen leftovers—these treats disappear faster than candy corn. Adults and kids alike go crazy for them.
- Unbelievably Delicious: The combination of gooey marshmallow, crispy cereal, and that gentle vanilla flavor—it’s classic comfort food, but dressed up for the season.
What truly sets this Rice Krispie treat pumpkins recipe apart? It’s the way you shape and decorate them. Instead of just cutting squares, you roll them into rounds, add a Tootsie Roll stem or a pretzel stick, and maybe a green M&M or a leaf-shaped candy for flair. I’ve found that a little orange gel food coloring gives you that vibrant pumpkin hue without making the treats soggy. Plus, a tiny bit of butter goes a long way toward keeping everything smooth and easy to shape.
Honestly, this recipe is my answer to those “what should I bring?” moments. It’s a classic, but with a seasonal twist—so everyone’s happy. And the best part? No baking, no special skills, just a little imagination and some sticky fingers. That’s what makes these Rice Krispie treat pumpkins the ultimate easy homemade Halloween party recipe!
Ingredients Needed
This recipe is all about keeping things easy and delicious. You probably have most of these ingredients in your kitchen right now, and if not, they’re all easy to find at any grocery store. Here’s what you’ll need for a batch of Rice Krispie treat pumpkins:
- For the Rice Krispie Treats:
- 6 cups Rice Krispies cereal (or store-brand crisped rice cereal; both work fine)
- 3 tablespoons unsalted butter (adds richness; if you want, use salted for a little extra flavor pop)
- 1 (10-ounce / 283g) bag mini marshmallows (about 5 ½ cups; mini melt faster and more evenly)
- ½ teaspoon vanilla extract (adds depth; optional, but I think it makes a difference)
- Orange gel food coloring (gel gives vibrant color without watering down the mix; liquid food coloring works in a pinch, but use sparingly)
- For Decorating:
- Tootsie Rolls or mini pretzel sticks (for pumpkin “stems”)
- Green M&Ms, green jelly beans, or leaf-shaped candies (for pumpkin “leaves”; I usually grab M&Ms—they’re easy and cute)
Ingredient notes: If you’re making these for gluten-free friends, double-check your cereal and candies. Most Rice Krispies cereal is gluten-free, but some brands may contain barley malt—always read the label! You can swap the butter for coconut oil if you want a dairy-free version; just know the flavor will change slightly. For the marshmallows, I always reach for Jet-Puffed, but store brands work well too.
If you run out of orange food coloring, a mix of red and yellow will do the trick (I’ve done that more than once). And if you want a healthier twist, try using organic brown rice cereal and natural marshmallows. You’ll get a slightly nuttier flavor, which is honestly pretty tasty.
For the stems, I’ve also used cut-up pieces of chocolate bars—when you’re out of Tootsie Rolls, you get creative! The leaves are optional, but trust me, they make the pumpkins pop visually. Don’t stress if you don’t have everything; these treats are super flexible. That’s why I love them!
Equipment Needed
- Large nonstick pot or saucepan: For melting the butter and marshmallows. I use a heavy-bottomed pot to avoid scorching.
- Wooden spoon or heat-resistant spatula: To stir the mixture. Silicone spatulas are my favorite—they clean up easily and don’t stick!
- Large mixing bowl: For combining the melted marshmallow mixture with the cereal.
- Baking sheet or wax/parchment paper: For shaping and cooling the pumpkins. Wax paper is perfect for easy cleanup.
- Disposable gloves (optional): Helps keep your hands clean while shaping the pumpkins—especially if you’re working with kids.
- Small knife or kitchen scissors: For trimming Tootsie Rolls or candies for stems and leaves.
If you don’t have a nonstick pot, just butter the sides of your regular pot—works in a pinch! When I first made these, I didn’t bother with gloves, but after one year of sticky orange fingers, I was convinced. For budget-friendly options, any sturdy mixing bowl and spoon will do. Maintenance tip: soak your pot and spatula in warm soapy water as soon as you’re done; marshmallow residue can be stubborn if left to dry.
Preparation Method

- Melt the Butter: In a large nonstick pot, melt 3 tablespoons (43g) unsalted butter over medium-low heat. This takes about 1-2 minutes. Watch closely—the butter can brown quickly!
- Add Marshmallows: Stir in one 10-ounce (283g) bag of mini marshmallows. Keep stirring constantly until completely melted and smooth, about 3-4 minutes. The mixture will become glossy and thick. (Tip: If you see unmelted chunks, lower the heat and keep stirring—patience pays off here!)
- Color the Mixture: Remove from heat. Add ½ teaspoon vanilla extract and 2-3 drops of orange gel food coloring (or enough to reach your desired shade). Stir well until the color is evenly distributed. If you’re using liquid food coloring, start with a few drops—too much can make the treats sticky.
- Incorporate Cereal: Pour in 6 cups (165g) Rice Krispies cereal. Use a wooden spoon or silicone spatula to fold the cereal into the marshmallow mixture. Mix until all cereal is coated. It will be sticky—don’t worry, that’s perfect.
- Shape the Pumpkins: While the mixture is still warm (but cool enough to handle), scoop out portions using lightly greased hands or a cookie scoop—about ⅓ cup (75ml) per pumpkin. Roll gently into balls and flatten slightly so they look more pumpkin-like. Place each on wax or parchment paper to cool.
- Add the Stem: Gently press a Tootsie Roll or pretzel stick into the top center of each pumpkin for the stem. If the treats feel too soft, let them set for a few minutes before decorating. (Tip: If the mixture sticks to your hands, rub a little butter or oil on your palms!)
- Decorate with Leaves: Press a green M&M, jelly bean, or candy leaf next to the stem. For extra fun, use a small dab of melted chocolate or frosting to “glue” the candy in place.
- Cool Completely: Let the Rice Krispie treat pumpkins set at room temperature for at least 15 minutes. They’ll firm up and hold their shape.
Troubleshooting: If your mixture hardens too fast, pop it in the microwave for 10 seconds to soften. If your pumpkins flatten, try using a bit less cereal next time or shaping them more quickly while warm.
Personal tip: I usually prep all my stems and leaves first, so decorating goes faster. If you’re working with kids, give everyone their own little “station”—makes for less chaos and more fun!
Cooking Tips & Techniques
From my years of Halloween treat-making, I’ve picked up a few tricks that make all the difference. Here’s what I’ve learned (sometimes the hard way!) to guarantee your Rice Krispie treat pumpkins come out looking festive and tasting perfect:
- Use fresh marshmallows: Stale mallows don’t melt smoothly—you’ll end up with lumpy treats. I always check the expiration date!
- Don’t overheat: Melting the marshmallows too quickly can make the mixture tough. Keep the heat low and gentle; patience really pays off.
- Coloring matters: Gel food coloring gives a bold hue without changing the texture. If you use liquid, add gradually—too much can make the treats sticky and hard to shape.
- Grease your hands: Butter or a little oil stops the mixture from sticking while you roll the pumpkins. Disposable gloves work great, especially with kids helping.
- Shape while warm: The mixture sets fast, so form your pumpkins right after mixing. If it cools too much, microwave for a few seconds to soften.
- Don’t pack too tightly: Gently roll the mixture—pressing too hard can make the treats dense instead of chewy.
I’ll admit, my first few batches were more “blobs” than pumpkins. I learned to shape quickly and not stress imperfections—honestly, the quirky pumpkins are the ones everyone remembers! Timing is key; I usually set up all my decorations beforehand so I can move fast once the treats are ready. For multitasking, melt the butter and marshmallows while you prep your stems and leaves—it saves a few minutes and keeps things flowing.
The most important thing? Have fun with it! Rice Krispie treat pumpkins aren’t about perfection—they’re about smiles and sticky fingers. That’s what Halloween is all about!
Variations & Adaptations
One of the joys of Rice Krispie treat pumpkins is how flexible they are! Here are a few variations I’ve tried over the years—feel free to mix and match to fit your crowd, dietary needs, or what’s in your pantry:
- Gluten-Free: Use a certified gluten-free crisped rice cereal and check your candies. Many options on the market fit the bill!
- Dairy-Free: Swap the butter for coconut oil or vegan margarine, and use vegan marshmallows. The texture is slightly different but still delicious.
- Flavor Boost: Add a pinch of pumpkin pie spice or cinnamon to the melted marshmallow mixture for a subtle fall flavor. My family loves this twist!
- Chocolate Lovers: Use cocoa-flavored crisped rice cereal and top with chocolate stems or drizzle melted chocolate on top.
- Fruit-Filled: Mix in a handful of dried cranberries or chopped dried apricots for a fruity surprise.
For different cooking methods, you can shape the mixture into bars or use silicone molds for perfectly uniform pumpkins. I’ve made these with almond butter instead of regular butter for a nutty spin—just check for allergies. If you need allergen-free candies, look for allergy-friendly chocolate and gummies for decorating.
My personal favorite adaptation? Last year, I added orange zest to the marshmallow mix for a citrusy kick. It was a hit—so don’t be afraid to experiment and make these Rice Krispie treat pumpkins your own!
Serving & Storage Suggestions
For the best results, serve your Rice Krispie treat pumpkins at room temperature. They hold their shape beautifully and taste freshest this way. Pile them onto a festive platter or tuck them into cupcake liners for easy grab-and-go at parties. If you really want to impress, arrange them with a little fake autumn leaf scatter—Pinterest-worthy, trust me!
These treats pair perfectly with apple cider, hot chocolate, or a big mug of coffee for the grown-ups. For a full party spread, serve alongside other Halloween faves like caramel apples or spooky sugar cookies.
To store, place pumpkins in an airtight container lined with wax paper. They’ll stay fresh for up to 3 days at room temperature. For longer storage, freeze them individually wrapped in plastic wrap—just thaw at room temp for an hour before serving. If they get a little firm, a quick zap in the microwave (10 seconds) brings back the gooey goodness. Over time, the flavors mellow and the texture gets chewier; some folks (like my husband!) love them even more on day two.
Nutritional Information & Benefits
Each Rice Krispie treat pumpkin (about ⅓ cup, or 40g) contains approximately:
- Calories: 120
- Fat: 2g
- Carbohydrates: 25g
- Sugar: 13g
- Protein: 1g
Rice Krispies cereal is low in fat, and the marshmallows provide quick energy—great for busy party days! You can make these treats gluten-free and dairy-free with the right ingredient swaps. Allergens to note: contains dairy (butter), may contain gluten (depending on cereal brand), and some candies may contain nuts or soy—always double-check labels.
As a parent, I appreciate a homemade treat with simple ingredients and portion control. Plus, this recipe lets you skip artificial preservatives and control the sweetness. It’s a cheerful way to celebrate—and a fun project for kids to learn about kitchen creativity!
Conclusion
Rice Krispie treat pumpkins are the kind of homemade Halloween party recipe that brings out everyone’s inner kid. They’re easy, festive, and guaranteed to spark joy at any celebration. From the vibrant orange color to the little edible stems, every detail is a conversation starter—and a memory-maker.
I love that you can customize these treats for any dietary need or taste preference. Whether you go classic or get creative, you’ll end up with a platter of pumpkins that are almost too cute to eat (almost!). Honestly, this is my go-to recipe for making Halloween extra special, and I hope it becomes yours, too.
Ready to give it a try? Share your own twists or party stories in the comments below! Pin this recipe, pass it along, or tag me with your creations—I can’t wait to see what you come up with. Happy Halloween, and happy baking!
FAQs
Can I make Rice Krispie treat pumpkins ahead of time?
Absolutely! They keep well for up to 3 days in an airtight container. For longer storage, wrap and freeze—just thaw before serving.
What can I use for the pumpkin stem if I don’t have Tootsie Rolls?
Pretzel sticks, chocolate bars cut into pieces, or even green apple licorice work as fun alternatives.
How do I keep the mixture from sticking to my hands while shaping?
Grease your hands lightly with butter or oil, or use disposable gloves. This makes shaping much easier and tidier!
Can I make these treats without food coloring?
Yes! They’ll taste the same—just skip the coloring, or use natural options like carrot juice for a subtle tint.
Are Rice Krispie treat pumpkins gluten-free?
They can be! Use certified gluten-free cereal and double-check your candies for gluten-containing ingredients.
Pin This Recipe!
Rice Krispie Treat Pumpkins Easy Homemade Halloween Party Recipe
- Total Time: 30 minutes
- Yield: 18 pumpkins 1x
Description
These adorable Rice Krispie treat pumpkins are a festive, kid-friendly, and crowd-pleasing dessert perfect for Halloween parties. With a vibrant orange color and cute edible stems, they’re easy to make and guaranteed to spark joy at any celebration.
Ingredients
- 6 cups Rice Krispies cereal (or store-brand crisped rice cereal)
- 3 tablespoons unsalted butter
- 1 (10-ounce) bag mini marshmallows (about 5 ½ cups)
- ½ teaspoon vanilla extract (optional)
- Orange gel food coloring (or red and yellow food coloring)
- Tootsie Rolls or mini pretzel sticks (for pumpkin stems)
- Green M&Ms, green jelly beans, or leaf-shaped candies (for pumpkin leaves)
Instructions
- In a large nonstick pot, melt 3 tablespoons unsalted butter over medium-low heat for 1-2 minutes.
- Add the mini marshmallows and stir constantly until completely melted and smooth, about 3-4 minutes.
- Remove from heat. Add vanilla extract and 2-3 drops of orange gel food coloring (or enough to reach desired shade). Stir until color is evenly distributed.
- Pour in 6 cups Rice Krispies cereal. Fold the cereal into the marshmallow mixture until all cereal is coated.
- While the mixture is still warm, scoop out portions (about ⅓ cup per pumpkin) using lightly greased hands or a cookie scoop. Roll into balls and flatten slightly to resemble pumpkins. Place on wax or parchment paper to cool.
- Gently press a Tootsie Roll or pretzel stick into the top center of each pumpkin for the stem.
- Press a green M&M, jelly bean, or candy leaf next to the stem. Use a dab of melted chocolate or frosting to secure if needed.
- Let the Rice Krispie treat pumpkins set at room temperature for at least 15 minutes before serving.
Notes
Use fresh marshmallows for best texture. Grease hands or use gloves for easier shaping. Shape pumpkins while mixture is warm. For gluten-free or dairy-free versions, use certified gluten-free cereal and swap butter for coconut oil and vegan marshmallows. Store in an airtight container for up to 3 days or freeze for longer storage.
- Prep Time: 10 minutes
- Cook Time: 10 minutes
- Category: Dessert
- Cuisine: American
Nutrition
- Serving Size: 1 pumpkin (about ⅓ cup or 40g)
- Calories: 120
- Sugar: 13
- Sodium: 65
- Fat: 2
- Saturated Fat: 1
- Carbohydrates: 25
- Protein: 1
Keywords: Rice Krispie treats, Halloween dessert, pumpkin treats, kid-friendly, party recipe, no bake, marshmallow, easy Halloween snack